How to Write a Manuscript: A Step-by-Step Guide for 2026
You've opened a new manuscript project, named the file, chosen a promising working title, and then discovered that the blank page doesn't tell you what to do next. Research sits in scattered documents, character ideas live in notes apps, and the cover, illustrations, and formatting feel like problems for some distant future.
That workflow creates avoidable rework. A manuscript is both a creative work and a production asset. The choices you make about scope, structure, revision, collaboration, visuals, and export affect one another, so learning how to write a manuscript means designing the whole path from first sentence to finished book.
Table of Contents
- Defining Your Manuscript Scope and Target Length
- Building a Structural Outline with Research Integration
- Establishing Daily Drafting Rhythms and Momentum
- Approaching Revision as a Staged Quality Process
- Using AI-Assisted Editing and Collaboration Tools
- Formatting and Exporting for Print and Ebook Publication
- Your Repeatable Manuscript Production Workflow
Defining Your Manuscript Scope and Target Length
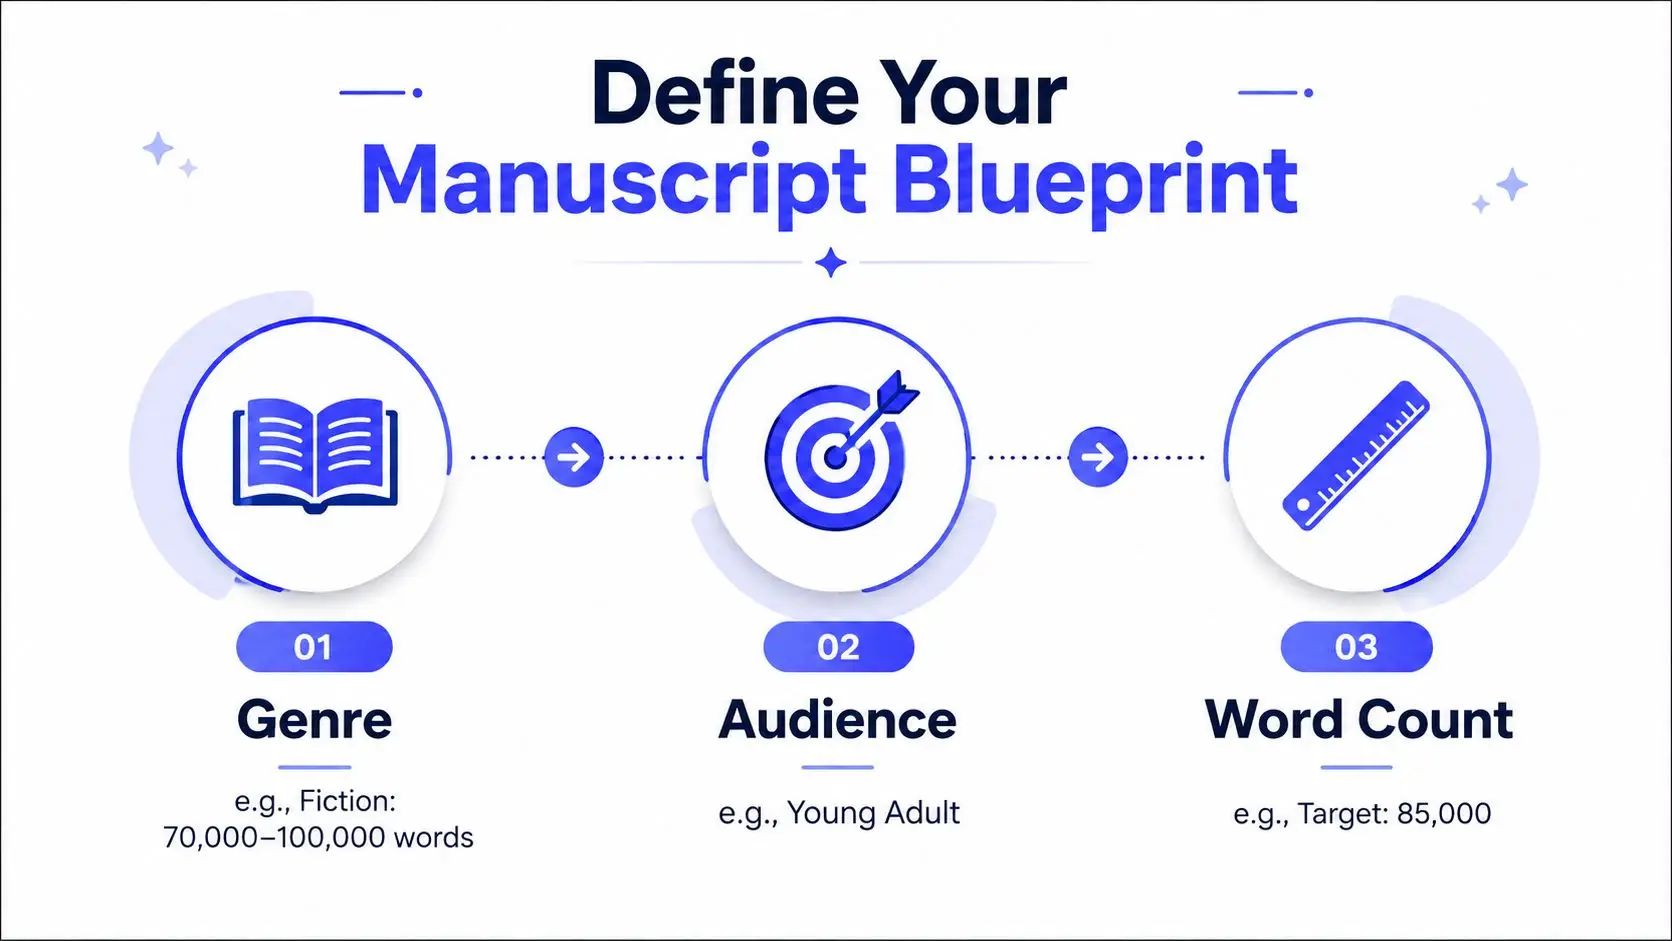
A manuscript can stall before drafting begins if its scope stays vague. Decide the genre, audience, and target length first, because they shape pacing, chapter size, research depth, visual requirements, and the eventual print or ebook files. Treat the project as a production asset from the start. A change in format or illustration later can force cuts, redesigns, and new page planning.
Genre needs a usable level of precision. “Fiction” does not tell you enough. Identify whether the project is adult literary fiction, memoir, young adult fiction, fantasy, or another clear category, then note any meaningful subcategory. Those labels establish reader expectations for tone, narrative scale, and length. The book word-count planning guide can help compare your intended scope with common genre expectations.
Set a target that matches the project
Publishing guidance commonly places adult fiction and memoir at roughly 70,000 to 90,000 words, while science fiction and fantasy often reach 100,000 to 150,000 words. Young adult fiction is often positioned around 55,000 to 79,900 words. These are benchmarks, not laws. Ignoring them can leave a manuscript feeling underdeveloped or make it harder to position for publication.
Academic and technical work follows a different logic. A full article manuscript may sit around 10,000 to 13,000 words, while survey papers may reach 18,000 to 20,000 words, according to the same publishing guidance. A 20,000-word technical manuscript needs a different research plan, outline, and drafting rhythm from a 150,000-word fantasy novel.
Write a one-page blueprint that production decisions can use:
- Genre: Record the category and subcategory, along with the conventions you intend to meet.
- Audience: Define the reader's knowledge, needs, and expected reading experience.
- Promise: State the emotional, intellectual, or practical result the manuscript should deliver.
- Target range: Choose a working range that fits the project, its research, and its intended format.
- Boundaries: List three topics, timelines, characters, or research areas you will exclude. Clear exclusions keep the target achievable and reduce illustration, cover, and formatting rework later.
Turn length into a working constraint
A target range gives each writing session a defined purpose. If the planned material cannot support the intended length, you can find that gap before drafting hundreds of pages. If the project contains too much, combine threads, remove secondary material, or plan a longer work deliberately.
Set the target in your writing environment and divide it into milestones. Storyloft's goal settings can connect a manuscript target with daily progress records, giving each session a visible endpoint. Keep the number subordinate to the manuscript's promise. A concise draft with a clear shape is stronger than padded material that repeats itself, and a controlled scope protects later design and export work.
Building a Structural Outline with Research Integration
A chapter list isn't a working outline. It tells you where material sits, but not why it belongs there, what evidence supports it, or what must change before the manuscript is complete.
Build the outline as a living production map. For fiction, connect each scene to its point of view, conflict, change, setting, and relevant character information. For nonfiction, connect each chapter or section to its central claim, supporting evidence, examples, objections, and unresolved questions.
Create an architecture you can navigate
Use binders or equivalent containers for the major layers of the project. One binder can hold the manuscript, another can hold research, and others can contain character profiles, visual references, interview notes, or discarded material. Tags then provide a second navigation system. A research note might carry tags for a chapter, theme, historical period, source type, and verification status.
This structure matters because linear folders force you to remember where information lives. Tags let you retrieve material by relationship. A memoir chapter might connect to a location note, a timeline entry, a family detail, and a thematic thread without duplicating the same material across several files.
A useful outline entry includes:
- Purpose: What must this scene or section accomplish?
- Material: Which notes, sources, images, or interviews support it?
- Change: What becomes different by the end?
- Risk: Where could the section become inaccurate, repetitive, or unfocused?
- Next dependency: What later section relies on this information?
Keep research beside the draft
Context switching costs more than writers expect. If you leave the manuscript to search through unrelated windows, you interrupt the sentence-level work and increase the chance of using the wrong detail. A side-by-side workspace lets you keep the relevant note visible while drafting, then return to the prose without losing the thread.
For source-heavy work, record the exact support for each important claim while outlining. Don't wait until the final edit to reconstruct your evidence trail. For fiction, use the same principle with continuity. Attach character facts, dates, locations, and visual references to the scenes where they matter.
The workflow for organizing book notes and research can help you design binders and tags around retrieval rather than storage. Your outline should remain useful after drafting begins. When a scene changes, update its purpose and dependencies instead of treating the outline as abandoned scaffolding.
Establishing Daily Drafting Rhythms and Momentum
The middle of a manuscript rarely fails because the author lacks ideas. It fails because the project becomes too large to feel actionable. A writer finishes an exciting opening, reaches the less glamorous connective material, and starts revising the first chapters instead of moving forward.
A more durable rhythm begins with a modest daily target. The target should fit the time you have, not the output you imagine producing on an ideal day. A parent writing after work may need short, protected sessions. A full-time author may choose longer blocks, but the same rule applies: consistency beats dramatic bursts that leave you exhausted.
A practical rhythm in action
Consider a novelist with a defined target and a scene-level outline. Each session begins by reviewing the previous paragraph, checking the current scene objective, and entering focus mode. The writer drafts until the session ends, records the result, and leaves a brief note about the next scene's opening.
That final note removes the next-day restart problem. You don't have to rediscover the intention behind the scene before writing. You already know whether the next beat is an argument, a discovery, a transition, or a decision.
Use progress records to answer practical questions:
- Where do you stall? Mark the chapter or task, not just the lost day.
- What causes drift? Note whether research, uncertainty, fatigue, or over-editing interrupted you.
- Which sessions work? Compare your energy and concentration across different times.
- What needs changing? Adjust the target or outline when the pattern repeats.
The writing routine guidance offers a useful framework for pairing daily goals with sustained progress. Streaks can encourage accountability, but they shouldn't turn one missed session into a reason to abandon the project.
Protect the first pass
Drafting and editing require different mental modes. During a first pass, your job is to discover the complete shape of the manuscript. Fix an obvious typo if it distracts you, but don't spend an hour perfecting a paragraph while later chapters remain unwritten.
Keep a short “repair later” note for problems that need attention. Then return to forward motion. The rough scene you finish today gives you something concrete to revise, while the perfect opening chapter can't solve an absent ending.
Drafting rule: Leave the first pass imperfect on purpose, but never leave it undefined. Know what the scene or section needs to accomplish before you begin.
Approaching Revision as a Staged Quality Process
A manuscript can look finished and still fail as a production asset. The argument may be incomplete, illustrations may no longer match the text, a cover may promise the wrong reading experience, or the print and ebook files may expose errors that were invisible in the draft. Revision works best as a series of quality checks, each with a defined question and deliverable.
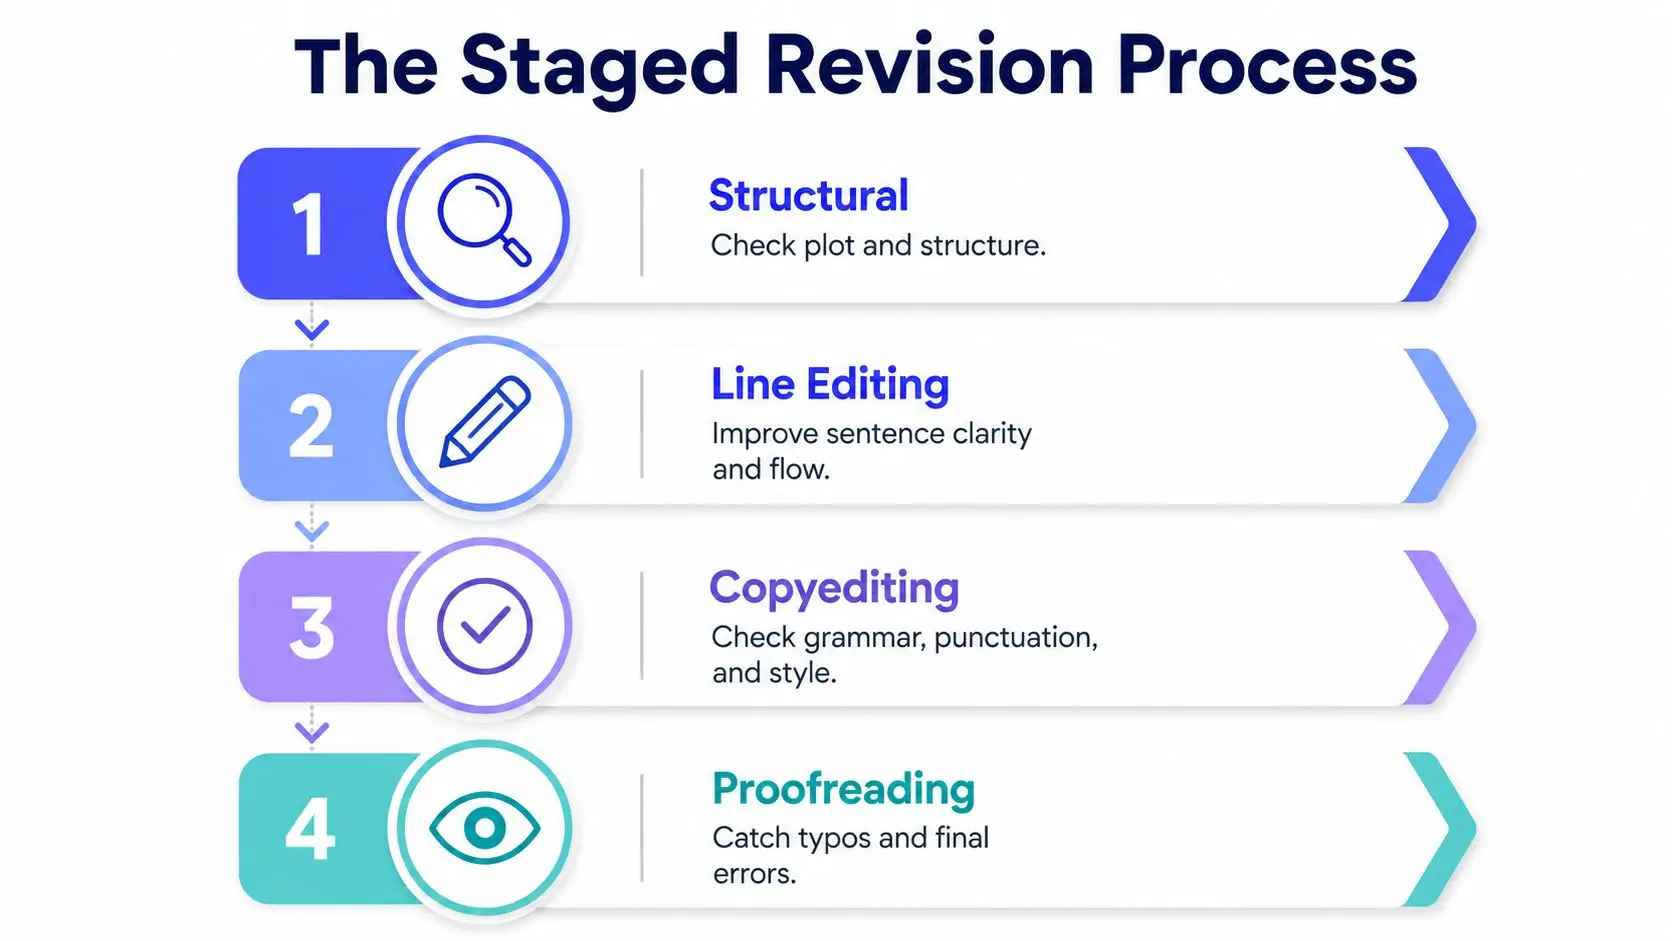
Start with the manuscript's function. Structural revision tests sequence, emphasis, and completeness. Developmental revision tests whether the ideas, scenes, research, and evidence do enough work. Line editing improves clarity, rhythm, tone, and transitions. Copyediting and proofreading protect the final files from language, citation, formatting, and output errors.
Scholarly publishing gives revision a practical context. In one journal study, 84.7% of manuscripts that received a first-round major-revision decision ultimately achieved acceptance, while minor-revision decisions converted at 98.3%. A third resubmission reached 100% acceptance in that dataset. The journal study of revision outcomes does not guarantee publication, but its results show why a major-revision decision can be a request for focused work rather than a disguised rejection.
Diagnose the expensive problems first
Read the manuscript once for structural completeness. Mark missing turns, unsupported claims, weak transitions, repetitive chapters, unresolved character motives, and sections that promise more than they deliver. Leave sentence polishing alone until those defects are visible. Otherwise, polished wording can hide a broken argument or an unfinished narrative.
For research-led work, classify each gap before choosing a fix:
- Knowledge gap: necessary information or evidence is missing.
- Methodological gap: the approach does not support the conclusion.
- Population gap: a relevant group or perspective is absent.
- Contextual gap: the claim ignores where or when it applies.
A usable gap statement names what is missing, explains why the omission matters, and states how the manuscript addresses it. Avoid “little research exists” unless the absent material can be defined precisely. The guidance on writing clear gap statements offers a practical basis for this diagnosis.
Give each pass a deliverable
Structure pass: Move, combine, cut, or add whole sections. Confirm that the sequence makes sense and that each major part earns its place.
Substance pass: Repair evidence gaps, continuity errors, incomplete explanations, weak motivations, and unsupported conclusions. Do targeted research only after identifying the exact problem.
Line pass: Improve clarity, rhythm, tone, transitions, and repetition without flattening the author's voice.
Copyediting and proofreading pass: Check grammar, spelling, citations, formatting consistency, page elements, and errors in the final print and ebook outputs.
An acceptance review of scholarly manuscripts reports that only 5% to 10% are accepted on submission, as documented in the PubMed-indexed review of manuscript acceptance. The review also discusses revision planning, including about a week of author work for minor revisions and a more substantial, targeted rewrite for major revisions. These figures support a staged workflow, where each round has a manageable purpose instead of one sprawling “fix everything” session.
Keep edit history and production notes together. Record why a section moved, which evidence changed, and whether an illustration, cover element, caption, or file setting now needs review. A later version can weaken an argument or create a mismatch between formats. Version history lets you inspect the decision instead of reconstructing it from memory.
The guide to editing a draft supports this separation between drafting and revision. A short visual explanation can reinforce the distinction between developmental and surface work:
Using AI-Assisted Editing and Collaboration Tools
A manuscript can stall when every editorial problem is handed to AI as “improve this chapter.” The request is too broad to produce dependable work. Define the job instead: check continuity, find repeated ideas, test solutions to a plot obstacle, identify unclear transitions, or flag claims that the evidence does not support.
AI is useful for pattern recognition across a long manuscript, especially after several rounds of revision. It can also flatten voice, invent details, or make distinct characters sound alike. The author remains responsible for deciding what enters the book, and each suggestion needs to be checked against the surrounding chapter and the project's factual boundaries.
Set the working brief before asking for revisions. Give the tool the chapter's purpose, intended audience, point of view, tone, terminology, tense, and known constraints. Request several possible changes rather than one replacement passage. Then test each option against the underlying problem, apply only useful edits, and record rejected suggestions when they expose an issue that may recur elsewhere.
Keep AI work inside a manuscript-aware environment where possible. Suggestions made beside the relevant passage preserve access to character history, terminology, earlier decisions, and nearby context. That reduces the copy-and-paste loop between drafting, editing, illustration notes, cover concepts, and production instructions. The manuscript is a production asset, so those decisions should remain connected rather than scattered across unrelated files.
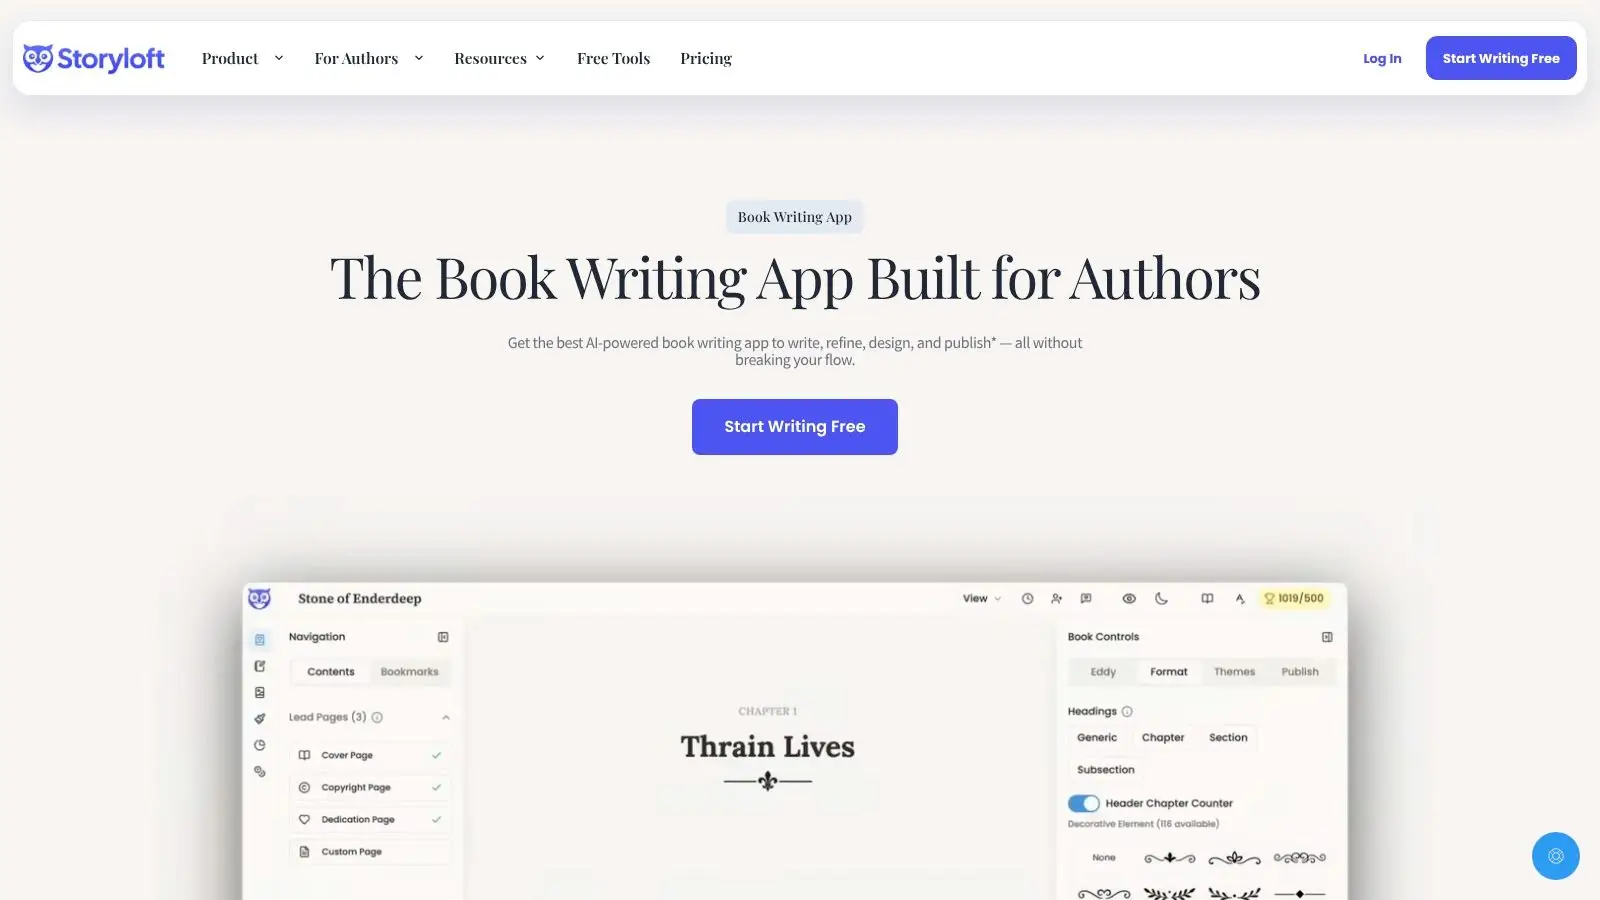
Collaboration needs clear boundaries. A developmental editor can comment on structure, a co-writer can edit assigned passages, and beta readers can review a controlled copy. Role-based permissions reduce accidental changes and show who owns each decision. Keep a preserved version before accepting a substantial rewrite, label the revision round, and compare changes before deleting material.
AI can support related formats too. For a video adaptation, AI-powered video script planning can help translate the manuscript's core ideas while keeping the script's requirements separate from book structure. The same source material may feed illustrations, cover direction, and formatted outputs, but each requires its own review.
Use AI to widen options, expose inconsistencies, and reduce repetitive checking. Keep editorial judgment, facts, structure, voice, and ethical decisions under human control.
Formatting and Exporting for Print and Ebook Publication
A manuscript becomes a production asset when its content, visuals, metadata, and output files are prepared together. Print and ebook formats follow different rules, so set up the production plan before the final pages are assembled. A clean editor view can still produce broken navigation, awkward page breaks, or misplaced artwork.
Start by defining reusable styles for body text, chapter headings, subheadings, scene breaks, blockquotes, captions, and front matter. Manual formatting may look faster during drafting, but every later typography or export change turns those individual adjustments into repair work.
Assemble the book in a controlled sequence
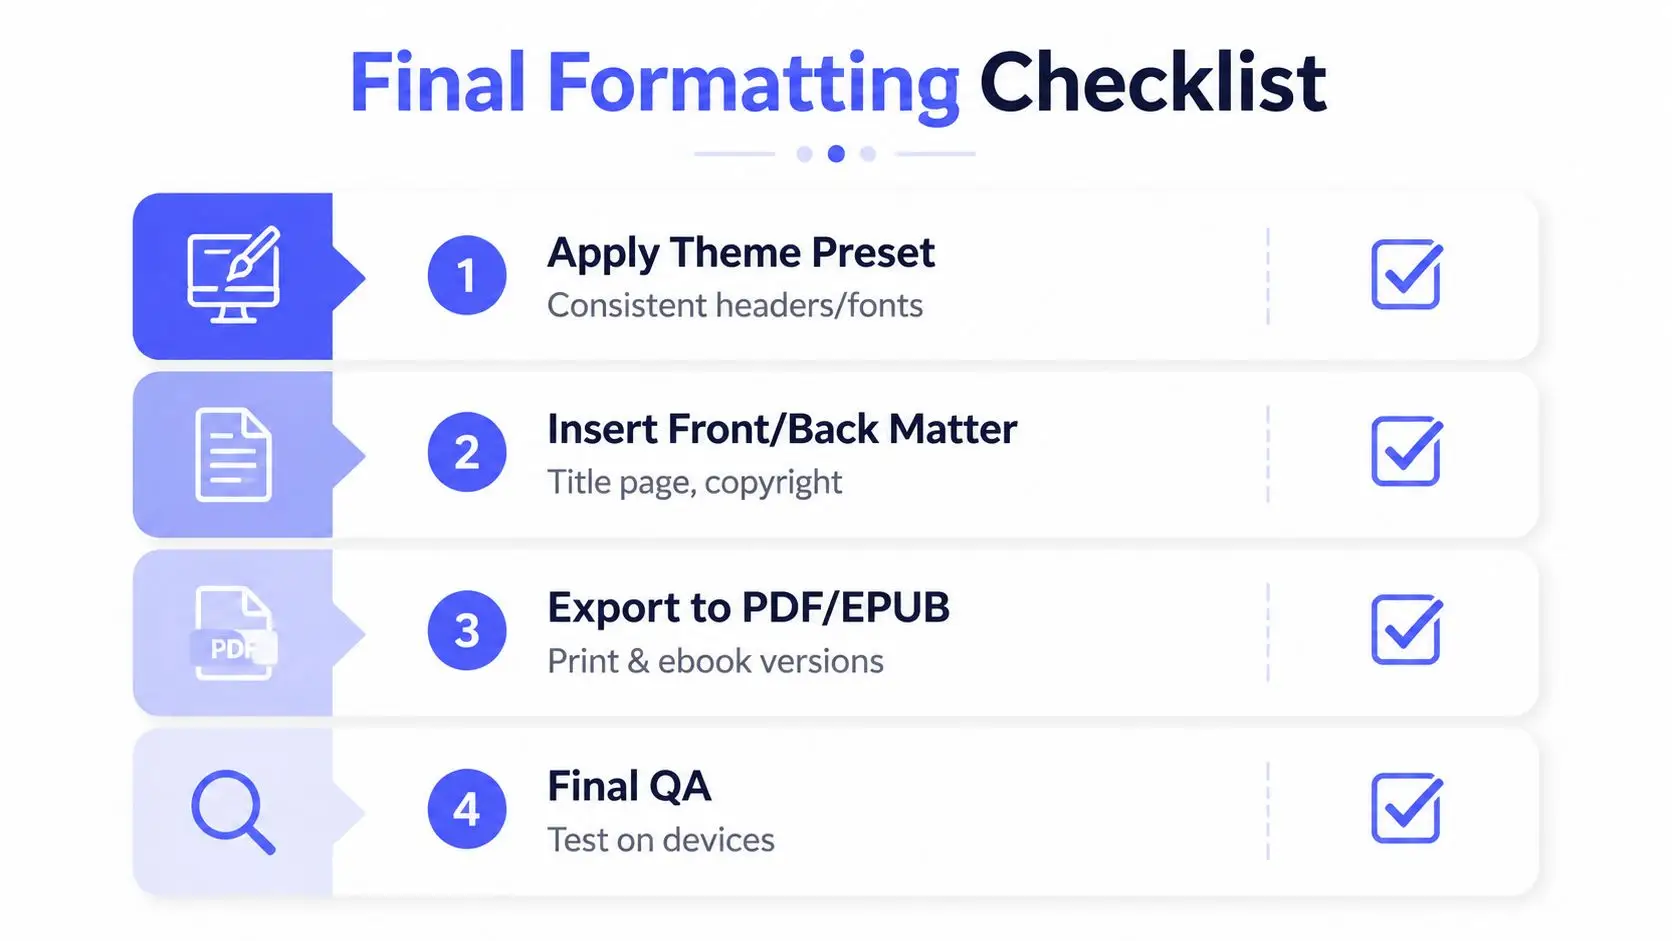
Apply the theme first. Then build the supporting material around the main text:
- Front matter: Add the title page, copyright information, contents elements, dedication, acknowledgments, and other required opening pages.
- Main text: Check chapter starts, heading hierarchy, scene breaks, quotations, tables, footnotes, and image placement.
- Back matter: Add author information, references, discussion material, acknowledgments, and calls to read another work.
- Visual assets: Confirm that illustrations, diagrams, and cover elements have the intended resolution and placement.
- Metadata: Review the title, subtitle, author name, description, categories, and identifiers before export.
Print files need close inspection of margins, page breaks, running elements, image placement, blank pages, and the relationship between the cover and trim specification. Ebook files need testing for navigation, reflow, heading links, image behavior, and readability across more than one device or reading application.
Keep the cover connected to production
The cover is part of the book's system. Its typography, title treatment, dimensions, and visual promise should match the category and the final output. If AI helps create illustrations or cover layouts, record the prompt, selected version, character references, and usage decisions. That record makes revisions easier and reduces visual inconsistency.
Bring the cover into the active manuscript early enough to test it. A synchronized preview can reveal title placement problems, unreadable thumbnail text, or differences between print and ebook versions before final export. Generate the ISBN barcode during this production pass, then verify its identifier and placement before submission.
Export separate print and ebook files, and inspect each one as a reader. Check the actual publication files, not only the source document, before approval.
Your Repeatable Manuscript Production Workflow
A manuscript becomes easier to finish when each stage produces a usable production asset, not another pile of notes. Set clear decisions and quality gates, then adjust their weight according to the project.
- Define the brief. Record genre, audience, promise, boundaries, and target length. Do not draft until you can state what the manuscript must deliver.
- Build the project architecture. Create binders for the draft, research, characters, visuals, and discarded material. Tag notes to chapters, scenes, claims, or assets.
- Outline dependencies. Give every major section a purpose, supporting material, change, and unresolved risk. Keep the outline as editable project documentation.
- Draft forward. Set a sustainable daily target, protect focus time, record progress, and leave a restart note after each session.
- Run the structural gate. Confirm that the full manuscript exists and its sequence works before polishing sentences.
- Repair substantive gaps. Check evidence, context, methodology, continuity, character motivation, and reader promises.
- Use targeted editorial tools. Give AI specific problems, such as repetition or unclear transitions, and review its suggestions against the brief. Use comments, assigned roles, and version history so collaboration does not overwrite decisions.
- Polish the language. Move from line editing to copyediting, then proofread the exported files.
- Prepare production assets. Apply themes, assemble front and back matter, create or import visuals, synchronize the cover, generate the ISBN barcode, and export print and ebook versions.
- Perform final QA. Read the files on intended devices and inspect the print layout page by page.
Apply different gate weights to different projects. A 75,000-word novel may spend more time in structural and character-consistency checks, while a 20,000-word technical manuscript may require more review of evidence, terminology, and citations. Keep a project template with your binders, tags, styles, revision labels, AI prompts, illustration references, and export checks. Refine it after every book.
The shift from handwritten drafting to typed manuscript production offers a useful precedent. Mark Twain's Life on the Mississippi was submitted to a publisher in typed form and published in 1883, a milestone described in this history of Twain's typewritten book. Production requirements changed the format. Your workflow should follow the same principle: make the manuscript easy to write, inspect, revise, illustrate, format, collaborate on, and publish.
Storyloft brings long-form drafting, planning, AI-assisted editing, collaboration, illustration, cover design, and print and ebook formatting into one workflow. Visit Storyloft to set the project scope, organize supporting material, and move from a controlled draft toward publication-ready files.