How to Write a Chapter Outline

Every writer knows that staring at a blank page can be daunting. But here’s a little secret: it’s not the enemy. A solid chapter outline is the weapon that slays that blankness every time. When I first ventured into writing my novel, I thought outlining was only for meticulous planners. Yet, I quickly learned that even those of us who prefer to go with the flow can benefit from a clear roadmap.
A well-crafted outline serves as the backbone of your entire book. It provides a bird’s-eye view of your plot, character arcs, and pacing, ensuring you don’t waste countless words on a dead-end subplot. Think of it as a diagnostic tool that helps you identify where your story may need adjustments.
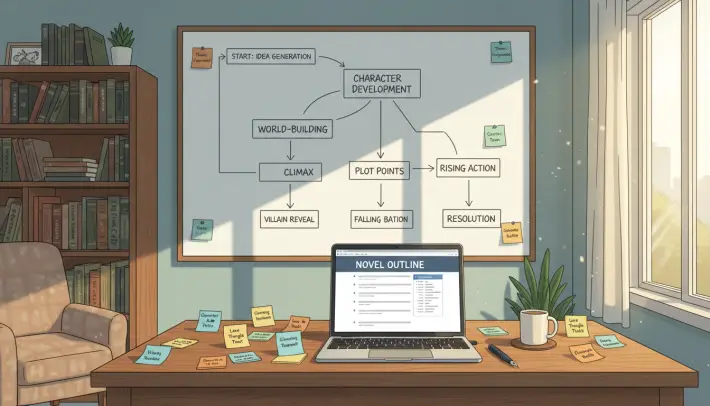
With tools like Storyloft’s Free Book Outline Generator, you can bypass the blank-page paralysis. This innovative platform allows you to create a structured workspace complete with chapter descriptions and creative notes. By the end of the process, you’ll have a solid foundation to build upon, transforming your initial idea into a usable outline.
Key Takeaways
- A chapter outline helps structure your story and identify key events.
- Even spontaneous writers can benefit from a clear plan.
- Outlining provides a visual representation of your plot and character arcs.
- Tools like Storyloft streamline the outlining process.
- Creating an outline can prevent wasted words on ineffective subplots.
Why Creating a Chapter Outline is a Game Changer
Tackling a writing project without a plan can feel like navigating a maze without a map. A chapter outline is not just a tool; it’s a game changer. It reveals the structure of your story, helping you pinpoint where things might be going awry.
When I first started writing, I thought I could keep everything in my head. But I quickly learned that forgetting which character knew what secret by chapter seven could lead to some serious plot holes. My protagonist would act on information she never actually learned—oops!
A well-crafted outline saves you an embarrassing amount of time. It reveals structural problems early, like that saggy middle where nothing happens for three chapters straight except your hero brooding in a coffee shop. By pulling back to see the big picture, you gain a visual representation of how your story unfolds.
Here’s a quick breakdown of how a chapter outline acts as a diagnostic tool:
| Issue | What an Outline Reveals |
|---|---|
| Too Much Backstory | Identifies chapters that are bogged down with unnecessary details. |
| Missing Key Events | Highlights chapters that lack pivotal moments for character development. |
| Weak Climax | Shows if the climax lacks impact, landing with all the force of a wet napkin. |
| Imbalanced Characters | Reveals if any character is neglected for several chapters. |
The real power of this method is that it forces you to see what’s actually on the page, not just what you think is there. This humbling experience is essential for any writer. For those who have completed a draft only to realize the story should start at chapter three, a chapter outline is the intervention you needed before typing those first 10,000 words.
I’ve seen fellow authors cut their revision time in half by mapping out their chapters. With Storyloft, you don’t just get chapter titles; you receive detailed subpoints, reader direction, and creative notes. This turns your outline into a working document rather than a forgotten file on your desktop.
When to Outline Your Chapters: Plotters vs. Pantsers
Writers often find themselves at a crossroads when deciding how to approach their story. Some meticulously plot every twist and turn before they even write the first word. These are the planners, armed with color-coded spreadsheets and index cards. Others dive right in, letting the story unfold organically as they go. These adventurous souls are known as pantsers, writing ‘from the seat of their pants.’
Now, it’s not that one method is superior to the other. It all depends on what works best for you as a writer. I’m a recovering pantser myself, and I can tell you, the thrill of letting a story develop is exhilarating—until chapter twelve hits. That’s when I often realize my protagonist has somehow teleported between settings with no explanation!
Most of us find ourselves somewhere in the messy middle, blending planning and improvisation. This hybrid approach often shifts depending on the project and, let’s be honest, how much coffee we’ve consumed. Even if you prefer to write spontaneously, I highly recommend donning the planning hat after your first draft. Revision without a map is like wandering through the woods, hoping to stumble onto a paved road.
The purpose of outlining at the right time isn’t to stifle your creativity. Instead, it provides your story with the structural integrity it needs to resonate with readers. For both fiction and non-fiction, Storyloft’s Free Book Outline Generator is here to meet you wherever you are in your writing process. You can work alongside Eddy, the AI writing companion, to build a book plan in minutes instead of weeks.
I’ve found that the best time to outline is whenever that creeping sense of dread hits—usually around chapter three—when it feels like my story is spiraling out of control. By outlining, you can regain that sense of direction and power over your narrative.

Step-by-Step Guide to Writing Your Chapter Outline
Embarking on a writing journey without an outline can feel like setting sail without a compass. It’s essential to have a structured approach to create a coherent and engaging narrative. Here’s a straightforward method to help you craft your chapter outline.
Step 1: Craft Your One-Sentence Chapter Summary
First up, we’re writing a one-sentence summary of the chapter. Not two or three sentences—just one. This deceptively difficult task really makes you think about the purpose of the chapter. It forces you to confront the uncomfortable question: does this chapter actually have a purpose, or is it just 3,000 words of your protagonist thinking about their feelings in the rain?
Step 2: Summarize Main Events in Each Chapter
Next, expand your summary to include the main events. Write a sentence or two to summarize each of the main events in your chapter. These must include the beginning, middle, and end. This step helps to create a natural forward momentum that pulls the reader through the chapter like a current rather than a stagnant pond.
Step 3: Expand Into a Paragraph or More
Finally, condense each chapter into a paragraph or multi-paragraph summary. You can do this in point form too. This is where the outline starts to breathe, allowing you to layer in the finer details about new characters, setting changes, and those juicy revelations that make a story worth reading.
As you work through these steps, ask yourself questions like: Are any subplots introduced or resolved here? What obstacles am I throwing at my characters? Did I remember to answer that burning question I set up three chapters ago?
With Storyloft, these steps become part of a guided experience. As you answer a few simple questions, Eddy helps you generate detailed chapter descriptions, creative notes, and reader direction without ever staring at a blank page.
| Step | Description |
|---|---|
| 1 | Craft a one-sentence summary to clarify the chapter’s purpose. |
| 2 | Summarize main events, ensuring a clear beginning, middle, and end. |
| 3 | Expand into a paragraph or more, adding details about characters and scenes. |
Organizing Your Chapter Outline Like a Pro
Finding your way through the complexities of storytelling can be a daunting task without proper organization. Luckily, there are various methods to keep your narrative on track. Let’s dive into how you can use tools to streamline your chapter outline.
Using Storyloft’s Tools and Creative Assets
Storyloft’s Free Book Outline Generator is a game changer for authors. It transforms your ideas into a structured book plan in mere minutes. With Eddy, the AI writing companion, you’ll have a guided experience that makes outlining both fun and efficient.
Along the way, Storyloft generates creative assets that make your project feel tangible. You’ll receive intelligent planning notes and even a concept book cover inspired by your idea. By the end, you’ll have a solid foundation to build upon, making the transition from outline to manuscript seamless.

Alternative Tools: Spreadsheets, Plot Grids, Index Cards
I’ve tried every organizing method under the sun—spreadsheets that looked like NASA launch plans, index cards that took over my dining room table, and plot grids that made me feel like a detective solving my own novel’s murder.
Spreadsheets are fantastic for tracking multiple POV characters, time jumps, and word count per chapter. They’ve helped me catch a character who somehow aged three years between chapters two and three without explanation.
Index cards and sticky notes offer a tactile freedom that digital tools sometimes lack. There’s something deeply satisfying about physically shuffling your story into shape.
The Plot Grid method takes organization to the next level. It lets you attach notes to each scene, track character arcs, and color-code perspectives. This way, you can quickly spot if you’ve been neglecting your secondary characters for six chapters.
But here’s where I get excited: Storyloft eliminates the setup headache entirely. It generates a complete workspace with structured sections, detailed subpoints, and creative assets like a concept book cover that makes your project feel real from day one.
Instead of spending hours formatting a spreadsheet, I can work alongside Eddy to build a usable outline in minutes. The best part is that everything lives inside Storyloft. No more juggling seventeen different files and a pile of index cards that my cat has decided are toys.
For more tips on creating a chapter outline, check out this guide.
Taking Your Outline Deeper: Scene Lists and Subplots
Diving deeper into your story can reveal hidden gems and potential pitfalls. Once I’ve got my chapter outline locked down, I like to go full detective mode and break everything into scene lists. That’s where the real magic—and the real problems—hide.
A scene list forces me to look at every single unit of the story and ask uncomfortable questions. Does this scene earn its place, or am I just emotionally attached to that witty dialogue I wrote at 2 a.m.?
I track which characters appear in each scene, whose POV we’re in, and where the scene takes place. Nothing kills immersion faster than a protagonist who’s somehow in two locations at once!
Subplots are sneaky little creatures that love to disappear for fifty pages and then pop up again like they never left. I use my scene outline to trace each subplot thread and make sure it weaves through the story consistently.
The Snowflake Method takes this even deeper, but honestly, even a basic scene list with notes on character arcs and setting changes will save you from the dreaded revision spiral.
When I’m reading through my scene outline, I’m looking for patterns—too many scenes in coffee shops, a side character who vanishes after chapter five, or a revelation that lands with zero setup.
Storyloft supports this deeper work by generating detailed subpoints and creative notes for each section. This way, you’re never just staring at chapter titles wondering what actually happens inside them.
| Scene | Summary | Characters | POV | Location |
|---|---|---|---|---|
| 1 | Introduction of the protagonist and setting. | Protagonist, Sidekick | First Person | Coffee Shop |
| 2 | Conflict arises between characters. | Protagonist, Antagonist | Third Person | Park |
| 3 | Character learns a crucial secret. | Protagonist, Mentor | First Person | Library |
| 4 | Climax where all threads converge. | All Main Characters | Third Person | City Square |
Conclusion
Writing without a plan is like trying to cook without a recipe; chaos often ensues. A solid outline serves as your story’s roadmap, guiding you through twists and turns. It gives you the altitude to see the whole terrain while also helping you spot where your protagonist might have taken a wrong turn.
The aim here isn’t to stifle your creativity but to build a sturdy foundation for your imagination. Whether you choose Storyloft’s AI tools, a spreadsheet, or a collection of index cards, the key is to create a visible plan. With Storyloft, you can swiftly transform a vague idea into a complete working outline, complete with creative assets that make your project feel real.
So, go ahead—open up Storyloft, fire up that spreadsheet, or grab those index cards. Give your story the structure it deserves before you write another word!