How to Do an Outline for a Book Step by Step Guide

Picture this: you have a brilliant idea for a novel swirling in your mind. It feels electric, full of potential. But as you sit down, the excitement quickly turns into frustration. Turning that spark into a structured plan feels like trying to nail Jell-O to a wall—impossible and messy.
Yet, crafting an outline isn’t about stifling your creativity. Instead, it offers your story a solid skeleton, preventing it from collapsing into a formless blob by chapter three. This guide will walk you through the entire process, from dreaming up a compelling protagonist to finalizing a draft-ready structure.
Along the way, you’ll gain insights from award-winning novelist Kirsten Bakis, who knows a thing or two about navigating the writing wilderness. By the end, you’ll have a clear, actionable path from concept to completed outline, with plenty of wit and wisdom to keep you entertained.
Key Takeaways
- Transform your brilliant idea into a structured plan.
- Learn the importance of an outline in maintaining story structure.
- Gain insights from experienced authors to guide your writing process.
- Understand that outlines are living documents that evolve with your story.
- Stop the blank-page paralysis and start building your book structure.
Why You Should Learn How to Do an Outline for a Book
Imagine the satisfaction of turning a fleeting thought into a detailed roadmap for your story. Outlining might seem like a chore, but it’s actually a powerful tool that keeps your writing on track. By planning ahead, you can prevent yourself from getting lost in a maze of plot twists and character arcs.
The Power of Planning Before Pencil Hits Paper
Planning before you start writing allows you to test-drive your story idea. You won’t waste time committing to a plot that fizzles out faster than a cheap firework. An outline acts like a GPS for your novel. Sure, you can take scenic detours, but you’ll always know how to get back to the main road.
How Outlining Boosts Your Writing Efficiency and Creativity
Outlining significantly boosts your writing efficiency. You’ll spend less time staring at the ceiling wondering what happens next. Instead, you’ll be putting words on the page. Plus, it supercharges your creativity! When you know the big beats, your mind can play with language, dialogue, and those delicious little details that make a story sing.
Kirsten Bakis reminds us that even Nicholson Baker turned a shoelace-buying expedition into a whole novel. If that plot can work, yours can too! With Storyloft’s approach, you get more than a generic chapter list. You’ll have a full outline with sections, chapter breakdowns, subpoints, and supporting notes. This structure helps you move from planning into writing with momentum.
Authors who outline often find they write faster drafts. They aren’t constantly stopping to figure out what comes next. Think of your outline as a safety net, not a straitjacket. It catches you when you fall but doesn’t stop you from doing backflips if the mood strikes.
Learning this skill now means every future book project starts with confidence instead of chaos. And who doesn’t want that?
Discover Your Writing Style: Outliner, Pantser, or a Bit of Both
Understanding your unique writing style can be the key to successfully organizing your narrative. Before diving into the outlining process, you need to determine what kind of writer you are. Are you an Outliner who craves a detailed map, a Pantser who thrives on chaos, or a Hybrid who enjoys the best of both worlds?
What’s an Outliner and How They Work
Outliners are the architects of the writing world. They construct elaborate blueprints filled with character backstories, plot points, and scene-by-scene breakdowns before writing a single word. These meticulous planners often conduct imaginary interviews with their characters, knowing exactly what will happen on page 87 before they’ve even written page one.
The Free-Spirited Pantser Approach
Pantsers, on the other hand, are the free-spirited jazz musicians of fiction. They start with a germ of an idea and write by the seat of their pants, discovering the story as they go. Jerry Jenkins, who has penned nearly 200 books, identifies as a Pantser:
“I write as a process of discovery.”
Stephen King famously puts “interesting characters in difficult situations and writes to find out what happens,” which is basically the Pantser national anthem.
Why You Might Be a Hybrid and How to Balance Both
Most writers are hybrids, needing enough structure to feel secure while also craving the flexibility to follow unexpected creative detours. Storyloft’s outline generator adapts to your style—whether you’re a hardcore Outliner or a Pantser who prefers a loose roadmap. It organizes themes, structure, audience, characters, ideas, and pacing into a format you can actually write from.
The key is not to judge your process. Dean Koontz’s Classic Story Structure works wonders for plotters, but if outlining makes you break out in hives, you might be a Pantser at heart. Try both approaches and see which one makes your fingers fly across the keyboard. Your writing style is as personal as your fingerprint, and there’s no wrong way to birth a book.
| Writing Style | Description | Famous Authors |
|---|---|---|
| Outliner | Needs a detailed plan with structured outlines and character arcs. | J.K. Rowling, James Patterson |
| Pantser | Thrives on spontaneity and writes to discover the story. | Stephen King, Jerry Jenkins |
| Hybrid | Balances structure with flexibility, adapting as the story evolves. | Most modern authors |
Meet Storyloft’s Free Outline Generator: Your New Writing Sidekick
Envision having a trusty companion that transforms your chaotic thoughts into a clear blueprint for your writing. That’s exactly what Storyloft’s free outline generator, Eddy, offers. This innovative tool helps you go from a rough idea to a structured book plan in mere minutes.
Whether you’re crafting a gripping thriller or a heartfelt memoir, Eddy adapts to your needs. You simply present your concept—perhaps it’s a novel about a time-traveling barista or a self-help guide on vintage typewriters. Eddy then guides you through a short, interactive conversation that feels less like filling out a form and more like chatting with a caffeinated editor.
From Rough Idea to Structured Book Plan in Minutes
Unlike those generic chapter list generators that churn out bland titles like “Chapter 1: Introduction,” Storyloft builds a full outline. It includes sections, chapter breakdowns, subpoints, and supporting notes that actually help you write. This tool ensures you have everything you need to start drafting your story.
Fiction or Non-Fiction? Eddy Adapts to You
One of Eddy’s standout features is its adaptability. Whether you’re writing fiction or non-fiction, it tailors the experience to suit your project. Your romance novel will receive the emotional beats it needs, while your self-help book gets the logical structure readers expect.
Creative Assets, Notes, and Workspace Ready to Go
As you work with Eddy, it creates notes and visual inspiration—think mood boards and creative assets. This way, your project feels alive before you even type page one. When you’re finished, you can create a free account, and your entire book workspace is ready for you inside Storyloft.
No blank page stares back at you like an unblinking eye. No complex setup that requires a PhD in software engineering—just a faster, smarter way to turn your idea into a real book. Whether you’re a first-time author or a seasoned pro tired of outlining on cocktail napkins, Eddy meets you where you are and hands you a map to the finish line.
It’s like having a developmental editor, a project manager, and a cheerleader rolled into one digital sidekick. Best of all, it won’t cost you a single dime to get started!
Step 1: Create Your Main Character – The Heart of Your Story
At the core of every unforgettable story lies a protagonist who captivates and challenges readers. Choosing the right character can make or break your narrative. This first step in your outline is crucial, as it sets the tone for the entire journey ahead.
Every great story starts with a protagonist who grabs readers by the collar and drags them through 300 pages of adventure, heartbreak, or shoelace-related drama—so picking the right one matters. Your main character is the engine of your plot; if they’re not actively making choices that move the story forward, you’ve got a mannequin in a fancy outfit, not a protagonist.
Kirsten Bakis wisely suggests starting with just one main character for your initial outline. You can always add more later, but right now you need a single North Star to guide your planning. Don’t agonize over choosing the perfect protagonist from your cast of dozens; just pick one, any one, and run them through the outlining gauntlet to see what shakes loose.
Choosing a Protagonist Who Drives the Plot
Character names can be weirdly paralyzing. You might spend three hours on baby name websites instead of actually writing. So, use a character name generator or grab something temporary and keep moving. Jerry Jenkins hammers home that character development makes or breaks your story. Even at the outline stage, think about who this person is, what they want, and what broken bits of their past are rattling around inside them.
- Your protagonist doesn’t need to be likable, but they do need to be interesting. Readers will follow a fascinating disaster of a human being much further than a bland saint.
- The journey from Point A to Point B can be emotional, physical, or both. Your character might travel to new lands, learn and grow as a person, or do all of those things while battling dragons or deadlines.
- Remember that this choice isn’t set in stone. Your outline is a living document. If a different character starts banging on the door demanding to be the star, you can always recast later.
- The goal here is momentum: pick a protagonist, give them a name (even a placeholder like “Protagonist McProtagonistface”), and get ready to throw some serious problems their way.
Using Character Names and How to Pick One Fast
Character names are essential. They give your protagonist an identity and can even hint at their personality. If you’re stuck, consider using a name generator or just jot down something that feels right. The name can always change later!
As you move forward, keep in mind that your protagonist’s journey is what will keep readers engaged. A well-developed character with clear goals and motivations will lead your story into exciting territory.
| Aspect | Importance | Tips |
|---|---|---|
| Character Development | Drives the plot and engages readers | Focus on motivations and backstory |
| Choosing a Name | Establishes identity | Use generators or temporary names |
| Protagonist’s Journey | Creates emotional investment | Ensure growth and challenges |

Step 2: Give Your Main Character a Big Problem or Goal
A compelling story is often defined by the trials and tribulations of its lead character. This step is crucial as it sets the stage for your narrative’s conflict and drives the plot forward. Your protagonist needs a problem so big and gnarly that readers can’t help but lean in and wonder how the heck anyone could possibly survive it. That’s the fuel your story runs on.
The problem and the goal are two sides of the same coin. Your character’s Big Problem is intertwined with their Big Goal, and there are usually numerous obstacles standing in the way. Take Winter’s Bone by Daniel Woodrell: Ree’s family faces losing their home if her father skips his court date. The stakes are sky-high because that house is literally all they have, and losing it means losing everything.
Stakes don’t have to be life-or-death to be compelling. Nicholson Baker’s The Mezzanine shows that even a broken shoelace can drive an entire novel if it genuinely matters to the character. The key is that the problem must matter deeply to your protagonist. Readers will care about a lost house, a broken shoelace, or a missing cat if you show them why it’s devastating to this specific person.
Jerry Jenkins recommends plunging your main character into the worst trouble you can imagine as soon as possible. Readers bond with characters who are actively struggling against something. Balancing big versus small problems is an art. A world-ending threat can feel abstract and boring, while a personal, intimate problem can feel more urgent than any apocalypse.
Your character’s goal should be specific enough that readers know exactly what success looks like. “Find dad before the court date” is much clearer than “fix everything.” At the outline stage, write down your main character’s main problem in one sentence and don’t second-guess yourself. You can change it later, but you need a target to aim at right now.
The problem you choose will shape every other element of your outline, from the obstacles you throw at them to the resolution that finally lets them breathe.
Step 3: Find Your Story’s Catalyst and First Action
Every story needs a spark, a moment that ignites the action and sets the plot in motion. This pivotal moment is known as the catalyst, and it’s essential for driving your narrative forward. Without it, your protagonist might just sit around contemplating their troubles, which isn’t very exciting for readers.
Kirsten Bakis explains that identifying your catalyst involves asking: when does your character first realize they have this Big Problem? Think of it as the “one day” moment in Pixar writer Emma Coats’s famous formula: “Once upon a time there was _____. Every day _____. One day _____.” The catalyst is that “one day” event that launches your story into action.
For example, in Winter’s Bone, the catalyst occurs in Chapter Three when the deputy informs Ree that her family will lose their house if her father doesn’t show up for court. Suddenly, the stakes are high, and the clock is ticking. Your character’s first action follows the catalyst and propels the plot forward. In Chapter Five, Ree sets out to visit her uncle, hoping to uncover her father’s whereabouts.
It’s crucial that this first action doesn’t resolve the Big Problem—otherwise, you’d have a very short book! Instead, it should demonstrate your protagonist’s determination, even if they make mistakes along the way. Readers love characters who are active and willing to take risks.
At the outline stage, capture your catalyst moment in one sentence and your character’s first action in another. These two beats form the one-two punch that hooks readers and launches your plot. The beginning of your story should feel like a shove off a cliff—the catalyst pushes, and the first action is your character flailing their arms, trying to figure out how to fly.
Don’t overthink this step; you can always adjust the catalyst later. What matters is having a clear starting point to build the rest of your outline around. A strong catalyst and first action tell readers exactly what kind of story they’re in for and give them a reason to keep turning pages long past their bedtime.
| Element | Description | Importance |
|---|---|---|
| Catalyst | The event that disrupts the protagonist’s normal life. | Initiates the plot and creates urgency. |
| First Action | The character’s immediate response to the catalyst. | Shows determination and propels the story forward. |
| Reader Engagement | Active characters keep readers invested. | Encourages emotional connection and suspense. |
Step 4: Set Obstacles and Build Rising Conflict
The heart of a compelling narrative lies in the obstacles that test your characters. Every plot thrives on the tension created by the hurdles your characters must overcome. This step is all about throwing rocks at your protagonist and watching how they react.
Throwing Rocks at Your Character: Increasing Challenges
Billy Wilder nailed it: plot is getting your character up a tree, throwing rocks at them, and eventually getting them down. Your protagonist’s journey shouldn’t be a pleasant stroll through the park; it should be an escalating nightmare. Each attempt to fix things should dig them deeper into the hole.
Making Obstacles Get Badder Before Getting Better
Write down three to five obstacles—your “rocks”—and arrange them from bad to worse to “oh no, this is genuinely terrible.” In Winter’s Bone, Ree’s challenges include the fact that no one knows where her dad is, people keep telling her to stop asking questions, and the threats get increasingly menacing as she gets closer to the truth.
Jerry Jenkins insists that everything your character does to get out of trouble should only make it worse. Every complication must be logical—no random pianos falling from the sky unless you’ve set up a piano-moving company on the roof.
These obstacles should force your character to grow, adapt, and reveal who they really are under pressure. That’s where the juicy character development happens. At the outline stage, you’re not writing full scenes yet—just jot down one sentence for each rock, describing what the obstacle is and how it complicates your protagonist’s journey.
Rising conflict is the engine of reader engagement. If things aren’t getting progressively worse, your audience will wander off to watch cat videos instead. Don’t be afraid to be mean to your characters; your job as the author is to make their lives as difficult as possible before the eventual resolution.
These obstacles are the meat of your story’s middle section, so make them count. Each rock should feel like a genuine setback that forces your protagonist to dig deeper and fight harder.
Step 5: The Ordeal – Your Story’s ‘All Is Lost’ Moment
Every great story reaches a point where hope seems lost, and the protagonist faces their darkest hour. This pivotal moment, often referred to as The Ordeal, is crucial for driving the emotional core of your narrative. It’s that gut-wrenching scene where everything falls apart, leaving readers gripping the edge of their seats, wondering how your character can possibly recover.
In the classic structure of The Hero’s Journey, this moment is known as the “All is Lost” point. Think of it as the biggest rock thrown at your character while they’re already up a tree. It’s the moment when the plot takes a dramatic turn, and the stakes couldn’t be higher.
Creating a Darkest Hour That Keeps Readers Glued
Imagine your character sprawled on the ground, feeling utterly defeated. This moment should be so hopeless that even you, the author, briefly wonder how you’re going to write your character out of it. That’s how you know you’ve hit the mark!
The Ordeal doesn’t have to be a life-or-death situation. It could simply be a moment of profound discouragement where your character feels like they’ve failed everyone they love. This beat is vital for emotional impact because readers need to witness your protagonist at their lowest point. Only then can they truly appreciate the triumph when your character finally claws their way back up.
Why This Moment Is Vital for Emotional Impact
At the outline stage, jot down one sentence describing your “All is Lost” moment. Don’t overthink it—just unleash the darkest, most devastating scenario you can imagine for your character. This scene typically lands in the second half of your story, after the obstacles have piled up and your character’s resources are completely depleted.
The best Ordeal moments force your character to confront something true about themselves—a flaw, a fear, or a lie they’ve been telling themselves since page one. When you nail this beat, readers will be emotionally devastated in the best possible way, desperate to see how your character finds a way out of the darkness.
Step 6: Resolution – How Your Character Finds a Way Out
The resolution is not just an ending; it’s the culmination of growth and understanding for your character. After the “All is Lost” devastation, your protagonist needs a way out. The best resolutions often arise from the realization that they won’t get what they want, but they will get what they need instead.
Kirsten Bakis suggests making a quick list of your character’s wants vs needs. This distinction is pure storytelling gold. Your character may chase a specific goal, but the real solution requires them to understand something deeper about themselves.
Consider the classic example from The Wizard of Oz. Dorothy wants the Wizard to send her home, but she needs to realize she has the power in her ruby slippers all along. The resolution comes from internal growth, not external magic.
Similarly, Caroline Leavitt points to Nick Carraway in The Great Gatsby. He desires money and entry into Gatsby’s glittering world. However, after Gatsby’s murder, he recognizes that world is empty and walks away.
As Jerry Jenkins emphasizes, everything your character learns through struggle and failure equips them with what they need to win the day. At the outline stage, jot down one to three sentences about how your character escapes the “All is Lost” moment and begins solving their problem.
- The resolution should feel earned, not like a deus ex machina where a magical solution drops from the sky.
- Your protagonist’s growth and choices should drive the ending.
- A satisfying ending doesn’t always mean a happy one; sometimes, the most powerful resolutions are bittersweet.
- Planning the resolution now gives your entire outline a destination, making the journey easier to navigate.
- The transformative solution should tie back to the character’s arc, showcasing their change from the beginning of the story.
Step 7: Develop and Track Your Character’s Arc
Your protagonist’s evolution is the emotional backbone of your narrative, making it essential to track their journey. The arc of your characters is a powerful tool, guiding readers through their emotional landscape from start to finish.
As you dive into this step, consider a simple yet effective exercise from Rachael Herron. In your main character’s voice, fill in these blanks: “I started out _______. I ended up _______.” Do this three more times to uncover layers you didn’t know existed. If your character started out sad and ended up happy, dig deeper: what specifically made that difference? A new job, a new love, or a newfound sense of self-acceptance? Specificity is your friend here.
From Start to Finish: Mapping Emotional Transformation
Tana French’s literary thriller In the Woods uses brilliant bookends: the same patch of woods appears at the beginning and end, but everything about the narrator’s experience has changed, reflecting his entire journey. Mapping the emotional transformation from start to finish helps you track whether your plot events are actually changing your character or just happening around them like background noise.
Jena Brown reminds us that characters are the beating heart of your novel. Without a clear arc, your plot is just a random sequence of events with no emotional weight. At the outline stage, you don’t need to nail every nuance of the arc, but you should have a clear sense of who your character is at the beginning and who they become by the end.
Simple Exercises to Deepen Your Character’s Journey
- The journey should include specific moments where your character’s beliefs are challenged, their flaws are exposed, and they’re forced to grow in ways they never expected.
- Simple exercises like the bookend technique—describing two parallel scenes that show the transformation visually—can give you a powerful A-to-B journey to track as you write.
- A well-developed character arc is what makes readers close your book with a satisfied sigh and immediately recommend it to everyone they know.
Step 8: Structuring Your Outline: Tools, Techniques, and Tips
Now that your plot points are ready, let’s explore the best ways to structure your narrative. The right tools can turn a jumble of ideas into a cohesive outline. Whether you prefer sticky notes, mind maps, or digital apps, there’s a method that fits your style.
Using Sticky Notes, Mind Maps, and Digital Apps
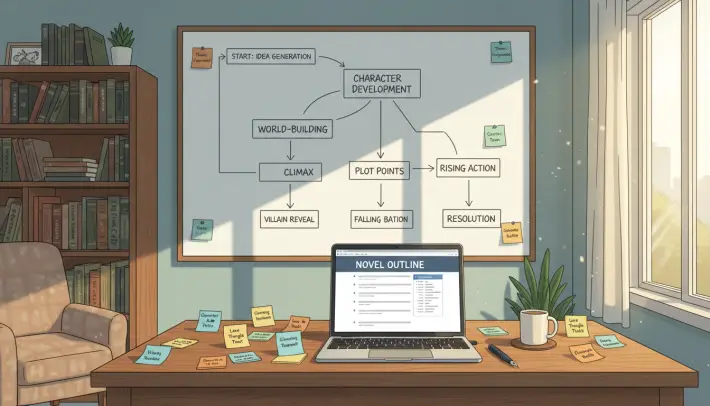
Kirsten Bakis swears by sticky notes, which can be arranged and rearranged on a wall or trifold board. This method allows you to visualize your scenes easily, keeping descriptions concise. Each note represents a scene, giving you the flexibility to move them around until the flow feels just right.
If you’re a visual thinker, mind maps might be your best friend. Nina Amir recommends creating separate mind maps for each chapter, character, and major event. This approach helps you see how everything connects in a web of creativity.
For those who enjoy a more tactile method, the Zettelkasten technique uses index cards. Write brief descriptions of characters, plot points, and scenes on these cards. You can physically drag and drop them to organize your story arc like a literary puzzle.
Pantsers, don’t fret! K.M. Weiland’s Reverse Outline method starts at the end and works backward. This technique helps you discover the events that lead to each scene, making it easier to structure your story.
How Storyloft Makes Structure Simple and Fun
Storyloft simplifies the structuring process by building a full outline with sections, chapter breakdowns, subpoints, and supporting notes. Say goodbye to generic chapter lists! Eddy, the free outline generator, also creates notes and visual inspiration along the way. Your project will feel alive and breathing before you’ve even written a single word of your first draft.
Adapting Your Outline As Your Story Evolves
The most important rule? Your outline should be a living document. As your story develops, don’t hesitate to move, cut, or transform scenes that aren’t working. This flexibility allows your narrative to evolve naturally.
Choose the tools and techniques that resonate with you. The best structure is the one you’ll actually use, not the one that looks impressive but gathers dust in a drawer. With the right approach, you’ll have a solid foundation for your novel outline that keeps you on track as you write.
Step 9: Finalizing Your Outline and Starting Your Draft
As you prepare to embark on your writing journey, finalizing your outline is the next crucial step. You’ve built your outline, arranged your scenes, and mapped your character’s journey. Now, it’s time to organize everything for flow from the opening scenes to the last page.
Organizing For Flow: From Opening Scenes to Last Page
Take a final pass through your outline. Ensure the order of events creates a narrative rhythm that pulls readers forward. Tension should rise and fall in all the right places.
Kirsten Bakis offers liberating advice: when you start writing, your story will change. This is not just okay; it’s a good thing! It means you’re on the unpredictable, creative journey of writing a novel.
Remember: Outlines Are Guides, Not Chains
Your outline is a guide, not a chain. If a character suddenly does something unexpected or a scene takes a hard left turn, follow that impulse. See where it leads!
Jerry Jenkins reminds us that the outline’s purpose is to keep you on track, prevent stalling, and give you a safety net. It should not imprison your creativity in a maximum-security plot prison.
George Saunders said artists work outside the realm of strict logic. So, when your draft starts wandering into weird and wonderful territory, trust the process and let it breathe.
Jumping Into Your First Draft With Confidence
Jumping into your first draft with confidence means accepting that some of your outline ideas won’t survive contact with actual prose. That’s exactly how it should be!
Storyloft makes the transition seamless. When you’re done outlining, create a free account, and your entire book workspace is ready. No blank page staring you down, and no complex setup required.
The pages ahead are yours to fill. Your outline has given you a roadmap, but the actual driving is where the fun begins. Take a deep breath, open a new document, and start writing—your book is waiting, and you’ve already done the hard work of figuring out where you’re going.
| Key Considerations | Details |
|---|---|
| Flow of Scenes | Ensure events create a narrative rhythm. |
| Flexibility | Outlines should adapt as the story evolves. |
| Confidence | Embrace changes during the drafting process. |
Conclusion: Turn That Idea into Your Real Book, Faster
Congratulations! You’ve navigated the winding path of outlining and emerged with a solid plan. You now possess a map of key scenes, a protagonist with depth, and a structure ready to support your novel.
The journey from “I have an idea” to “I have a real book” doesn’t have to take years. A solid outline cuts through confusion and gets you writing faster. Kirsten Bakis would encourage you to celebrate your achievement and start your draft using those plot points as guideposts.
With Storyloft’s Free Outline Generator, you can turn a rough concept into a structured book plan in minutes. No blank page intimidation or complex setup required. This process works for both fiction and non-fiction, and the skills you’ve built will serve you well in every future writing endeavor.
Remember, your outline will evolve as you write. When you finish your draft, revisit these exercises with fresh eyes to deepen your understanding of your story. The only thing standing between you and a finished book is the act of writing. So stop staring at that intimidating blank page and start building the book that’s been living in your head rent-free. Your story deserves to exist in the world—go write the thing!
FAQ
What is the purpose of outlining a book?
Outlining helps you organize your thoughts, plot, and characters, ensuring a smoother writing process and a more coherent story.
Can I change my outline as I write?
Absolutely! Think of your outline as a flexible roadmap. Feel free to take detours as inspiration strikes!
Do I need to outline every detail?
Not at all! Some writers prefer a broad overview, while others dive into specifics. Find what works best for you!
What if I get stuck while outlining?
If you hit a wall, take a break or brainstorm new ideas. Sometimes stepping away can spark fresh thoughts!
Is there a specific format I should follow for my outline?
There’s no one-size-fits-all! Use bullet points, mind maps, or whatever format makes sense to you. Get creative!
How detailed should my character descriptions be in the outline?
Include key traits, motivations, and arcs. The more you know your characters, the easier they’ll be to write!
Can outlining improve my writing speed?
Yes! A solid outline provides direction, allowing you to write more efficiently without constantly stopping to think.
Should I outline before or after brainstorming ideas?
Start with brainstorming to generate ideas, then outline to organize those thoughts into a structured format.
What tools can I use for outlining?
You can use sticky notes, digital apps, or even good old-fashioned pen and paper. Choose what feels right for you!
How do I know if my outline is effective?
If it helps you visualize the story and keeps you motivated to write, then you’re on the right track!