Chapter Outlines: My Guide to Better Writing

I looked at my first manuscript and felt both proud and scared. It had 87,000 words, but something was wrong. Scenes were repeated, and characters disappeared for long stretches. A subplot I loved just stopped at chapter twelve.
I’d worked on it for nine months. But I couldn’t see the big picture. That’s when a friend gave me index cards and said, “Write one sentence for each chapter. Just one.” It seemed too easy, but it changed everything.
Chapter outlines became my secret tool. They showed me what was really on the page, not what I thought. This made a huge difference. My brain filled in gaps while reading, but outlines showed every flaw.
I’ve tried many methods since then. Sticky notes, spreadsheets, and PowerPoint slides. Each one taught me something new about storytelling. I learned that structure can free creativity, not trap it.
This guide will share everything I’ve learned about chapter outlines. It’s for beginners and advanced writers. These tools will help you see your story in a new light.
Key Takeaways
- Chapter outlines reveal the real structure of your story, exposing gaps your brain tends to gloss over during regular reading.
- You don’t need to outline before writing — post-draft chapter outlines are just as powerful for revision.
- Simple tools like index cards, sticky notes, and spreadsheets can drive a meaningful writing process transformation.
- Organized storytelling doesn’t kill creativity; it sharpens it by showing you where your story actually needs attention.
- Tracking elements like point of view, setting, timeline, and word count per chapter helps balance your narrative.
- There’s no single “right” method — the best chapter outlines are the ones you’ll actually use and revisit.
Understanding the Power of Chapter Outlines
I used to think outlines were for before writing. But now I know the magic happens after the first draft. This change cut my rewrites almost in half. Let’s dive into how and why it’s key for your writing.
Why I Started Using Outlines After My First Draft
My first novel was a mess. I wrote it without a plan. Then, I tried outlining after finishing my draft. I made a one-sentence summary for each chapter.
This helped me see what was missing and what was too long. It gave me clear steps to revise my draft.
The Difference Between What’s on the Page and What You Think Is There
Here’s a truth for writers: what you think you wrote and what you actually wrote are rarely the same thing. I’ve seen this gap many times. I thought a character’s motivation was clear. It wasn’t.
An outline built from your finished draft forces you to confront the real text, not the version living in your head.
This gap is where most problems hide. A post-draft outline reveals them quickly.
How Visual Mapping Changed My Writing Process
Visual story mapping changed my revisions. Seeing my chapters on a board helped me see things I couldn’t before.
- I spotted pacing issues at a glance
- I tracked subplots across chapters without flipping pages
- I identified scenes that belonged in different chapters
Visual story mapping isn’t just about cutting words. It’s about understanding the shape of your story. With a solid plan, you’re ready for the next step.
My Journey from Pantser to Planner
I started writing without a plan. I let my characters guide me. But hitting a wall at chapter ten made me rethink my approach.
Writers often fall on a spectrum. Some plan everything, while others go with the flow. I’ve tried both.
Discovering the Balance Between Structure and Creativity
I thought planning would stifle my creativity. But a simple guide showed me structure can actually help.
It’s about finding the right balance. A loose plan keeps you on track. But it also leaves room for surprises.
| Aspect | Pure Pantser | Balanced Approach |
|---|---|---|
| First Draft Speed | Fast start, slow middle | Steady pace throughout |
| Revision Rounds | 5 or more | 2 to 3 |
| Creative Freedom | High but unfocused | High and directed |
| Plot Consistency | Often needs major fixes | Minor tweaks only |
When I Learned to Don the Planning Hat
My big change came after finishing a first draft. I took a break and summarized my work. This revealed many plot holes.
Switching to planning before revising changed my writing life. It’s a tip I share with all writers. Next, I’ll show you the tools you need to start planning.
Essential Tools for Creating Book Chapter Structure
When I started writing with a plan, I needed the right tools. A good spreadsheet became my best friend. I set up columns for each element I wanted to track.
This setup is critical for stories with long time periods or multiple narrators. Without tracking, it’s easy to lose a character or subplot. I learned this the hard way when I lost a secondary storyline.
Here’s what I track in my spreadsheet for every chapter:
- POV character and their emotional arc in that chapter
- Time and date within the story’s timeline
- Primary setting and any location changes
- Key turning points or plot revelations
- Word count to monitor pacing
- Subplot threads that advance or resolve
A manuscript assessment is easier with all this data in one place. I can spot imbalances, like one POV character dominating. Tools like Google Sheets, Scrivener, and Notion are great for this. Scrivener’s metadata features let me tag and filter chapters easily.
The right tools don’t replace creativity. They protect it. When I trust my tracking system, I focus more on crafting scenes. Reliable chapter organization lets me tell a great story.
Building Your First Outline Writing Guide
Creating a chapter outline is not hard. It’s like building layers, starting simple and adding more as you go. This way, you can understand the story structure basics without getting lost.
Starting with One-Sentence Chapter Summaries
I start by writing just one sentence for each chapter. That’s all. This helps me find the main point of each chapter. If I can’t sum it up in one sentence, the chapter might not be focused.
“A chapter outline provides a map with a defined level of detail, revealing what’s truly on the page — not what you think is there.”
This step in my chapter outlining process shows me where chapters are weak. If a chapter feels vague in one sentence, it needs work.
Expanding to Include Main Events
After I have my one-liners, I add more details to each. I write three sentences for each chapter. These cover:
- The chapter’s beginning — what draws the reader in
- The middle — where tension builds or shifts
- The end — what propels the reader to the next chapter
This helps me see if a chapter is too busy. It shows where the story needs more focus.
Creating Paragraph-Sized Chapter Descriptions
The final step is to write chapter summaries in paragraphs. I ask myself questions about each chapter:
| Question | Purpose |
|---|---|
| Are new characters introduced? | Track character load per chapter |
| Does the setting change? | Monitor pacing and transitions |
| What does the character learn or lose? | Measure development and stakes |
| Are subplots advanced? | Ensure balanced thread progression |
| What obstacles appear? | Maintain tension and conflict |
These paragraph summaries are my main guide during revisions. They give me a clear view of the whole manuscript. This is what every draft needs before editing starts.
Chapter Organization Methods That Work for Me
I’ve tried many ways to keep my stories organized. Three methods are my favorites. They solve problems I faced while writing.
Using Spreadsheets to Track Multiple POVs
Spreadsheets are a lifesaver for stories with many viewpoints. I use columns to track everything I need. This lets me see who’s telling the story, what’s happening, and when.
| Chapter | POV Character | Time/Date | Setting | Turning Point | Word Count |
|---|---|---|---|---|---|
| 1 | Elena | Monday, June 3 | Chicago apartment | Discovers the letter | 2,800 |
| 2 | Marcus | Monday, June 3 | Downtown office | Gets fired | 3,100 |
| 3 | Elena | Tuesday, June 4 | Train station | Decides to leave | 2,500 |
Color-Coding for Story Thread Balance
This trick is ridiculously simple but powerful. I use colors for each POV character. This helps me see if the story is balanced.
Time and Setting Tracking Systems
Stories that span days or weeks can get messy. I use a timeline column to keep track. I also note the setting for each chapter. This stops characters from teleporting.
I once realized during revision that two characters were in the same café at the same time—without ever noticing each other. A simple tracking grid would have caught that in minutes.
These techniques make revisions easier. I’ll talk about that next.
Creating Chapter Summaries for Better Revision
Writing a first draft is a big win. But the real magic comes when I revise. One of my top strategies is making chapter summaries after I finish the draft. These summaries give me a bird’s-eye view of my manuscript.
Each summary captures key details about each chapter. They are like snapshots that show what’s really happening in the story. Here’s what I include in each summary:
- The time period and setting of the chapter
- The point of view character (essential for multi-POV stories)
- The single key event driving the chapter forward
- Any major emotional shifts or turning points
When I compare these summaries, patterns become clear. I’ve found pacing issues, backstory dumps, and chapters without a clear purpose. This exercise has made my structures tighter. Looking at past projects, I see how much better my structures are now.
| What Summaries Reveal | How It Helps Manuscript Editing |
|---|---|
| Chapters missing key events | Signals scenes to cut or combine |
| Uneven story thread distribution | Guides rebalancing of subplots |
| Excessive backstory in early chapters | Identifies better starting points |
| Repetitive emotional beats | Highlights where variety is needed |
This method saves me hours of unnecessary work. Instead of reading the whole draft again and again, I can spot problems quickly. These strategies work well with other chapter organization methods. They also prepare me for more detailed planning techniques I’ll share next.
My Favorite Chapter Planning Techniques
I’ve tried many plotting tools over the years. Some worked, others didn’t. Here are three methods I always come back to. Each fits a different mood or project. Let’s explore them.
The Index Card Method
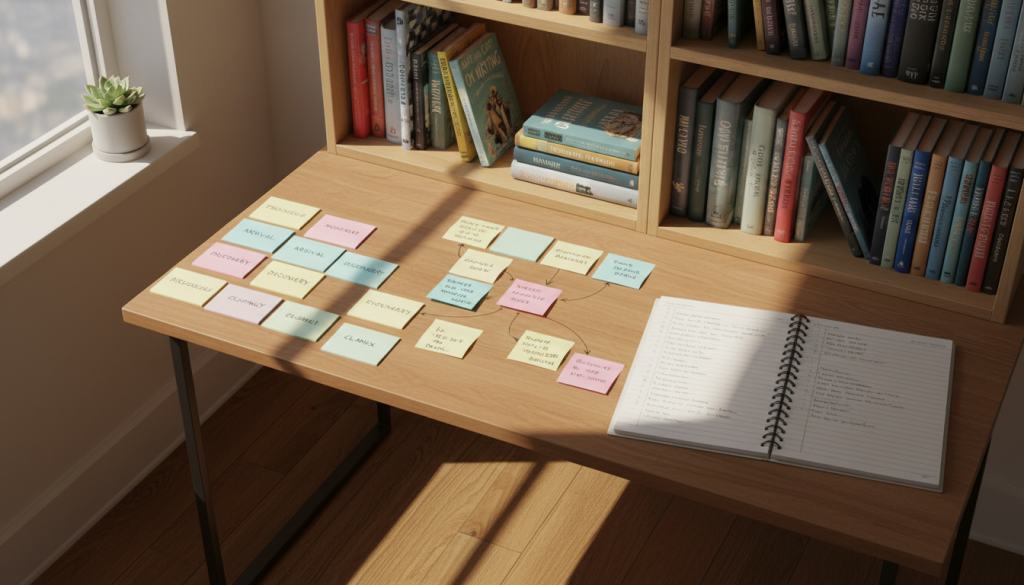
This method is a classic for a reason. I write one scene or chapter idea on each card. Then, I spread them out on my desk or floor. It’s a tactile way to organize chapters that feels real.
Color-coded cards help me keep subplots, POVs, and timelines separate. It’s easy to see everything at a glance.
Digital Tools and Plot Grids
For keeping everything in one place, I use digital tools like Dabble’s Plot Grid. It has columns for chapter summaries, subplots, and more. The Book view shows scenes one by one.
I can tag POVs with colors and access notes on the side while writing. It’s very handy.
“The outline is the bones. The writing is the flesh. You need both.”
— Stephen King
Storyboarding with Sticky Notes
Sticky notes on a wall or whiteboard are magic for visual learners. I draw small boxes and write a few sentences per chapter. It’s super easy to move things around.
This method is very flexible and works well for me.
| Technique | Best For | Key Benefit | Example Tool |
|---|---|---|---|
| Index Cards | Early brainstorming | Easy to rearrange physically | 3×5 lined cards |
| Plot Grids | Complex novels with multiple POVs | Scene-level tracking with metadata | Dabble Writer |
| Sticky Note Storyboard | Visual thinkers and pantsers | Big-picture story chapter breakdown | Post-it Notes + whiteboard |
Mixing digital tools with hands-on methods works best for me. I suggest trying all three to find what works for you.
Outline Format Examples from Famous Authors
Looking at how famous writers outline has changed how I write. Seeing actual outlines from bestselling authors is very helpful. These outlines show us how to keep complex stories organized.
Learning from J.K. Rowling’s Chapter Maps
J.K. Rowling’s outline for Harry Potter and the Order of the Phoenix is famous. It’s a detailed spreadsheet that tracks many plot threads. Each column is a different storyline, and each row is a chapter.
Her method is clear and easy to follow. She could see how all the storylines fit together. This is why her books are so well-organized.
Joseph Heller’s Structural Approach
Joseph Heller’s approach was different for Catch-22. He focused on character arcs and themes, not just plot. He used charts to show how characters and stories connect.
Here’s a quick comparison of these two methods:
| Author | Outline Style | Primary Focus | Best For |
|---|---|---|---|
| J.K. Rowling | Spreadsheet grid | Plot threads per chapter | Multi-POV stories with parallel timelines |
| Joseph Heller | Character-based charts | Thematic and character connections | Non-linear narratives with large casts |
Both methods show that there’s no one right way to outline. The important thing is to find a method that works for your story. I mix elements from both styles for different projects.
Story Chapter Breakdown Strategies
Breaking down your story chapter by chapter is like solving a puzzle. Each piece has a special shape and role. I see every chapter as a mini-story with its own start, middle, and end. This method keeps my writing focused and meaningful.
My chapter development starts with a simple question: What does this chapter accomplish? If I can’t answer that in one sentence, it needs a rethink. Each chapter should advance the plot, show character, or increase stakes. The best chapters do all three.
I watch if a chapter has one scene or several. Single-scene chapters are quick and sharp. Chapters with many scenes are slower and layered. Choosing the right approach is key to good narrative planning.
“The chapter is a unit of revelation.” — Robert McKee, Story
Before, I packed too many events into one chapter. That messes up the pace. Now, I check each chapter against simple criteria:
| Chapter Element | Purpose | Warning Sign |
|---|---|---|
| Opening Hook | Grabs the reader’s attention | Starts with exposition or backstory |
| Central Conflict | Drives the chapter forward | No tension or stakes present |
| Scene Count | Controls pacing and rhythm | More than three scenes feel cluttered |
| Closing Turn | Propels the reader to the next chapter | Ends on a flat or resolved note |
| Story Progression | Advances plot or character arc | Chapter could be removed without impact |
This analysis grid has helped me avoid writing unnecessary chapters. It fits well into my narrative planning and works with genre-specific frameworks too.
Writing Chapter Frameworks for Different Genres
Not every book is the same. What works for thrillers doesn’t fit self-help books. I’ve found that each genre needs its own special outline.
Fiction Chapter Structures
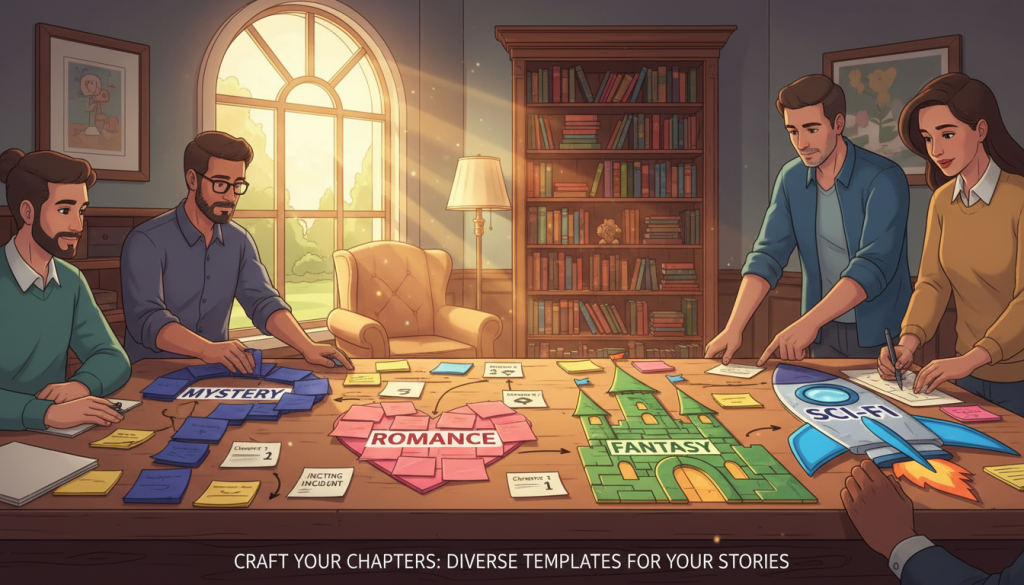
In fiction, each chapter moves the story along. I keep track of character growth, tension, and themes. Romance novels focus on emotional moments, while mysteries are all about clues.
The right structure depends on what the genre offers readers.
“Structure is the bones of a story. Without it, even the best prose collapses under its own weight.”
Non-Fiction Chapter Organization
Non-fiction needs clear organization. I arrange chapters around one central idea. This idea is backed by research or personal stories.
For non-fiction, outlining helps keep the flow of ideas clear for readers.
| Element | Fiction Approach | Non-Fiction Approach |
|---|---|---|
| Chapter Goal | Advance plot and character | Teach or persuade with one key idea |
| Pacing | Driven by tension and conflict | Driven by logical progression |
| Ending Hook | Cliffhanger or emotional beat | Provocative question or transition |
Weaving Multiple Storylines Together
Handling multiple viewpoints is key. I make sure each story gets its turn without getting lost. This keeps the book balanced.
Here’s how I balance it:
- Each storyline appears at least once every three chapters
- Timelines stay aligned across all threads
- Emotional tone varies between consecutive chapters
- Key plot events in one thread ripple into others
Good multi-storyline management keeps readers hooked. It’s all about careful planning for a richer story.
The Chapter Development Process I Follow
I’ve honed my chapter development process over years. It mixes structure with instinct. It starts with my chapter outlines as a living guide. Before writing, I check each chapter against three filters to keep my story on track.
Identifying Chapter Purposes and Goals
Every chapter must have a reason to exist. I ask, What does this chapter do that others don’t? If I can’t find a reason, it gets cut or merged.
I give each chapter a purpose from a few options:
- Introduce or deepen a conflict
- Reveal critical information
- Shift a character’s belief or desire
- Raise the stakes for what comes next
This step helps avoid writing scenes that slow down the story.
Tracking Character Arcs Through Chapters
Tracking character growth is key. I use a simple grid to see how each character changes. This helps me keep character arcs consistent.
| Chapter | Character | Emotional State (Start) | Emotional State (End) | Key Shift |
|---|---|---|---|---|
| Chapter 3 | Protagonist | Confident | Doubtful | Betrayed by ally |
| Chapter 4 | Antagonist | Calm | Desperate | Plan exposed |
| Chapter 5 | Protagonist | Doubtful | Resolute | Finds new evidence |
This method keeps character arcs on track and prevents growth resets.
Building Momentum Between Chapters
Story momentum comes from the spaces between chapters. I end each chapter with a question, obstacle, or revelation. The next chapter then answers enough to keep readers engaged while introducing new tension.
“A chapter ending should be a door left ajar — not slammed shut.”
This pattern of promise and payoff makes a story compelling. My chapter outlines help me see this pattern early, so I can fix any issues quickly.
Common Pitfalls I’ve Learned to Avoid
Let me be honest with you. One big mistake I made was treating my outline like the book itself. I spent three months perfecting it before writing a single chapter. That’s not planning; it’s hiding from the real work.
Outlines should be a starting point, not the end. Spending too much time on details can drain your creative energy. I now set limits on my prep work to overcome these challenges.
Here are the limits I follow:
- Spend no more than one month on outlining before starting the draft.
- Keep the full outline to one page — two pages max.
- Limit each chapter summary to three sentences.
- Cap world-building notes at one page of details.
Another trap is making your outline too rigid. This can stifle spontaneity in your story. Characters should surprise you. If everything is too planned, your story might feel flat.
“The outline is a tool, not a contract. Break it when the story demands it.”
Also, beware of endless revisions to your outline. It might seem productive, but it’s a way to avoid writing. Know when to stop and start writing.
The chapter development process I shared is a solid start. Trust it and move on to the draft. That’s where the real magic happens, not in spreadsheets.
When and Why I Create Chapter Outlines
I don’t always start with an outline. Sometimes, I make one before writing a word. Other times, it’s after I’ve written a draft. The when and why guide how I use my outline writing guide for each project.
Pre-Writing Outlines for Plotting
When I know my story’s end, I plan each chapter first. This is where my plotting strategies really help. I lay out the big moments, add subplots early, and check the story’s pace.
Pre-writing outlines are like a GPS. They help me stay on track without losing the fun of writing.
“Writer’s block is simply a failure of nerve.” — Alma Katsu
A good chapter outline gives me direction when I’m stuck. I look at my plan, find the next step, and start writing. The block goes away because I have a clear path.
Post-Writing Outlines for Revision
If I write without a plan, I make a reverse outline later. I summarize each chapter in one sentence. This helps me see if everything fits together well.
- Are story beats landing at the right moments?
- Does each chapter serve a clear purpose?
- Do character arcs progress chapter to chapter?
Using Outlines to Pitch Your Story
In traditional publishing, you need a strong synopsis. My chapter outline is the core of that synopsis. Agents and editors want to see the whole story arc. A solid outline makes writing the pitch easier.
| Outline Purpose | Best Timing | Key Benefit |
|---|---|---|
| Plotting strategies | Before first draft | Prevents structural rewrites |
| Revision roadmap | After first draft | Reveals pacing and subplot issues |
| Manuscript pitching | Before querying agents | Streamlines synopsis writing |
No matter when I create an outline, my goal is the same. I aim to write a better, more cohesive book.
Advanced Techniques for Scene-Level Planning
Mastering chapter outlines is just the start. Now, let’s dive deeper. Think of your chapter outline as a map and scene-by-scene planning as the satellite view. This closer look sharpens your story’s terrain.
I use this method to spot problems early. It keeps my story tight from start to finish.
Moving from Chapter View to Scene View
Chapters are like containers. Scenes are the moments that fill them. When I switch to scene view, I break each chapter into its smallest parts.
This is where detailed outlining really matters. Each part has a purpose. If a scene doesn’t serve a purpose, I cut it.
Creating Detailed Scene Lists
My scene lists track specific elements for every scene. Here’s what I include:
| Element | What I Track | Why It Matters |
|---|---|---|
| Scene Summary | One to two sentences describing the action | Keeps me focused on the core event |
| POV Character | Who tells this scene | Prevents overusing secondary characters |
| Setting | Location and time of day | Shows how environment shapes character behavior |
| Characters Present | Full list of who appears | Avoids continuity errors |
| Subplot Served | Which thread this scene advances | Ensures balanced story development |
This detailed outlining boosts my confidence before writing.
Connecting Scenes Within Chapters
Scenes in a chapter must feel connected. I use methods that check if each scene answers a question from the previous one. Does Scene B build on Scene A’s emotional impact? Does Scene C advance a subplot?
Scene-by-scene planning helps me find gaps in the story. It’s the key to chapters that read well, not just exist. Once scenes are linked with purpose, chapters become stronger. This prepares you for pitching or revising your manuscript.
Conclusion
Chapter outlining has changed how I write. It gives me a clear view of my story’s structure. Creating chapter summaries helps me spot gaps between what I think is on the page and what’s actually there.
This single habit has cut down the number of drafts I need. It has saved me countless hours of revision.
Whether you’re a planner or a pantser, outlining can fit your style. I’ve learned that story development doesn’t require a rigid plan. It just needs a flexible guide that keeps your ideas organized.
Use outlines as a map, not a cage. Let your creativity breathe while keeping your narrative on track.
The real key is balance. Too much structure can feel stiff. Too little can leave you lost in your own manuscript.
My biggest writing improvement came when I stopped treating outlines as rules. I started treating them as tools. Pick the methods that work for you — index cards, spreadsheets, sticky notes — and make them your own.
I hope this guide helps you build a process that brings out the best in your writing. Story development is a journey. A solid outline is one of the best companions you can have along the way.
FAQ
What exactly is a chapter outline, and why should I create one?
A chapter outline is a visual map of your manuscript. It helps you see your book’s structure at a glance. You can track elements like point of view characters and turning points.
It reveals the gap between what you think you’ve written and what’s truly there. This helps you identify strengths, weaknesses, and structural issues. It’s more effective than just reading your full draft alone.
Should I create my chapter outline before or after writing my first draft?
It depends on whether you’re a plotter or a pantser. Plotters plan their story before writing. Pantsers outline after writing to ensure cohesive chapter structures.
Most successful writers use both approaches. Even if you write without planning, outlining after your first draft is crucial. It helps avoid endless revisions.
What tools work best for chapter planning techniques?
Writers prefer different tools based on their learning style. Physical methods include index cards and sticky notes. Digital solutions include spreadsheets for tracking.
Tools like Plot Grids through Dabble help with chapter summaries. Even PowerPoint slides can be useful. The best tool is one you’ll use consistently.
How do I start building my first outline writing guide for a manuscript?
Start with one-sentence summaries for each chapter. This helps identify each chapter’s core purpose. Then, expand to include main events.
Finally, create paragraph-sized descriptions for each chapter. This approach builds a comprehensive outline without overwhelming you.
How do chapter organization methods help with multiple POV stories?
For stories with multiple POVs, tracking systems are essential. Use spreadsheets with columns for each POV character. Color-coding reveals structural imbalances.
Highlighting each chapter by POV character shows braiding and balance issues. Studying authors like J.K. Rowling shows the effectiveness of these frameworks.
What should my creating chapter summaries include for effective revision?
Include time and setting details, POV character identification, and the key event of each chapter. These summaries help identify structural corrections.
They reveal patterns and pacing issues. This visual approach helps you see your story differently.
Can chapter outlines help me overcome writer’s block?
Absolutely. Outlines provide solutions for writer’s block without stifling creativity. Knowing what needs to happen next saves time.
However, avoid over-focusing on outlining. Set limits to prevent procrastination. Use constraints like a one-month maximum for outlining.
What’s the difference between chapter-level and scene-level planning?
Chapter outlines give a map view, while scene lists provide detailed terrain. Each scene has its own position with summaries and character lists.
Scene-level planning tracks perspectives and setting influences. It ensures scenes connect logically and serve subplot development. I move between both views in my process.
Do professional authors actually use chapter outline format examples?
Yes, many writers use detailed outlining systems. You can find examples online from J.K. Rowling and others. Rowling’s chapter maps tracked plot threads and character appearances.
Heller used charts for Catch-22. Studying these outlines shows how authors manage complex storylines and maintain coherence.
How does chapter outlining reduce the total number of drafts I need?
Outlining after a draft helps you understand what needs to happen next. This reduces the number of drafts needed. Without an outline, revisions often lack depth.
Outlining provides a visual representation, guiding your next draft. Chapters are mini-stories contributing to the larger plot. An outline ensures each chapter has a cohesive structure.