
Craft Hyperrealistic Scenes: Characters and Artifacts in Your Book
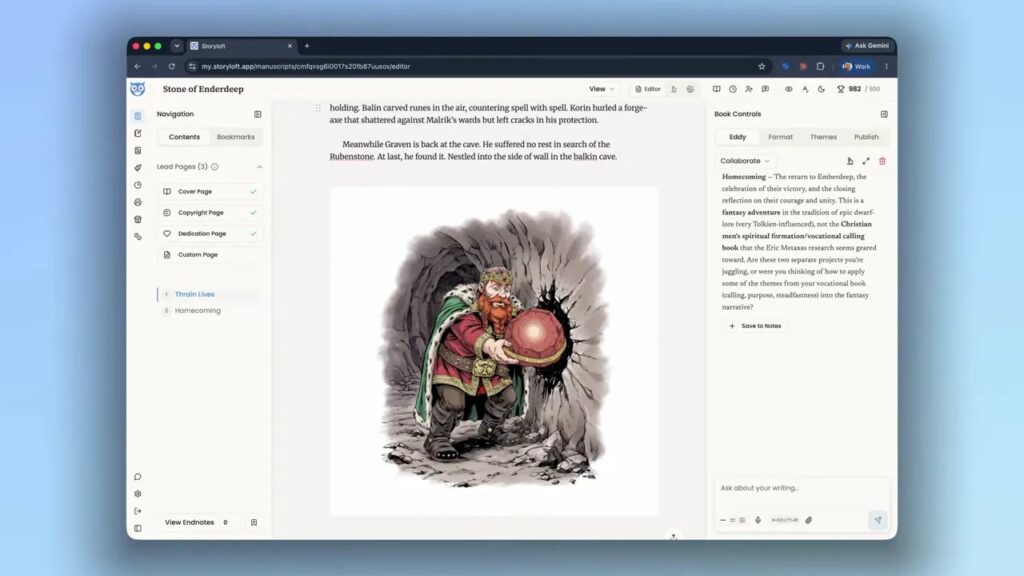
A character can look exactly right, but if the magical stone in their hand changes from one illustration to the next, your book loses a little of its cohesion. The objects that matter to your story need the same visual consistency as the people who carry them.
That is where artifacts come in. In Storyloft, artifacts work alongside character profiles and book-level style presets to help create intentional, consistent illustrations. You define the object, pair it with a character, and give their interaction a place in the story.
We will use the Ruben Stone from Stone of Enderdeep as an example: a glowing magical object that grants extra strength to whoever possesses it. Gravin, our dwarf character, has been searching for it. The moment he finally discovers it in a cave gives us a wonderful scene to illustrate.
Key Takeaways
- Artifacts give recurring story objects a consistent reference across illustrations.
- Character profiles, artifact details, and style presets work together to create cohesive scenes.
- Create scenes in the Illustration Studio or generate them directly from selected manuscript text.
- Choose a full, vignette, or spot format, then use Roll Dice to explore alternate interpretations.
Table of Contents
- What Is an Artifact, and Why Does It Matter?
- Create the Artifact: The Ruben Stone
- Method One: Combine a Character and Artifact in the Illustration Studio
- Choose a Full, Vignette, or Spot Illustration
- Add an Existing Illustration to Your Manuscript
- Method Two: Generate an Illustration from Manuscript Text
- Use Roll Dice to Explore Another Version
What Is an Artifact, and Why Does It Matter?
An artifact is a special object your characters interact with. Think of the Sorcerer’s Stone in Harry Potter, a sword, or a family heirloom. It does not have to be magical. What matters is that the object belongs to your story and needs to remain recognizable.
With a generic AI image tool, a recurring object can look different every time you describe it. That becomes a problem when the same artifact appears throughout an illustrated book.
Storyloft gives that object its own reference, rather than treating it as a fresh invention in every scene. Your character and artifact can then work together within a cohesive visual world. An artifact may also connect to details you have developed through world-building.
The goal is not simply to put a character beside an object. It is to show a believable interaction between them, with the right scale, expression, and story context.
Create the Artifact: The Ruben Stone
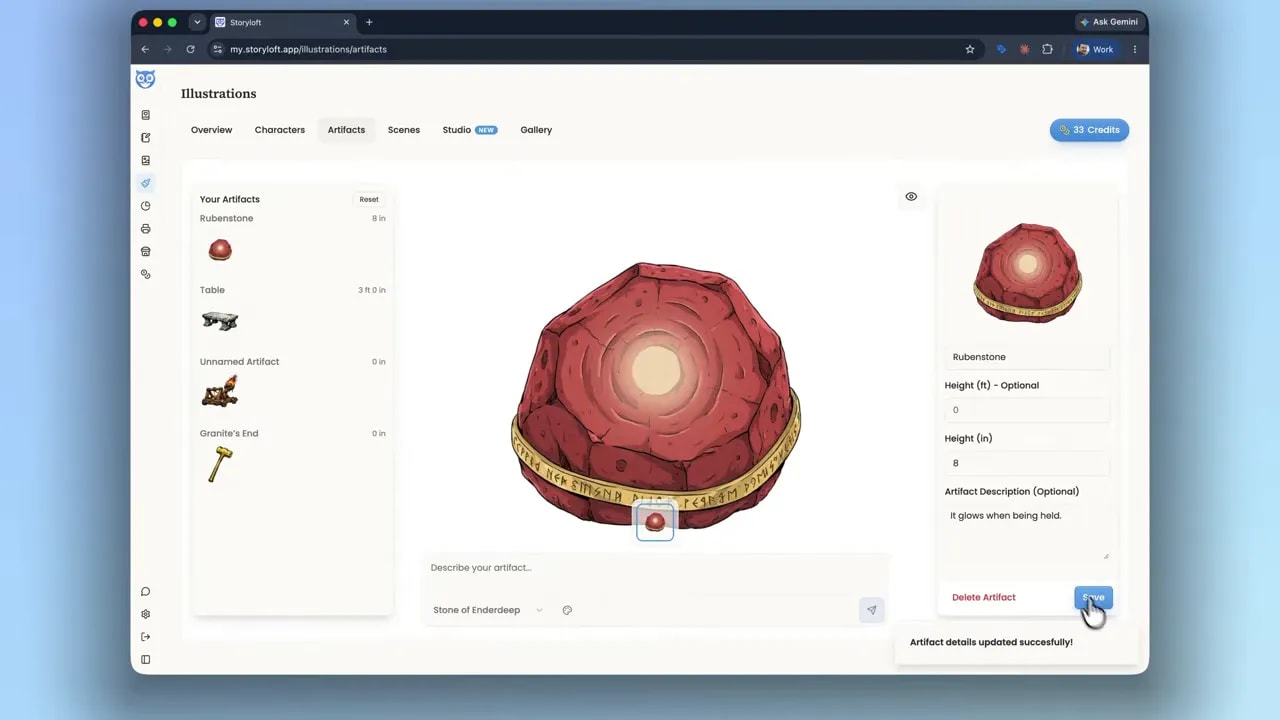
Start in the Artifacts section and describe the object you want to create. For this example, the Ruben Stone is a magical stone whose power gives its possessor extra strength. That establishes what it is and why Gravin wants it.
Once the illustration is generated, give the artifact the details it needs for future scenes:
- Name: Ruben Stone.
- Height: About 8 inches, making it a sizable object in a dwarf’s hand.
- Description: It glows when held.
The description does not need to be long. A short detail about how the object behaves can provide useful context for Eddy, Storyloft’s AI assistant, when it brings the artifact into an illustration.
Even if the initial image already appears to glow, recording that behavior is worthwhile. The image shows what the stone looks like; the description explains something about how it works.
Keep the Book’s Illustration Style Consistent
The artifact also needs to belong to the same visual world as your characters. In this example, the book uses geometric tension combined with a comic book style, producing a clean graphic novel look.
Those choices are set through the book’s style presets. Rather than separately trying to recreate the same aesthetic for every image, the presets establish a shared direction for the illustrations.
There are two kinds of consistency at work here: the artifact reference preserves the identity of the object, while the style presets help keep the book’s overall look cohesive.
Method One: Combine a Character and Artifact in the Illustration Studio
With the Ruben Stone ready, open the Illustration Studio. Storyloft carries forward the book context you were working in, but you can change the selected book if needed.
- Confirm that the correct book is selected.
- Add Gravin from your characters.
- Open the artifact selection and add the Ruben Stone.
- Describe the scene you want to illustrate.
For our scene, we describe Gravin pulling the Ruben Stone from a crack in the cave wall, holding it with a surprised expression.
Notice how much that gives the illustration to work with. There is a character, an object, a location, a physical action, and an emotion. It is not just a picture of a dwarf holding a stone. It is the moment his search finally pays off.
How Eddy Uses the Character Profile
Eddy refers back to Gravin’s character profile to understand his demeanor, mood, and how he typically interacts with objects. It combines that information with the artifact reference and the scene description.
Gravin’s surprise matters because he has been looking for the stone and has finally found it. His stature matters, too. The stone should feel substantial in his hands, with its size considered alongside the character’s proportions.
That combination is what makes the interaction compelling: character identity, artifact details, and the meaning of the moment. The illustration needs to communicate all three while fitting the book’s style.
Choose a Full, Vignette, or Spot Illustration
Once the scene is created, you can consider different illustration formats. Each gives the moment a different amount of visual emphasis.
- Full illustration: Gives the scene a more complete treatment, useful when you want the setting and action to have a strong presence.
- Vignette: Presents a focused scene with edges that blend into the page rather than a hard rectangular boundary. This vignette treatment can sit naturally alongside the prose.
- Spot illustration: Offers a smaller visual accent, giving the reader a quick impression without pulling as much attention from the writing.
The options can also show different angles or positions. I particularly like vignettes for this kind of scene because they bring in the detail and emotion while fitting comfortably into the manuscript.
Add an Existing Illustration to Your Manuscript
After creating the scene in the Studio, return to your manuscript. Open the folder used to manage images, find the illustration in your image library, and select the version you want to insert.
For the Ruben Stone scene, we choose the vignette. Gravin and the glowing stone appear within the cave, while the softer outer edges let the illustration sit against the white page.
This is a straightforward workflow when you want to create and compare illustrations first, then place your preferred image into the book for print or ebook use.
Method Two: Generate an Illustration from Manuscript Text
You can also begin with the writing itself. Instead of building the scene manually in the Studio, select the passage you want to illustrate and click Generate an image.
In our example, the passage describes Gravin back at the cave after a tireless search, finally finding the Ruben Stone nestled in the cave wall.
Eddy reads that selected scene in context, identifies Gravin and the Ruben Stone, and consults their saved references. It then studies their interaction within the passage to create the illustration.
- Select the part of the manuscript that contains the scene.
- Click Generate an image.
- Let Eddy identify the character and artifact references and interpret their interaction.
- Review the resulting illustration against the writing.
The result shows Gravin stooping inside the cave toward the glowing stone. The setting, posture, and surrounding story details help ground the illustration in the passage rather than leaving it as an isolated character portrait.
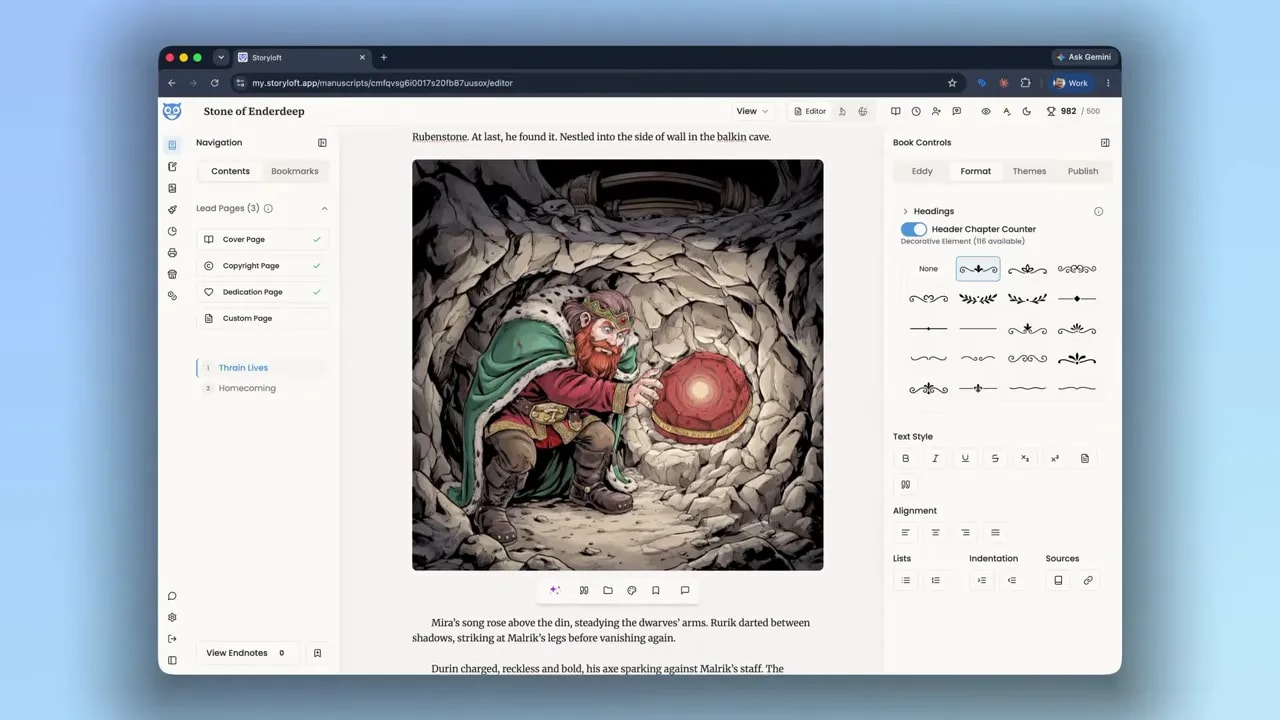
The difference is where you begin. In the Studio, you explicitly select the character and artifact and describe their interaction. In the manuscript, your selected prose supplies the scene, and Eddy identifies the relevant references.
Use Roll Dice to Explore Another Version
If the first interpretation is close but not quite what you want, hover over the illustration and choose Roll Dice.
This generates another version of the same scene with the artifact and character context still in place. You can explore a different composition without starting the setup again.
In the cave example, the alternate version changes Gravin’s pose and the scene’s arrangement while retaining the recognizable dwarf, glowing Ruben Stone, and cave setting.
That is the larger purpose of this workflow: establish your characters and important objects, keep the book’s style consistent, and then explore how each moment should appear on the page. You are not just generating attractive images. You are illustrating the story you are writing, with scenes that feel like they belong together in a book.