How to Create a Book A Friendly Guide for Beginners

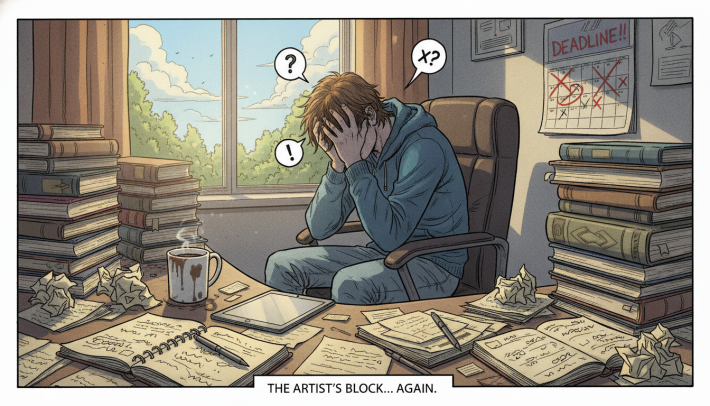
I still remember the night I typed the last sentence of my first manuscript. My hands were shaking. My coffee had gone cold hours ago.
I stared at that final period on the screen and felt a wave of pride. That tiny dot meant I’d actually done it — I’d written an entire book.
The next morning, reality hit me hard. I had a Word document full of raw text and zero clue what to do with it. Turning that file into a real, published book felt like climbing a mountain without a map.
If you’re beginning your writing journey right now, I want you to know that feeling is completely normal.
The good news? Self-publishing basics are easier to grasp than you might think. Platforms like Amazon Kindle Direct Publishing and IngramSpark have opened doors that used to be locked behind big publishing houses.
You don’t need an agent or a six-figure deal to share your story with the world.
Think of book design as a frame around a painting. Your words are the art, and the formatting, cover, and layout are the frame that makes people stop and look. A great frame draws readers in before they even read page one.
In this guide, I’ll walk you through every step — from figuring out how to start writing a book all the way to holding a finished copy in your hands. I wrote this for real beginners, so no experience is needed. Just bring your idea and a willingness to learn.
Key Takeaways
- Writing your first book is an emotional ride, and that’s part of what makes it so rewarding.
- Self-publishing basics are straightforward once you break them into small, manageable steps.
- Learning how to start writing a book begins with finding an idea you care about and setting a schedule.
- Book design and formatting are just as important as the words you write.
- Free and affordable tools exist to help you at every stage of your beginning writing journey.
- You don’t need a traditional publisher to create a professional, polished book.
Understanding What It Takes to Create Your First Book
Writing a book is very rewarding. But it’s not just about writing words. It’s a journey with ups and downs, planning, and learning new things. Before you start, here’s what you should know.
The Emotional Journey of Writing
When I began my book, I felt excited. That excitement lasted for a while. But then doubt came. Is this good enough? Will anyone read this?
These doubts are normal. Every writer feels them. The important thing is to keep writing, even when it’s hard. Finishing your draft will make all the hard times worth it.
Setting Realistic Expectations
One key tip I got early on was simple. Finishing your manuscript is just the start. You’ll need to edit, format, design a cover, and get your book ready for print or digital.
I broke the process into smaller steps. This made it feel less overwhelming.
| Book Creation Phase | Estimated Time | Difficulty Level |
|---|---|---|
| Writing the Manuscript | 3–6 months | Moderate to High |
| Editing and Revisions | 1–3 months | Moderate |
| Formatting and Layout | 1–2 weeks | Low to Moderate |
| Cover Design | 1–2 weeks | Low to Moderate |
| Publishing and Distribution | 1–3 days | Low |
Why Self-Publishing Is More Accessible Than Ever
Self-publishing used to be hard. Now, it’s easy. Sites like Blurb, Amazon KDP, and IngramSpark let you publish with just a PDF and some details. Tools like BookWright and Blurb’s plugins make it free.
These tips are not secrets. They’re open doors waiting for you.
How to Start Writing a Book
Starting a book can feel scary when you see a blank page. I’ve been there too. The good news is, every author started just like you. Just break it down into smaller steps before worrying about design.
One piece of advice I wish I knew early: finish your manuscript first. Many beginners get caught up in choosing fonts or formatting too soon. For books like novels, finish and edit your draft first. For books with lots of pictures, like cookbooks, write and plan your pages before designing.
Finding Your Story Idea
Your idea doesn’t have to be new. Write about what interests you or keeps you up at night. Grab a notebook and jot down ideas. The journey starts with a spark of curiosity.
“Start writing, no matter what. The water does not flow until the faucet is turned on.” — Louis L’Amour
Choosing Your Genre and Audience
Knowing your genre helps you know what readers want. Romance and thriller fans have different tastes. Ask yourself: who is this book for?
| Genre | Typical Audience | Average Word Count |
|---|---|---|
| Romance | Women ages 18–54 | 70,000–100,000 |
| Thriller | Adults ages 25–65 | 70,000–90,000 |
| Memoir | Adults ages 30–60 | 60,000–90,000 |
| Children’s Picture Book | Kids ages 3–8 | 500–1,000 |
Creating a Writing Schedule That Works
Writing regularly is key. Set a daily word goal, even 300 words a day. This adds up to a draft in months. Schedule a time each day and treat it like an appointment. This makes starting easier and keeps you going.
Completing Your Manuscript Before Everything Else
I know the temptation all too well. You write three chapters and suddenly want to pick fonts, design your cover, or tinker with page layouts. Resist that urge. When writing a book for beginners, the single most important rule is this: finish your manuscript first.
Every minute spent on formatting before your draft is done is a minute stolen from your story. Drafting your first book demands full creative focus. Design choices can change ten times before you reach the final page. Your energy belongs in the writing itself.
“Start writing, no matter what. The water does not flow until the faucet is turned on.” — Louis L’Amour
Once your manuscript is complete, I recommend investing in professional editing. According to a 2023 survey by the Alliance of Independent Authors, self-published books that go through at least one round of professional editing earn 13% more revenue on average. Quality editing transforms good writing into great reading.
Here’s the order I suggest you follow:
- Complete your full first draft without stopping to perfect anything.
- Let the manuscript rest for at least two weeks.
- Revise it yourself with fresh eyes.
- Hire a professional editor for developmental or copy editing.
- Only then move on to formatting and design.
| Task | When to Do It | Why It Matters |
|---|---|---|
| Drafting your first book | Before anything else | Content is the foundation of every great book |
| Self-editing and revision | After draft completion | Catches structural issues and plot holes early |
| Professional editing | After self-revision | Polishes grammar, flow, and readability |
| Formatting and design | After all edits are finalized | Prevents rework when text changes during editing |
Writing a book for beginners doesn’t need to feel overwhelming. Keep it simple. Finish the words on the page, then make them beautiful. That sequence saves you time, money, and a whole lot of frustration.
Essential Writing Tips for First-Time Authors
Starting your first book can be tough. Many beginners try to do too much at once. Focus, discipline, and knowing when to stop are key.

Avoiding Common Writing Pitfalls
New writers often spend too much time on fonts and layouts before finishing the manuscript. Don’t do this. Just write during the first draft. Formatting comes later.
Another mistake is skipping editing. A good editor can spot things you can’t. Make sure to budget for editing to polish your book.
Staying Motivated During the Draft
Motivation can fade. Here are tips to keep going:
- Write in short, focused sessions of 25–45 minutes
- Track your daily word count to see progress
- Reward yourself after hitting weekly milestones
- Re-read your favorite passage from the draft when energy dips
“You don’t start out writing good stuff. You start out writing crap and thinking it’s good stuff, and then gradually you get better at it.” — Octavia E. Butler
When to Stop Editing and Move Forward
Too much editing can kill your project. At some point, it’s time to move on. Here’s how I decide:
| Sign | What It Means | Action |
|---|---|---|
| You’re only changing small word choices | The draft is solid | Stop editing |
| A professional editor has reviewed it | Major issues are resolved | Apply final fixes and move on |
| You’ve rewritten the same chapter 5+ times | Perfectionism is stalling you | Accept it and proceed |
| Beta readers say it reads well | Outside eyes confirm quality | Finalize your manuscript |
Follow these tips to finish your manuscript with confidence. Once it’s done, you can choose the right software to publish it.
Choosing the Right Book Creation Software
Choosing the right software is a key step in writing a book. It should match your skill level and budget. The software you pick will affect your whole writing process, from starting to finishing your book.
Affinity Publisher for Budget-Conscious Creators
Affinity Publisher by Serif is great for those who want professional design without a monthly fee. You only pay once and own it. It makes text flow, master pages, and image placement easy. Serif keeps updating it, making it a strong choice against more expensive tools.
Adobe InDesign for Professional Results
Adobe InDesign is the top choice for graphic designers working on many books. It has strong typesetting and lets you control every detail. But, it requires a monthly Creative Cloud subscription, which can add up over time.
Free Options Like Scribus
Scribus is a free, open-source app for desktop publishing. It can make print-ready PDFs, but its interface is old. You’ll need patience and a willingness to learn its unique features. It’s a good choice for those on a tight budget, but it might take longer to learn.
Simple Solutions with Atticus and Microsoft Word
Atticus is a web-based tool with a simple, Google Docs-like design. It has text editing and layout features, PDF export, and customizable templates. Microsoft Word is okay for basic manuscripts, but it struggles with book formatting.
The best software is the one that lets you focus on writing — not fighting with menus.
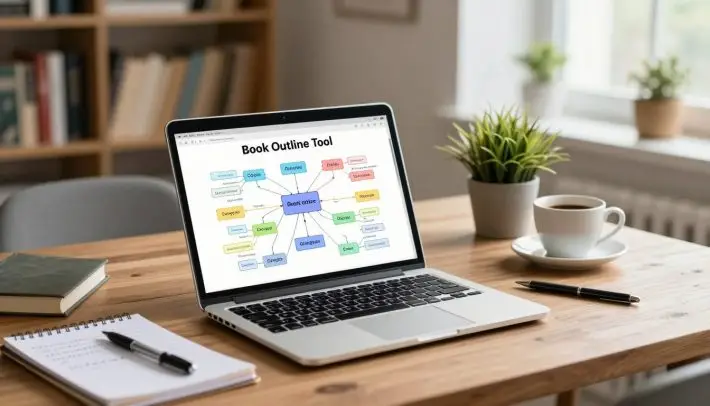
Many authors use Scrivener’s corkboard and outliner tools for organizing chapters before moving to layout software. This advice saves a lot of time later.
| Software | Price Model | Best For | Learning Curve | Export Formats |
|---|---|---|---|---|
| Affinity Publisher | One-time purchase (~$70) | Budget-friendly page design | Moderate | PDF, EPUB, print-ready files |
| Adobe InDesign | Subscription (~$23/mo) | Professional multi-book production | Steep | PDF, EPUB, IDML, print-ready files |
| Scribus | Free (open source) | Zero-budget creators | Steep | PDF, EPS, SVG |
| Atticus | One-time purchase (~$148) | All-in-one writing and formatting | Easy | PDF, EPUB |
| Microsoft Word | Subscription or one-time buy | Simple text manuscripts | Easy | DOCX, PDF |
Adding Front and Back Matter to Your Book
Starting a book project can be exciting. But, don’t forget about the front and back matter. These pages make your book look professional and credible.
Front matter is what comes before your main story. Back matter is what comes after. Adding both early helps you get the right page count for your PDF.
Here’s what you should include:
- Front Matter: Title page, copyright page, dedication, table of contents
- Back Matter: Author bio, acknowledgments, recommended reading list
Even simple books need a title page and copyright page. They’re quick to make and make a big impact.
| Element | Location | Required? | Time to Create |
|---|---|---|---|
| Title Page | Front Matter | Yes | 5 minutes |
| Copyright Page | Front Matter | Yes | 10 minutes |
| Table of Contents | Front Matter | Recommended | 15 minutes |
| Author Bio | Back Matter | Recommended | 10 minutes |
| ISBN Placement | Copyright Page | Yes, for retail | 5 minutes |
If you want to sell your book, you need an ISBN. This lets stores know it’s yours. I’ll talk more about ISBNs later.
Getting these parts done now makes the next steps easier. You’re ready to move on to page layout and formatting.
Mastering Page Layout and Book Formatting Basics
Once you’ve figured out how to start writing a book and your manuscript is complete, it’s time to make it look like a real book. Page layout is where your words take on a polished, professional shape. I think of this step as dressing your manuscript for success — and it matters more than most new authors realize.
Understanding Margins, Gutters, and Trim Sizes
When drafting your first book, picking the right trim size sets the foundation. Most novels use a 5×8 inch or 6×9 inch format. Margins keep your text from running too close to the edge of the page. The gutter — that extra margin along the spine — prevents words from disappearing into the fold.
Amazon’s KDP recommends a minimum 0.375-inch gutter for books under 150 pages, increasing for thicker volumes.
| Trim Size | Best For | Recommended Margins | Gutter Size |
|---|---|---|---|
| 5 x 8 inches | Fiction, Memoir | 0.5 inches | 0.375 – 0.5 inches |
| 6 x 9 inches | Nonfiction, Self-Help | 0.75 inches | 0.5 – 0.625 inches |
| 8.5 x 11 inches | Workbooks, Cookbooks | 1 inch | 0.625 – 0.75 inches |
Creating Professional Headers and Footers
Headers and footers give your book a finished feel. I like placing the author name on the left page header and the chapter title on the right. Page numbers sit in the footer or header corners.
Keep first pages of new chapters free of headers — that’s standard practice across traditional publishing.
Choosing the Perfect Fonts and Text Styles
Body text works best at 10–12 point size using serif fonts like Garamond or Baskerville. Use justified alignment so lines stretch evenly across the page. Stick with style presets for headings, body text, and spacing.
This keeps your formatting consistent from the first page to the last — a detail readers notice, even if they can’t name it.
Designing Your Book Cover That Sells
Your book cover is like a silent salesperson. It works all the time, catching eyes on Amazon and in stores. When you start writing, it’s easy to focus on the words. But the cover is just as important. Here are some tips to make your cover stand out.

First Impressions Matter
People judge books by their covers — literally. A study by Book Riot found that 79% of readers choose a book based on its cover. Your cover is your book’s first impression. A bad design can make your book look amateur, even if it’s great inside.
Good typography, balance, and images that fit your genre tell readers your book is worth reading. It shows it’s a book they should have on their shelf.
DIY vs Professional Cover Design
One key tip is to know your limits. If you’re good with design, tools like Canva or Adobe Photoshop can help. But if you’re not, it’s better to hire a pro. Here’s a quick guide to help you choose:
| Factor | DIY Design | Professional Design |
|---|---|---|
| Cost | $0–$50 | $200–$1,500+ |
| Time Investment | 10–20 hours | 1–2 weeks (designer handles it) |
| Quality Level | Varies widely | Industry standard |
| Best For | Tight budgets, simple designs | Competitive genres, bookstore placement |
Cover Requirements for Print and Digital
As you start writing, you’ll learn that you need different cover files. Print covers need a full wrap with 300 DPI resolution. Ebook covers are just a single image, 2,560 x 1,600 pixels for Amazon KDP. Both need RGB for screens and CMYK for print.
- Print: Include bleed area (0.125 inches on each side)
- Ebook: Keep text large enough to read at thumbnail size
- Spine width: Calculated based on your page count and paper type
Once your cover is ready, you’ll prepare your print-ready PDF. This is a big step in making your book real.
Creating Image-Heavy and Specialty Books
Not every book is just text. If you’re making a cookbook, photo book, children’s picture book, or graphic novel, your work is different. These projects need stunning visuals as much as great words.
One key tip for visual books is this: always use images at a minimum of 300 DPI (dots per inch). Lower DPI makes images look grainy and pixelated. Your readers will see it, and it won’t look good. Check your image resolution before adding it to your layout — not after.
A basic word processor won’t work for these projects. You need tools that let you control text and image placement. Here are some great options:
| Software | Best For | Cost |
|---|---|---|
| Adobe InDesign | Professional photo books and cookbooks | $22.99/month |
| Affinity Designer | Graphic novels and illustrated books | $69.99 one-time |
| Canva | Simple picture books and visual layouts | Free (with paid tiers) |
Each tool lets you adjust text wrapping, layer images, and change spacing with precision. This control is key when mixing visual and written stories.
Here are some extra tips for specialty books:
- Keep text blocks short so images stay the main focus.
- Use the same margins and gutters on every page.
- Test-print a sample before ordering a full run.
- Save original image files separately as backups.
With your visuals ready, the next step is making a clean, print-ready PDF file. I’ll show you how to do that now.
Preparing Your Print-Ready PDF File
You’ve written your manuscript and designed your cover. Now, it’s time to make a print-ready PDF. This is key to making your book look great on paper. Let’s go over the important settings to make sure your file prints right.
Essential Export Settings
When you export your PDF, pick PDF/X-1a or PDF/X-3. These are good for printing and most printers accept them. Use CMYK color mode for print books. RGB is better for screens but not for paper.
Here’s a quick guide for export settings:
| Setting | Recommended Value | Why It Matters |
|---|---|---|
| PDF Standard | PDF/X-1a or PDF/X-3 | Ensures printer compatibility |
| Color Mode | CMYK | Accurate print colors |
| Bleed | 0.125 inches | Prevents white edges on trimmed pages |
| Compression | Minimal or lossless | Preserves image quality |
Checking Resolution and File Size
All images should be at least 300 DPI. Lower DPI makes images blurry. Also, keep your file size small. Big files can cause problems when uploading.
My tip is to slightly compress images. Use tools like Adobe Acrobat or Affinity Publisher. This keeps DPI at 300 without losing quality.
Embedding Fonts and Flattening Layers
Always embed your fonts in the PDF. If the printer doesn’t have your font, text will look bad. Make sure to check the box for font embedding in your export dialog.
Flattening layers is also crucial. Your software stacks elements in layers. For printing, you need them all in one layer. This step prevents printing issues.
A beautiful manuscript means nothing if the PDF file doesn’t meet print specifications.
With your PDF ready, you can move on to ISBNs and copyright. These are the next steps in publishing your book.
Understanding ISBNs and Copyright Essentials
Once your print-ready PDF is ready, it’s time to focus on ISBNs and copyright. If you’re new to writing books, these terms might seem scary. But they’re actually quite simple.
An ISBN is a 13-digit code that makes your book unique. Stores like Amazon and Barnes & Noble use ISBNs to sell your book. Without an ISBN, your book can’t be sold in most places. When starting a book, decide if you’ll use a free or paid ISBN.
Here’s a quick look at your choices:
| ISBN Source | Cost | Who Is Listed as Publisher | Best For |
|---|---|---|---|
| Bowker (U.S. official agency) | $125 for one; $295 for ten | You or your imprint name | Authors wanting full brand control |
| Amazon KDP (free) | $0 | Amazon KDP | Exclusive Amazon distribution |
| IngramSpark (free) | $0 | IngramSpark | Wide retail distribution on a budget |
Copyright is also key. In the U.S., your work is automatically copyrighted when you write it. Registering with the U.S. Copyright Office costs about $65 for a single work.
Even if you’re making a gift book, include a copyright page. It shows who owns the work, when it was published, and your ISBN. This small step makes your book look more professional.
“An ISBN is to a book what a Social Security number is to a person — it’s your book’s unique identity in the marketplace.”
Getting these details right now will help you choose the best publishing path next.
Publishing and Distribution Options for Beginners
Once your manuscript is ready, it’s time to share it with readers. Learning to write a book is just the start. The real fun is in choosing where and how to publish. I’ll guide you through easy steps to make this process simple and stress-free.
Print-on-Demand Services
Print-on-demand (POD) is a big help for new writers. Services like Lulu, Amazon KDP, and IngramSpark print books only when someone orders them. You don’t need to buy lots of books upfront. Lulu has free accounts with easy-to-use templates for margins, bleed specs, and trim sizes.
One great tip is to start with POD. It lets you test the market without spending a lot of money.
Choosing Between Free and Paid ISBNs
Some platforms offer a free ISBN, while others make you buy one. The main difference is ownership. A free ISBN from Amazon KDP lists Amazon as the publisher. Buying your own ISBN from Bowker gives you full control over your publishing identity.
| Feature | Free ISBN (Amazon KDP) | Paid ISBN (Bowker) |
|---|---|---|
| Cost | $0 | $125 for one / $295 for ten |
| Publisher of Record | Amazon | You or your imprint |
| Distribution Flexibility | Limited to that platform | Use across all platforms |
| Professional Branding | No custom imprint | Full custom imprint |
Setting Up Online Retail Distribution
To get listed on big retailers, you need a formatted PDF and a valid ISBN. IngramSpark connects your book to over 40,000 retailers and libraries worldwide. A key tip is to check your file specs before uploading. A rejected file can delay your launch by weeks.
Knowing how to start writing a book is important. But knowing how to distribute it is what builds your career.
Conclusion
I hope this guide has made you feel ready to start your writing journey. You can find your story idea and format your manuscript. You can even design a cover. Today’s tools make it easy to bring your ideas to life.
Writing your first book, whether it’s fiction or a family story, is the same. You need a great story and a writing schedule. You also need the right software. Sites like Lulu help by offering templates and print-on-demand services.
Remember, your writing journey doesn’t have to be perfect. It just needs to start. Be patient and learn as you write. Every chapter you finish brings you closer to holding your book.
So, open that blank document and start writing today. The world is eager to read your story. You have all the tools you need to share it.