Indie Author Project: Your Blueprint for a 2026 Launch
You've got a manuscript in one document, character sketches in another, a cover idea saved as an image, and a formatting template you can't quite remember how to use. Every revision creates another version of the book, and you're no longer sure whether the file named “final” is final. That scattered setup can turn a promising indie author project into an administrative exercise before the book reaches a reader.
The practical alternative is to treat the book as one connected production system. Your outline, prose, research, illustrations, cover, metadata, and publishing exports should share a source of truth, so a change in the manuscript doesn't create a chain of forgotten updates elsewhere. The indie publishing segment is already substantial: Bowker data highlighted by Publishers Weekly reporting collected by the Alliance of Independent Authors shows that self-published titles with ISBNs exceeded 2.6 million in 2023, after rising 7.2% over 2022.
Table of Contents
- What an Indie Author Project Really Looks Like
- Setting Goals, Outlining, and Drafting the Manuscript
- Revision Workflows with Editors and Beta Readers
- Illustration, Character Design, and Cover Creation
- Formatting, ISBN, and Exporting Print and Ebook Outputs
- Launch Checklist and Post-Launch Workflow
What an Indie Author Project Really Looks Like
An indie author project isn't a pile of unrelated tasks. It's a pipeline in which each stage produces material the next stage needs:
- Goal setting defines the audience, format, scope, and commercial or creative outcome.
- Outlining turns that intention into chapters, scenes, or sections.
- Drafting creates the complete manuscript.
- Revision tests structure, language, continuity, and reader experience.
- Illustration and cover creation gives the book a visual identity.
- Formatting turns the approved content into print and ebook products.
- Launch puts those products in front of readers and generates feedback for the next release.
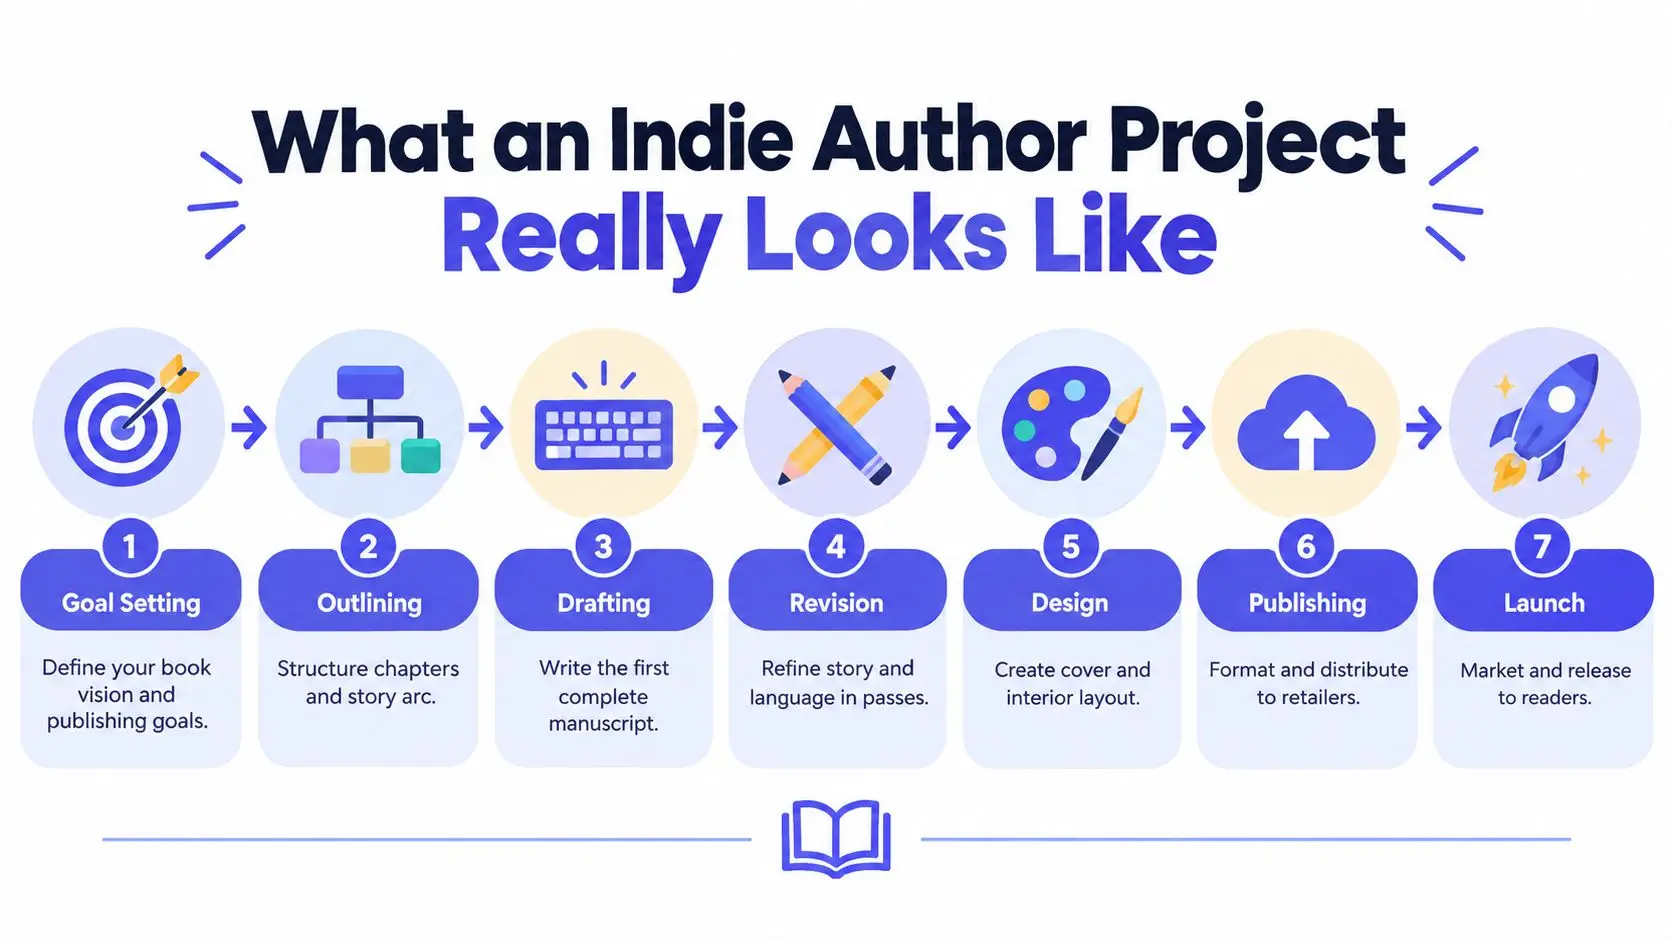
The useful detail is the handoff between stages. Your outline seeds chapters. Chapters reveal continuity questions and generate beta-reader feedback. That feedback can influence the emotional tone of the cover. The cover mood informs launch graphics, retailer copy, and newsletter language. If you keep those materials disconnected, every handoff becomes a manual copy-and-paste job.
Build one project file
At minimum, the project should contain:
- A project brief: audience, genre promise, format, deadline, and publishing objective.
- A planning area: synopsis, chapter cards, scene notes, character details, and research.
- The manuscript: chapters and scenes arranged in final reading order.
- A revision record: editor comments, beta feedback, decisions, and unresolved questions.
- A visual library: character references, mood boards, illustration prompts, and approved art.
- Output settings: trim size, typography, metadata, cover versions, and export templates.
An integrated writing environment keeps those components together instead of forcing you to reconcile files across a word processor, cloud folder, image editor, spreadsheet, and publishing dashboard. Tools such as the modern indie author stack can help you evaluate which functions belong in one environment and which specialist tools you still need.
The following stages show how to make the workflow operational. You'll set a brief, draft against an outline, run deliberate feedback passes, develop visuals before the text is frozen, and export formats only after the content and metadata agree.
Setting Goals, Outlining, and Drafting the Manuscript
Start with a one-page brief inside the manuscript project. Write down who the book is for, the genre promise, the intended format, a realistic word-count target, and the date when you want a complete draft or release candidate. Don't treat the deadline as decoration. It determines how much research, collaboration, design, and marketing the project can absorb.
A thriller brief might promise a fast, commercially recognizable mystery for adult genre readers, while a picture book brief may prioritize read-aloud rhythm, page turns, and visual storytelling. Those choices affect the outline long before you write the first sentence.
Use three levels of outline
A practical outline lets you move from the entire story to the next paragraph without losing the larger shape.
| Tier | Format | Word Count | Purpose |
|---|---|---|---|
| Story shape | One synopsis paragraph per act | Brief | Confirm the central movement and ending |
| Chapter plan | Bullet beats per chapter | Short | Decide what each chapter must accomplish |
| Scene card | One card per beat | Flexible | Track setting, characters, conflict, turn, and research |
Keep each tier in its own tab, binder, or planning view. The synopsis answers “Does the story work as a whole?” The chapter plan answers “What belongs here?” The scene card answers “What does the reader experience next?”
A connected workspace also keeps character details and source material beside the scene that uses them. If a character's injury affects movement later, attach that continuity note to the relevant scene rather than burying it in a separate document. If a nonfiction chapter relies on a source, keep the research link with the claim so fact-checking doesn't become a hunt through browser history.
For a structured starting point, use a writing SMART goals template to turn a broad intention into visible milestones and recurring work sessions.
Draft from cards, not from memory
Set a daily word target that fits your actual schedule, then work in timed sprints. During a session, keep the scene card visible beside the chapter view. Write the scene's action first, and leave inline notes for anything you'll solve later, such as “verify timeline,” “add sensory detail,” or “exposition arrives too early.”
Suppose a scene card says: “Mara discovers the forged letter, confronts her brother, and leaves with the key.” That card can become a 1,000-word scene through three movements: the discovery, the confrontation, and the decision to leave. A margin note might flag the explanation of the forgery as too long. You don't stop drafting to perfect it. You mark the problem, finish the scene, and let the revision pass handle the diagnosis.
Drafting rule: The first pass needs to be complete before it needs to be elegant.
That permission matters. A messy draft is salvageable when its structure, research, and unresolved questions remain visible. A polished opening attached to an unfinished project gives you less to revise than a complete manuscript with honest notes.
Revision Workflows with Editors and Beta Readers
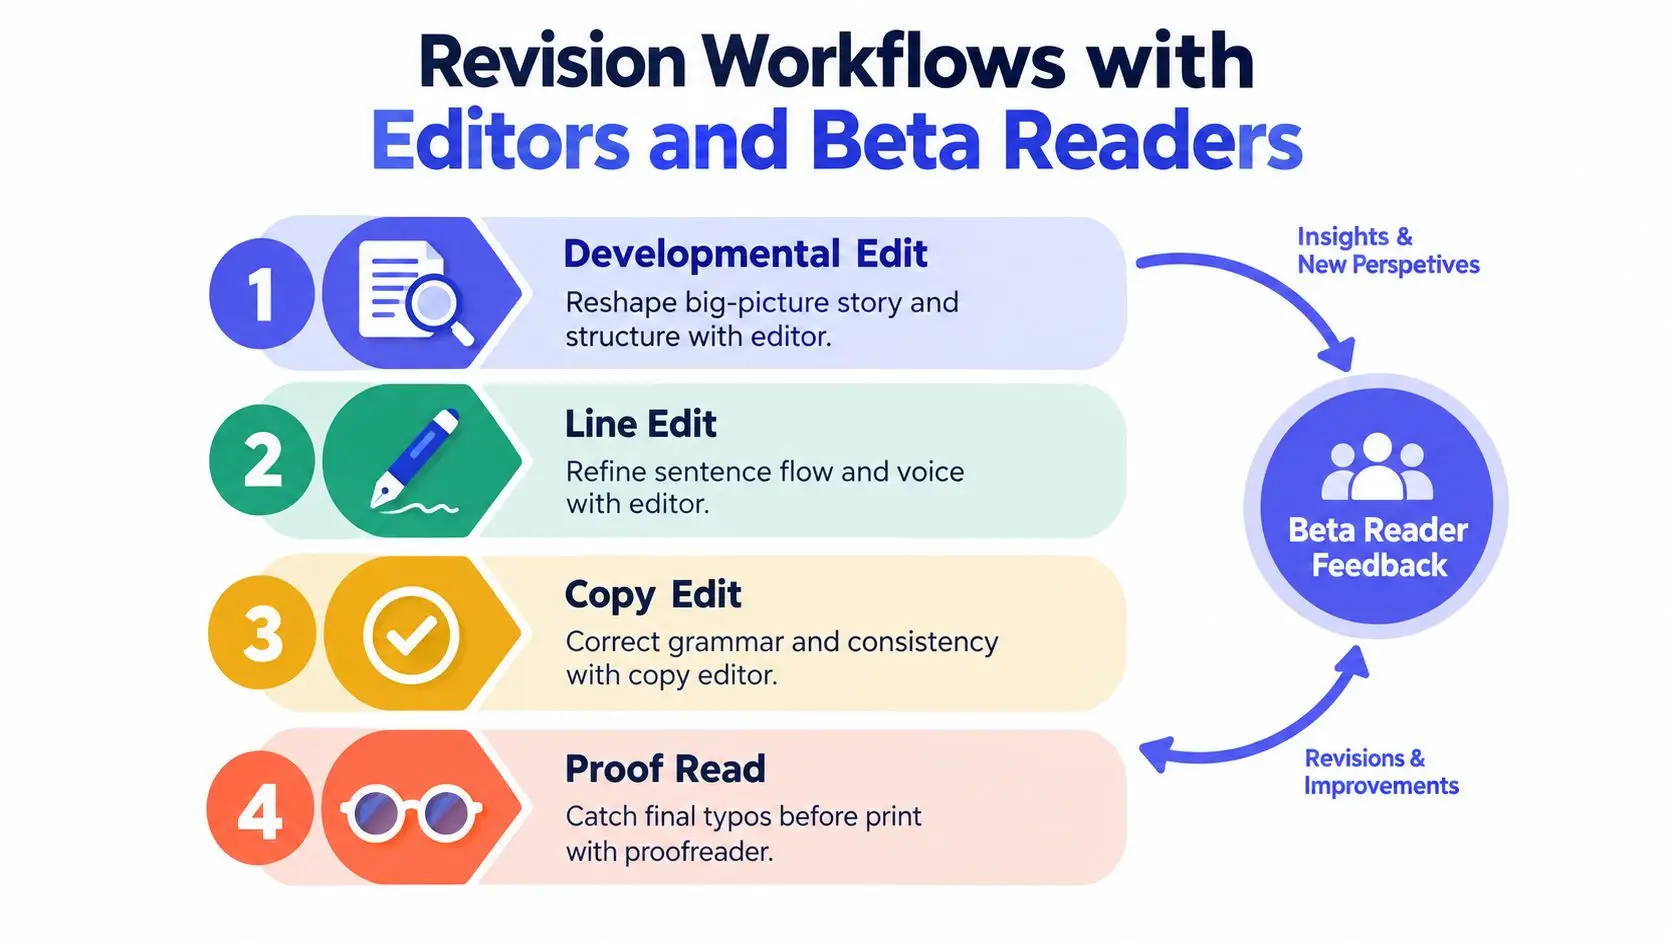
Revision works better as a controlled loop than as an endless instruction to “polish the prose.” Separate the work into developmental editing, line editing, copy editing, and proofreading, then record decisions in the project file. Each pass has a different purpose, and combining them too early makes it difficult to tell whether a beautiful sentence still belongs in the story.
Give every pass a defined job
Developmental editing examines structure, stakes, character arcs, argument, pacing, and audience fit. A developmental editor may recommend moving a reveal, cutting a subplot, or rebuilding a chapter sequence. The work is broad and often changes the manuscript substantially.
Line editing focuses on voice, rhythm, clarity, transitions, repetition, and sentence-level effectiveness. It's more granular than developmental editing, but it isn't primarily a grammar check.
Copy editing checks grammar, spelling, punctuation, usage, consistency, names, dates, capitalization, and style-sheet decisions. Proofreading happens after the layout is produced and catches residual errors in the actual print or ebook file, including spacing, page breaks, missing text, and typographical slips.
Use different comment colors or layers for each pass. Keep the outline and character bible visible beside the prose, so a plot concern can be traced back to the exact beat that created it. A human editor should make the substantive judgment calls. AI-assisted review can serve as a first filter for repetition, unclear phrasing, continuity prompts, or possible copy errors, but it shouldn't replace editorial responsibility.
Make beta feedback answerable
Recruit readers who understand the genre promise, not people who like you. Give them focused questions tied to the experience you want to create:
- Opening: Where did your attention strengthen or weaken?
- Character: What did you believe this person wanted?
- Pacing: Which section felt slow, rushed, or confusing?
- Promise: Did the ending deliver the kind of experience the description suggested?
- Trust: Did any detail break your confidence in the story or argument?
Collect comments against specific scenes rather than in an unstructured message. Then log the decision, such as “retain,” “revise,” or “monitor in next draft.” In a chapter with pacing concerns, beta notes might identify a long explanation before a confrontation. The line pass can tighten the dialogue, the copy pass can catch comma splices, and the proof pass can verify the final formatted pages.
For practical guidance on moving from rough prose to a reviewable draft, see editing a draft.
The process is easier to explain visually as a loop because beta feedback may send a chapter back to developmental work. Here's a short walkthrough that can help you think about the sequence before assigning tasks:
Illustration, Character Design, and Cover Creation
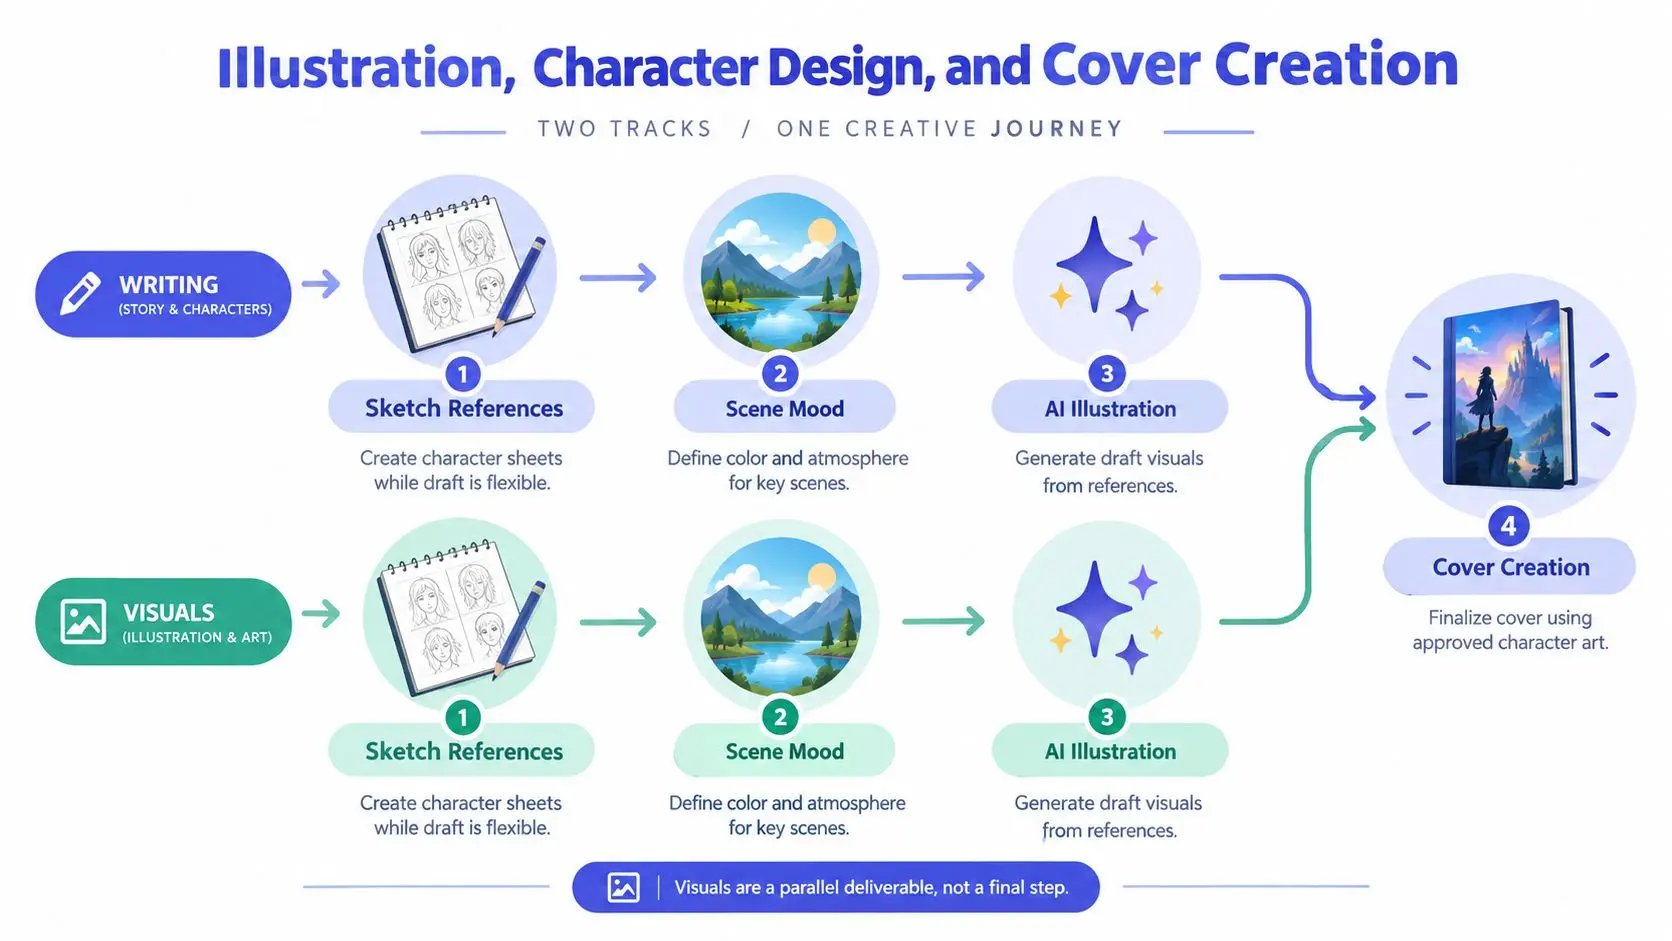
Visual development shouldn't wait until the manuscript is locked. Start character references and scene mood work while the draft is still flexible, because early visual decisions can expose inconsistencies in age, clothing, setting, scale, and tone.
Keep writing and visuals in parallel
Create a reference sheet for each important character. Record facial features, body shape, costume details, age range, posture, props, and changes across the story. Add a mood board for important locations, noting palette, light, atmosphere, architecture, and recurring visual motifs.
An AI illustration pipeline can then use those references to generate draft visuals while you assess consistency. The tool is useful for exploring possibilities quickly, but the author still needs to reject images that contradict the manuscript or create a visual promise the book can't fulfill. Consistency matters more than novelty when several interior plates or promotional images feature the same character.
Lock three decisions before spending time on typography:
- Silhouette: What shape or figure is recognizable at thumbnail size?
- Color story: Which dominant and supporting colors signal the book's emotional register?
- Typographic anchor: What single title or author-name treatment gives the cover its identity?
Build the cover from the active manuscript project. The title, subtitle, author name, trim size, and approved imagery should remain synchronized, so a late title change doesn't leave an outdated cover in a different folder. This is especially important when you're testing print and ebook versions with different dimensions.
Prepare art for production
Validate every interior illustration against the final trim and gutter. Export at the printer's required resolution, keep transparent or full-bleed elements intentional, and name files by plate number. A formatter should be able to place plate-01, plate-02, and so on without guessing which file belongs to which chapter.
The practical payoff is traceability. When the manuscript, character references, interior art, and cover share one source of truth, you avoid mismatched names, outdated visual versions, and a spine that no longer agrees with the approved front cover.
Formatting, ISBN, and Exporting Print and Ebook Outputs
Formatting turns approved content into products readers can open, hold, and explore. Decide the trim size and binding before building the interior, because those choices control margins, gutter space, bleed, safe zones, page count, and cover dimensions.
Set a readable body style, define chapter-opening behavior, and check widow and orphan control. For an ebook, prioritize reflow, navigation, accessible headings, image behavior, and device flexibility. For print, prioritize page geometry, typography, image placement, bleed, and the physical relationship between the interior and cover.
Keep format decisions explicit
| Format | File Type | ISBN | Key Spec |
|---|---|---|---|
| Ebook | EPUB or platform-specific ebook file | Assign the identifier required for that edition and market | Reflowable text, navigable headings, correctly sized cover |
| Paperback | Print-ready PDF | Use the ISBN assigned to the paperback edition | Trim, margins, gutter, bleed, and cover wrap must match |
| Hardcover | Print-ready PDF and cover file | Use the ISBN assigned to the hardcover edition | Binding, spine, trim, and safe zones must match the printer |
Each edition needs its own ISBN assignment, and the metadata should agree across retailer and distributor records. Check the title, subtitle, author name, categories, description, publication date, and contributor information before uploading. A mismatch may look minor in a spreadsheet but creates confusion across retailer pages and catalog records.
For teams that need to show a proof or preview on a website, this guide to embed PDF document in HTML explains the technical context without turning the publishing workflow into a web-development project.
Test the outputs, not just the source
Export the print PDF and inspect it at full size. Check chapter openings, running headers, page numbers, image edges, blank pages, widows, orphans, and the spine calculation. Open the ebook on a phone, tablet, and Kindle or equivalent reading environment. Test the table of contents, links, font behavior, image scaling, and scene breaks.
A manuscript-centric platform can reduce repetitive export work. Formatting and exporting for Amazon KDP, IngramSpark, and ebook platforms offers a useful checklist for connecting those outputs to their intended destinations.
A short round-trip is possible when the text, art, cover, metadata, and templates live together, but don't confuse speed with verification. The file that exports quickly can still contain a wrong subtitle, a missing illustration, or a cover designed for the wrong trim.
Launch Checklist and Post-Launch Workflow
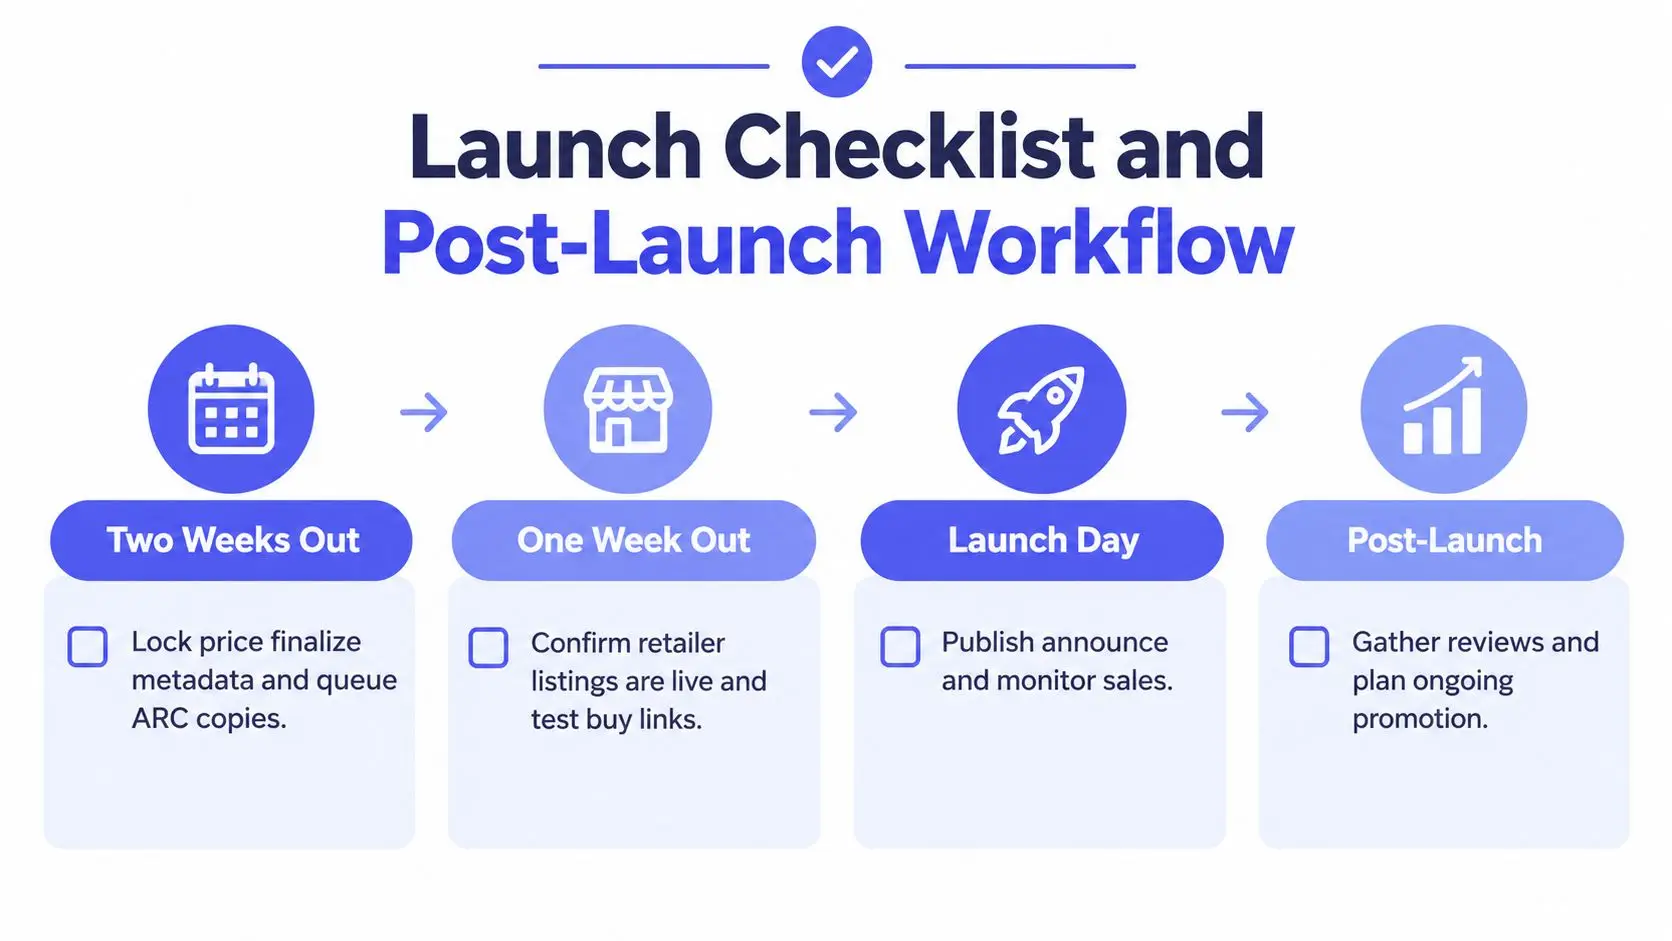
A launch is a sequence of decisions, not a single announcement. The work begins before the retailer page goes live and continues after the first readers arrive. Treat every task as a checkbox with an owner, a date, and a place where you'll record the result.
Two weeks out
Lock the price, metadata, cover, description, and retailer delivery schedule. Queue advance review copies for the readers and reviewers you've selected, and confirm that the files represent the edition you intend to sell.
One week out
Check that retailer listings are live and accurate. Test every buy link in a private browser window, confirm the cover thumbnail, review the description on mobile, and prepare the launch email. Draft platform-specific social posts rather than recycling one oversized announcement everywhere.
Launch day
Monitor delivery errors and retailer status. Send one clear message with the book's promise, format options, and purchase path. Reply to reader emails promptly, record technical issues, and avoid changing several variables at once if sales or downloads look different from your expectation.
Launch discipline: Keep a record of what happened while the details are fresh. Memory turns operational mistakes into recurring habits.
The weeks after release
The post-launch period is where discoverability becomes an operating system. Track sales by retailer, watch reviews and reader questions, and schedule ongoing promotion instead of allowing attention to disappear after the announcement. A price promotion can be planned for a later point in the campaign, and a follow-up newsletter can offer buyers the next book or a free short story.
The economics of indie publishing make this follow-through important. Industry summaries report that over 90% of self-published books sell fewer than 100 copies over their lifetime, while the average self-published title sells about 250 copies total, according to this industry sales-statistics discussion. Those figures describe a long-tail market, not a guaranteed outcome for any individual book, but they do clarify the operational problem: publication alone doesn't create discoverability.
Marketing needs a defined place in the weekly workflow. One industry white paper reported that 84% of respondents marketed their books, self-published authors spent 12.4 hours per week on marketing, and 24% spent more than $5,000 on marketing efforts, as documented by the Authors Guild white paper. The useful lesson isn't to copy someone else's budget. It's to reserve time for newsletter growth, metadata testing, advertising decisions, retailer maintenance, and reader follow-up.
At the 30-day review, compare results with the goal in your project brief. Write down what to repeat, what to stop, and what to change before the next book. That retrospective closes the current indie author project and gives the next one a stronger starting file.
Storyloft brings drafting, planning, AI-assisted editing, illustration, cover creation, collaboration, and print and ebook export into one manuscript-centered workspace. Visit Storyloft to see how you can keep the working book, its visual assets, and its publishing outputs connected from first outline to launch.