Software for Book Cover Design: A Complete Author’s Guide
You've finished the manuscript, stared at the blank cover slot, and realized the work isn't choosing a pretty image. It's making a file that a printer will accept, while still looking sharp on a Kindle thumbnail and true to genre in a crowded marketplace. That's where software for book cover design stops being a creative toy and starts acting like a publishing tool.
Many first-time authors get stuck here because the cover has more moving parts than the interior. Trim size, bleed, spine width, color mode, and export format all matter, and the wrong choice can send you back into revisions before you ever launch. A good tool has to handle both sides of the job, the visual side and the production side, so the cover looks professional and survives upload.
Table of Contents
- Why Your Book Cover Needs Real Production Software
- What Book Cover Design Software Actually Does
- Must-Have Features and File Export Requirements
- Standalone Design Apps Versus Integrated Author Platforms
- A Step-by-Step Cover Workflow Authors Can Follow
- What AI Cover Generators Get Right and Where They Still Fall Short
- Choosing the Right Tool for Your Author Type
Why Your Book Cover Needs Real Production Software
You can finish a manuscript in a clean writing app and still feel completely unprepared when it comes time to build the cover. That's because a cover is not just a picture, it's a publishing deliverable with real technical rules. Adobe InDesign became the benchmark for print-ready cover production because it handles master pages, paragraph and character styles, and precise layout control across the front cover, spine, and back cover (reference).
The manuscript is done, the file still isn't
A lot of authors hit the same wall at this stage. They have the title, the subtitle, and maybe a great image, but they haven't accounted for the cover as a full wrap file. Print covers need more than a front image, and industry guidance still specifies CMYK for print plus 0.125 inches of bleed beyond the trim line (reference).
That's why the software choice matters so much. Newer author-facing tools now generate print-ready PDFs from templates where spine width, bleed, and margins are calculated automatically from page count and trim settings (reference). If you're publishing independently, that kind of automation can mean the difference between a cover that uploads cleanly and one that comes back with errors.
Practical rule: if a tool can only make a front image, it's not enough for paperback or hardcover production.
Why this is a workflow decision, not a taste decision
The gap is simple. A cover has to look good and also meet production specs on the first try. That's why so many publishers treat cover software as part of the upload workflow, not just the design stage. The shift from general-purpose layout tools to author-focused builders has made technically correct output more accessible to independent authors, which is a foundational change for self-publishing workflows (reference).
If you want a quick primer on why the cover is doing so much work, the overview in Storyloft's cover importance guide is a useful companion read. The core idea is the same either way, the cover is a business asset with formatting constraints, not decoration after the fact.
What Book Cover Design Software Actually Does
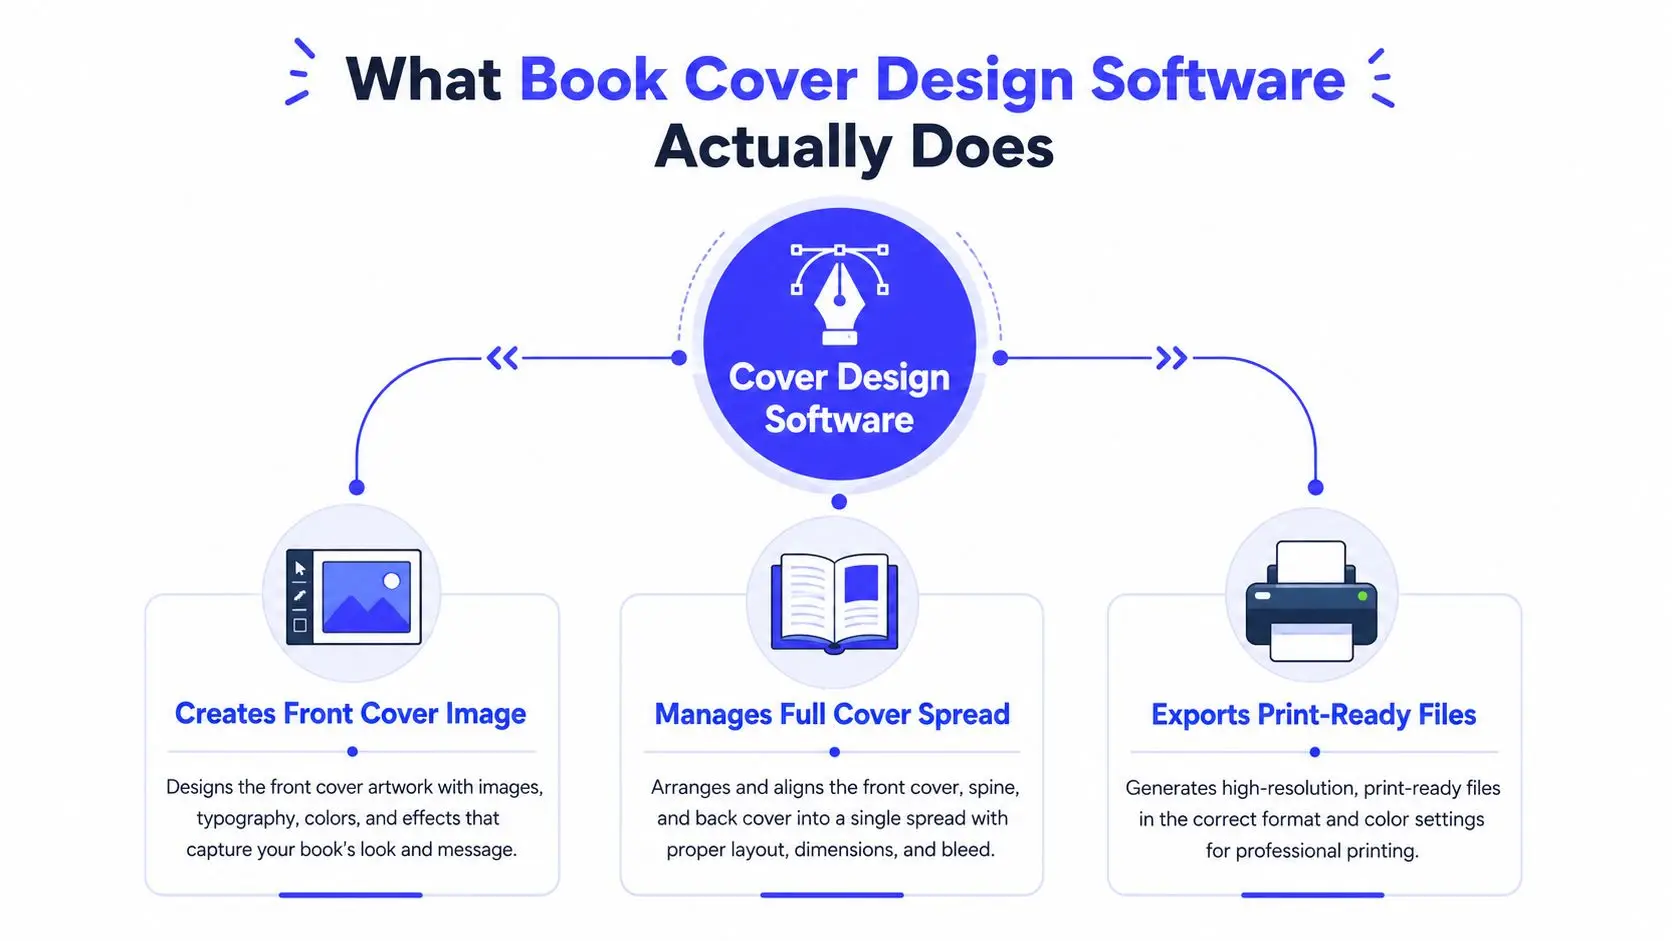
At the simplest level, cover software helps you move from concept to a file you can upload. But not every tool solves the same problem. Some tools create only a single front cover image, while others manage the full wrap with front, spine, and back cover in one file. The difference matters because print and ebook formats are not built the same way (reference).
Think in layers, not just in images
A useful way to sort the category is by what each tool is built to control. Raster editors like Adobe Photoshop are strong when the cover depends on photo composites and non-destructive layer work. Vector-first tools like Adobe Illustrator or CorelDRAW are better when you need logos, custom lettering, or shapes that stay crisp at print size (reference).
That's the first fork in the road. If your cover is mostly image manipulation, you want one kind of tool. If it's mostly typography and geometry, you want another. If you need both, you either combine tools or use a platform that wraps them into one workflow.
A good cover tool does not just draw. It also knows where the trim ends and the spine begins.
Front image versus full book wrap
Many readers confuse the ebook cover with the print cover because both are called “cover.” They're not the same file. Industry guidance distinguishes output by format, recommending JPG for ebook covers and a press-ready PDF for print covers, with the print file combining the front cover, back cover, and spine in one layout (reference).
That's why software for book cover design is really a production category. The best tools don't stop at the image. They expose bleed lines, trim guides, and export settings that fit the actual publishing job (reference). For authors who publish across Kindle, paperback, hardcover, and mockups, the useful platforms are the ones that carry one design across formats without forcing you to rebuild it each time.
For a look at how integrated formatting shows up in a writing environment, the export notes in Storyloft's cover format guide fit neatly into this picture.
Must-Have Features and File Export Requirements
A cover tool can look polished and still fail at the one job that matters, producing the right file. That's why the technical checklist comes first. For print, the software needs CMYK support, bleed handling, and a way to build the full wrap without manual guesswork. For ebooks, it needs a clean image export path that matches screen use, usually JPG (reference).
The technical features that actually protect you from rework
The most important production feature is automatic spine calculation from page count. One author guide says print cover templates calculate spine width automatically from the book's page count, while another states the standard bleed requirement is 0.125 inches on all sides for print-ready output (reference). Those aren't cosmetic details. They determine whether the printer accepts the file without correction.
You also want a tool that can handle both raster and vector elements. That matters because many covers use a photo or illustration in the background, plus typography or logo elements that need sharper scaling. Professional tools expose print-ready outputs, bleed lines, and trim guides, while workflow-focused platforms add full-wrap generation, spine and back-cover handling, and reusable design assets (reference).
If you're exporting for email review, a smaller PDF can help with file transfer. If you need that step, a practical guide on reduce PDF file size for email can save time before you send proofs around.
A quick specification check
| Specification | Ebook Cover | Print Cover |
|---|---|---|
| File type | JPG (reference) | Press-ready PDF (reference) |
| Color space | Screen-friendly output | CMYK for print (reference) |
| Layout | Front image only | Front, back, and spine in one file (reference) |
| Margin control | Simple framing | 0.125 inches of bleed on all sides (reference) |
One practical point gets overlooked often. The cover needs to stay visually aligned with the interior. Authors who use integrated writing platforms can sometimes sync the cover with the active manuscript, which reduces mismatches between the title page, blurb, and exterior design. That's part of the reason format-aware tools have become so useful in self-publishing workflows.
If you want to see how a writing platform frames that handoff, Storyloft's export formats overview shows the sort of output control authors should expect from production software.
Standalone Design Apps Versus Integrated Author Platforms
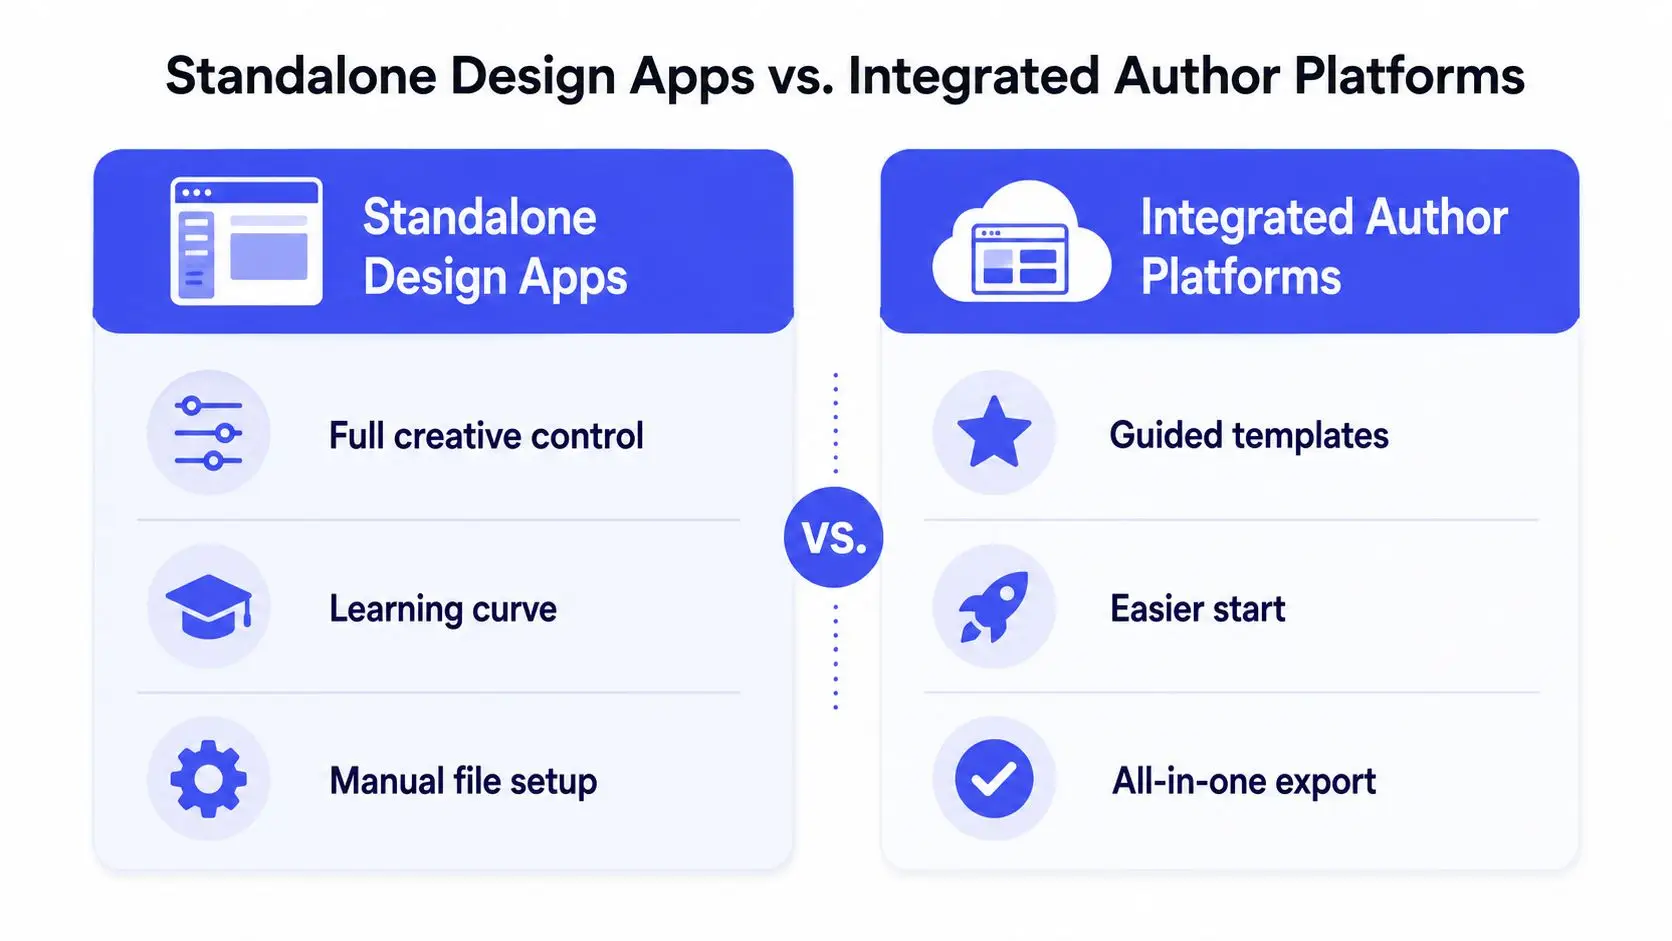
Some authors need a full design studio. Others need a cover workflow that stays inside the same place as the manuscript. The best choice depends on how much control you want and how much tool-switching you can tolerate. For professional book cover production, raster editors like Adobe Photoshop and vector tools like Adobe Illustrator or CorelDRAW stay strong when you need detailed control, while browser tools and integrated platforms trade some depth for speed (reference).
Three ways authors usually work
A standalone app gives you the most creative control. That's the world of Photoshop, Illustrator, and InDesign, where you build the cover piece by piece and manage production settings yourself. The upside is precision. The downside is that you're also responsible for every technical decision.
Browser-based template tools sit in the middle. They're fast, accessible, and often good enough for a straightforward ebook cover. But they usually work best when the file stays simple, and they can feel limited when you need print wrap logic or more demanding typography.
Integrated author platforms are different again. Storyloft includes a book cover studio with AI-generated layouts, presets for print and ebooks, the ability to import custom imagery from the manuscript, ISBN barcode generation, and cover synchronization with the active manuscript for testing on e-readers and PDFs (reference). That makes it less of a detached design app and more of a publishing environment.
How the trade-off usually plays out
Standalone apps reward users who want maximum freedom and are willing to manage file setup themselves. Integrated platforms help authors keep the manuscript and cover in one workflow, which reduces context switching and makes it easier to test consistency across outputs. Workflow-focused platforms also make it simpler to reuse assets across Kindle, paperback, hardcover, and marketing mockups without rebuilding from scratch (reference).
Practical rule: if you dread manual spine setup more than you dread creative limits, an integrated platform may fit your process better than a blank-canvas design app.
For authors who want to see what happens when writing and design live in one place, this cover workflow guide inside Storyloft is a useful reference point.
A Step-by-Step Cover Workflow Authors Can Follow
A solid cover process starts with the book, not the software. The design should answer a simple question fast, what genre is this, and why should a reader click it? Once that answer is clear, the technical work gets easier because the visual choices have a purpose instead of existing only for style.
Start with genre, hook, and format
Begin with the market signal. A thriller, a romance novel, and a nonfiction business book do not use the same visual language, even when all three are professionally designed. That's why authors who browse category leaders first usually make cleaner cover decisions later.
Then define the book's formats before you design anything. If you're releasing only an ebook, you need a front cover image. If you're also doing paperback or hardcover, you need the full wrap with spine and back cover. Author-focused tools now make it possible to generate print-ready PDFs from templates where the software calculates the spine and margins from the manuscript settings (reference).
Build the wrap with the manuscript in mind
Once the format is set, gather the parts of the wrap. The title, subtitle, author name, and back-cover copy need to work together, not compete. Some platforms also help with barcode placement and back-cover layout, which matters when you're preparing the file for print.
That's where the production-first mindset pays off. Storyloft includes a book cover studio with AI-generated layouts, presets for print and ebooks, the ability to import custom imagery from the manuscript, ISBN barcode generation, and cover synchronization with the active manuscript for testing on e-readers and PDFs (reference). In practice, that means the cover can stay tied to the manuscript while you check whether the visuals still read well in context.
Export with the printer in mind
The last step is not “save as final.” It's verify the export path. For ebooks, use a clean JPG output. For print, use a press-ready PDF that includes the full wrap and respects CMYK, bleed, and trim requirements (reference, reference).
A useful habit is to preview the cover where readers will see it, on a thumbnail, on an e-reader, and as a paperback wrap. Some platforms now include synchronized preview testing for that reason. If the title reads clearly in those views and the spine lands where it should, you're close to upload-ready.
What AI Cover Generators Get Right and Where They Still Fall Short
AI has made cover concepting faster, and that's real progress. Canva now positions AI book cover generation as a quick way to create concepts from a title, genre, and style prompt, and integrated tools like Storyloft also include AI-generated layouts inside a broader workflow (reference). The speed is useful, especially when you're exploring direction, but speed is not the same thing as design risk reduction.
Fast concepts are helpful, but they're not the final answer
The biggest strength of AI cover tools is that they get you moving. Instead of staring at a blank page, you can test composition, tone, and mood quickly. That helps first-time authors who don't yet know how to translate a premise into visual language.
The weakness is that AI can still leave authors with extra review work. Neutral guides caution writers to verify commercial-use licensing for images and to test designs with beta readers and genre peers before publication, which means the fast draft still needs human quality control (reference). That matters because a cover can look finished and still miss the genre mark or create a licensing headache.
AI sketching is not the same as art direction
Think of AI as a sketch artist, not an art director. A sketch artist can produce options quickly, but someone still has to judge whether the image fits the market, whether the typography reads at thumbnail size, and whether the file can survive print requirements. That's why some indie authors use AI for exploration and then finish with a production-aware tool.
If you want a broader view of current AI-first options, see the best AI cover software for a useful comparison. The main thing to watch is whether the tool helps you move from concept to a legally safe, genre-appropriate, printer-ready file, or whether it only gets you a mockup.
AI can save time at the start of the process. It does not remove the need to check licensing, typography, and production specs before upload.
For authors who want an AI-assisted cover workflow inside a manuscript environment, Storyloft's AI book cover design page is a relevant example of how those features are being folded into publishing software rather than standing alone.
Choosing the Right Tool for Your Author Type
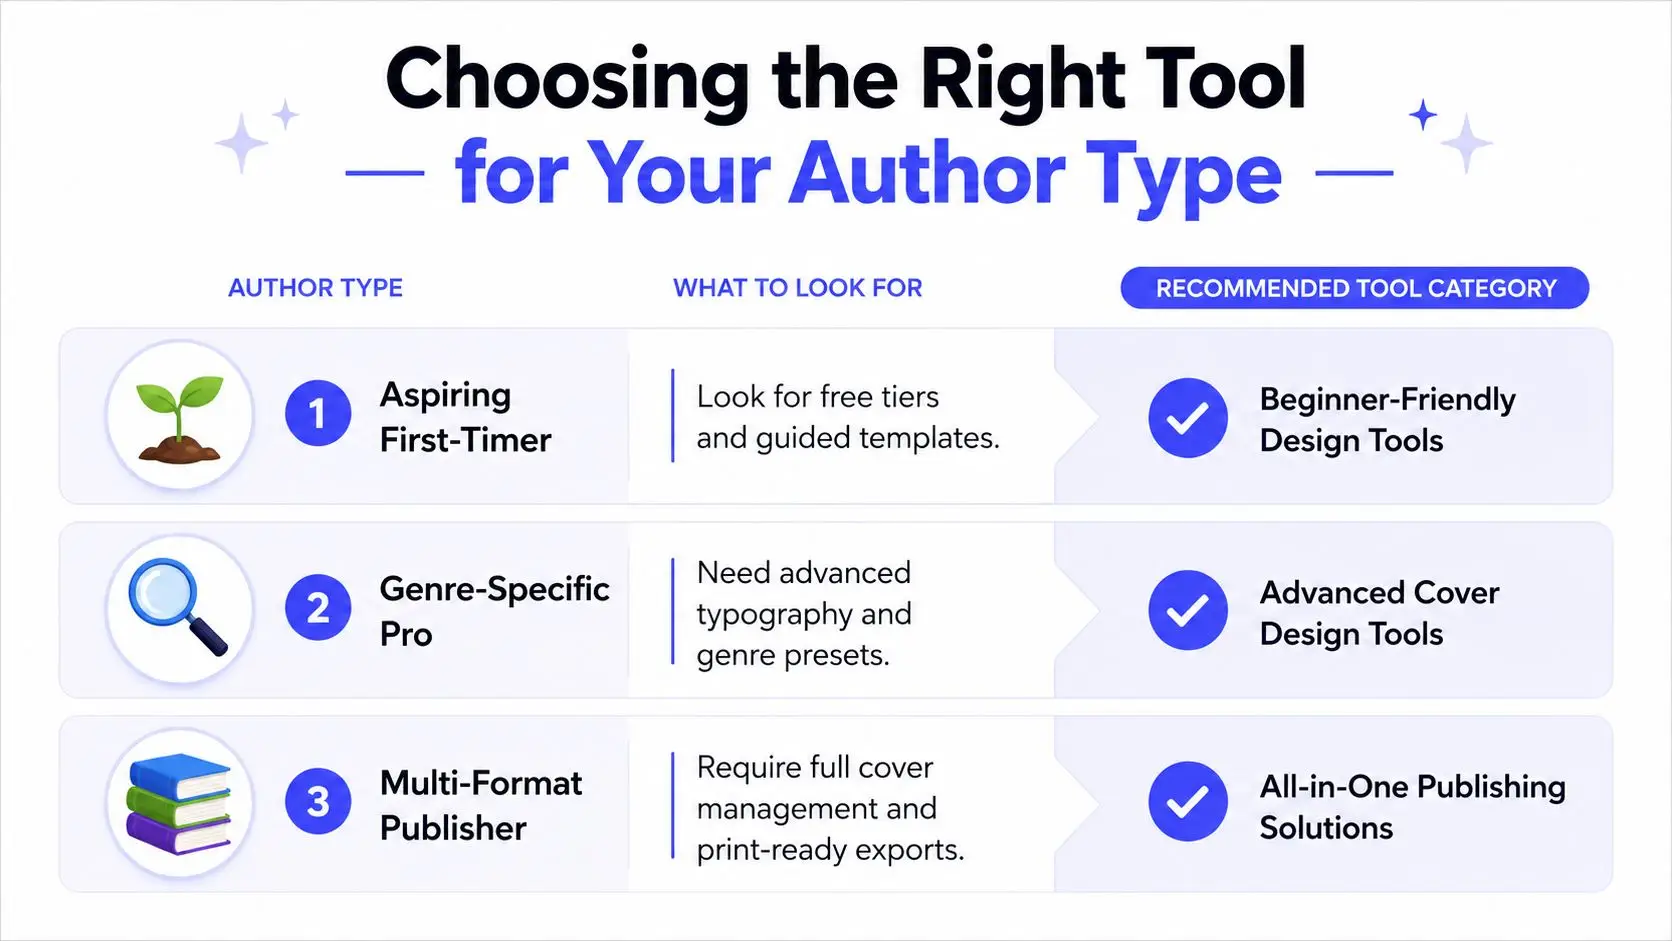
The right software depends less on taste and more on what kind of book you're making and how you work. An aspiring first-time author, a series fiction writer, and a nonfiction researcher do not need the same cover workflow. Choosing well means matching the tool to the production problem.
Match the tool to the job
For an aspiring first-timer, guided templates and a free starting tier usually make the most sense. You need something that keeps the process from feeling technical too early, especially if your main goal is to get a competent ebook cover out the door.
For a genre-specific pro, advanced typography and strong control over layout matter more. That's where standalone apps still shine, because they let you refine type hierarchy, image composition, and series branding with less compromise.
For a multi-format publisher, you need full cover management and print-ready export. That means a workflow that can handle front, spine, and back cover together, while still giving you formats for ebook, paperback, hardcover, and review copies. Tools with automatic spine calculation and wrap-aware export are especially useful here (reference, reference).
A final submission check
Before you upload anything, look for these basics:
- Format match: ebook cover as JPG, print as press-ready PDF (reference).
- Color mode: print file in CMYK (reference).
- Bleed coverage: 0.125 inches on all sides for print-ready output (reference).
- Wrap completeness: front, back, and spine included in one print file (reference).
- Readable thumbnail: title and author name still clear at small size.
A strong cover tool saves you from technical mistakes, but the final responsibility still sits with the author. If the file is clean, the typography is legible, and the export matches the platform, you're in good shape.
If you want a single place to draft, design, and prepare your cover inside the same manuscript workflow, Storyloft brings those steps together in one app. It gives authors a cover studio, print and ebook presets, and manuscript-synced testing so the file you build is closer to the file you upload. Visit it when you're ready to compare an integrated publishing workflow against the separate-tool approach.