The Snowflake Outline Method Explained
When I first attempted to write a novel, I thought I could just dive in without any planning. It was a bold move, but it led to a disaster. My first book surprisingly turned out well, but my second was a complete mess. My editor made it clear that it was unpublishable. This experience taught me the importance of having a solid outline.
That’s where the snowflake method comes in. This approach helps writers like me transform a simple idea into a structured book plan. It starts with a tiny seed of a story and gradually expands it into a comprehensive outline. This method not only prevents chaos but also makes the writing process more enjoyable.
In this guide, I’ll share my personal journey and the step-by-step process I used to create a successful outline. Expect a mix of practical tips and a bit of humor, because let’s face it—writing can be tough! By the end, you’ll see how this method can help you take your story from a mere thought to a full manuscript.
Why I Ditched the Blank Page and Found the Snowflake Method
Every writer has a moment that defines their journey. For me, it was the day my editor sat across from me, shaking his head. He told me my second novel was unpublishable. That moment was my wake-up call. I realized I had to rethink everything I believed about writing.
With a heavy heart, I went home and faced my computer. I hit Ctrl-A, selected all 80,000 words, and pressed delete. It felt like I was erasing a part of myself. But looking back, that was the best decision I ever made. It forced me to rewrite my novel from scratch, and this time, it flourished. It even caught the eye of one of the UK’s biggest summer book promotions.
In that moment of humiliation, I learned that real writing isn’t about channeling brilliance. My first novel’s success was a fluke, and my second’s failure proved it. The blank page was not a canvas; it was a void that swallowed my good ideas whole. I felt paralyzed without a roadmap for my story.
Then, I discovered the snowflake method. It was like finding a compass after wandering aimlessly in the wilderness of storytelling. This method gave me the structure I desperately needed. It showed me that outlining doesn’t stifle creativity; it actually unleashes it by providing guardrails for my imagination.
If you’ve ever felt like a fraud staring at a blinking cursor, know that you’re not alone. Many writers face this struggle. But there’s a way out that doesn’t require divine inspiration. Tools like Storyloft’s AI companion, Eddy, can help you transform that blank page into a structured plan with ease.
Choosing to ditch the blank page isn’t admitting defeat; it’s about working smarter. The snowflake method is the smartest approach I’ve found. It allows writers to create a clear path from an idea to a finished novel, saving time and effort.
| Moment | Impact | Lesson Learned |
|---|---|---|
| Editor’s Feedback | Realization of the need for structure | Writing requires planning, not just talent |
| Ctrl-A and Delete | Emotional release and fresh start | Sometimes, starting over is necessary |
| Success of Rewritten Novel | Validation of the new approach | Structure enhances creativity |
Understanding the Snowflake Method: What It Is and Why It Works
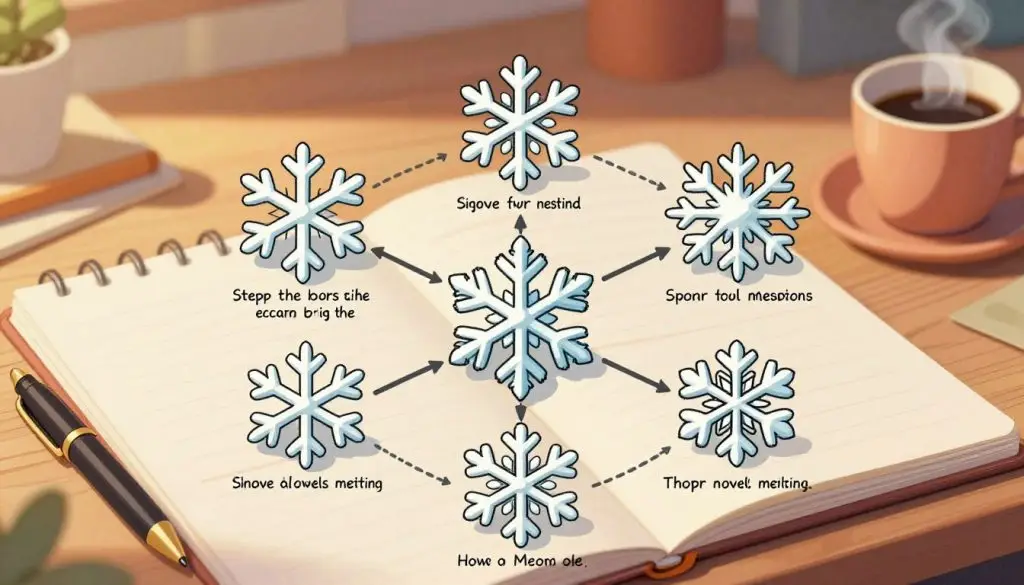
The more I wrote, the clearer it became that a structured approach could elevate my storytelling. The snowflake method is not just another writing trick; it’s a clever way to build your narrative. Developed by Randy Ingermanson, this process allows you to start with a simple idea and expand it incrementally. Think of it as a snowflake forming around a speck of dust—starting small and growing intricate.
Here’s how it works: You begin by summarizing your novel in one sentence. Who is your protagonist? What’s the setting? Each of these elements gets its own sentence. Then, you revisit your initial idea and break it down into five segments, each represented by a sentence. This iterative process reflects how our brains generate ideas, allowing for organic growth rather than rigid structure.
Many writers fall into the trap of traditional linear outlining, where you write, “Chapter 1: X happens, Chapter 2: Y happens.” This often leads to frustration because it demands details that may not yet be clear in your mind. The beauty of the snowflake method is its flexibility; you constantly refine your outline, transforming mistakes into insights.
Imagine a sculptor working with a block of marble. You wouldn’t carve a nose before shaping the head, right? You start with that rough block—your one-sentence idea—and gradually add detail. This method works across genres, whether you’re crafting literary fiction, mystery, or even non-fiction. It’s all about incremental expansion.
One of the best aspects of this approach is that it doesn’t require perfection on the first pass. Instead, it encourages forward momentum. Each cycle around your story elements sparks new connections and ideas. By the time you create a detailed scene list, everything feels inevitable, as it has grown organically from that initial seed.
Modern tools like Storyloft’s guided experience align perfectly with this philosophy. They make the incremental building process even smoother, allowing you to focus on what truly matters—your story.
The Brainy Origins: Randy Ingermanson Meets Fractal Geometry
In the realm of storytelling, few approaches are as fascinating as the one developed by Randy Ingermanson. He’s not just the creator of the snowflake method; he’s also a computational physicist who views storytelling through the lens of fractal geometry. This perspective is both wonderfully nerdy and surprisingly practical.
The specific fractal that inspired him is the Koch Snowflake. This shape starts as a simple triangle and grows infinitely complex through repeated, self-similar iterations. It mirrors how your novel outline should develop. Just like the snowflake, your story begins with a simple idea and expands into something intricate.
Ingermanson’s background gave him a unique perspective on writing. He recognized that most outlining methods demand too much complexity too soon. It’s like trying to draw a finished snowflake in one stroke. Instead, he realized that stories, like fractals, are best built through recursive loops. You define the simple core, then expand each part using the same principles until you have a richly detailed whole.
His method caught fire in the writing community because it solved a universal problem: the gap between having a cool idea and knowing what to actually write on day one. The snowflake method provides a structured approach that makes the writing process less daunting.
Ingermanson recommends practical timeframes for each step. For instance, he suggests spending an hour on the one-sentence summary and a few hours per character for the character bibles. This shows he understands the need for practical, bite-sized commitments that fit into a writer’s busy life.
While his guidelines are specific, the real power of this approach lies in its adaptability. You can follow his steps religiously or use them as a flexible framework that suits your style. The fractal metaphor isn’t just clever branding; it’s a genuine insight into how complex narratives can emerge from simple, repeated patterns of development.
By the end of this section, you’ll appreciate that the snowflake method has serious intellectual chops behind it. This is reassuring when you’re trusting it with your precious story idea.
| Aspect | Description |
|---|---|
| Creator | Randy Ingermanson |
| Inspiration | Koch Snowflake |
| Core Principle | Recursive loops for story development |
| Timeframe for Summary | 1 hour |
| Timeframe for Character Bibles | Few hours per character |
Step 1: Crafting Your One-Sentence Story Summary
To truly understand your story, you must first capture its heart in a single, striking sentence. This initial step in the writing process is deceptively simple yet incredibly powerful. It distills your entire novel into a concise summary that encapsulates your protagonist, their goal, and the central conflict.
This isn’t just a logline for marketing—it’s the DNA of your story. I’ll guide you through crafting one using the classic formula of character + goal + stakes, keeping it under 15 words for maximum punch.
For example, imagine you want to write a private eye story set in 1940s Los Angeles. You admire writers like Raymond Chandler but wish to add a unique twist. Your one-sentence summary might read: “A PI hunting a killer is stalked by the victim’s ghost.” This immediately sets the tone and raises intriguing questions.
The magic of this step is that it forces you to identify what your story is truly about. It strips away all the subplots and world-building until only the beating heart remains. Randy Ingermanson recommends spending a full hour on this single sentence. It’s not about perfectionism; it’s about giving your brain time to test different versions until one clicks.
Common pitfalls include being too vague—like saying, “A woman goes on a journey of self-discovery”—or cluttering your sentence with names and details. I’ll help you find that sweet spot where clarity meets intrigue.
This one-sentence summary becomes your North Star throughout the outlining process. It serves as a guide to check whether later additions truly serve your core story. Additionally, Storyloft’s AI companion can assist you in workshopping this sentence. It asks targeted questions that sharpen your focus, making that hour of honing even more productive.
By the end of this section, you’ll have a clear, actionable method for writing your own one-sentence summary. Remember, it’s okay to write badly at first; the key is to refine ruthlessly.
| Aspect | Description |
|---|---|
| Purpose | To capture the essence of your story in one sentence |
| Key Components | Character, goal, and stakes |
| Recommended Time | 1 hour |
| Common Pitfalls | Being vague or overly detailed |
| Final Outcome | A guiding sentence for your outline |
Step 2: Expanding to a One-Paragraph Story Synopsis
Writing a compelling story is like piecing together a puzzle, where each part must fit just right. In this step, we’ll expand your one-sentence summary into a concise paragraph that maps the entire story arc. This is where the magic happens, and your narrative starts to take shape.
To create a strong paragraph, we’ll follow the three-act structure. Each act will get its own sentence, allowing us to introduce the major plot points clearly. Here’s how it breaks down:
- Exposition: This is the status quo at the start of your story.
- First Plot Point: What major event kicks off the action?
- Mid-Point: This is where things take a turn for the worse.
- Second Plot Point: Here, your character hits rock bottom and begins to turn things around.
- Climax and Denouement: This is how your story resolves.
For example, let’s use my ongoing 1940s ghost-detective story. The beginning might say, “Amy’s father, Dorcan Adderley, sends a henchman to hire Bernie Brandon to investigate the death of his daughter.” The middle could describe Bernie’s investigation and his encounters with Amy’s ghost. Finally, the end reveals that Amy’s actual killer was her father, leading to a dramatic confrontation.
The beauty of limiting yourself to roughly five sentences is that it keeps you focused. You won’t get lost in the weeds while still identifying the major turning points that will carry your reader through. This paragraph summary becomes the skeleton you’ll hang all future details on. It’s worth revising until every sentence earns its place.
During this stage, you might discover plot holes—like a climax that doesn’t logically follow from the midpoint. Spotting and fixing these early can save you headaches later. Plus, using tools like Storyloft’s outline generator can help structure your ideas into a coherent chapter-by-chapter framework.
The key insight here is that a solid one-paragraph synopsis gives you confidence that your story actually works before you invest months in writing it. By the end of this section, you’ll have a template for crafting your own five-sentence story spine that you can pitch to anyone in under a minute.

Step 3: Introducing Your Characters—Broad Brushstrokes First
Understanding your characters is crucial, as they breathe life into your plot and conflict. In this step, I’ll show you how to sketch your major characters using broad strokes. This approach captures their essence without the need for a full biography right away.
Randy Ingermanson emphasizes spending time on four key aspects for each character: their motivations, goals, conflicts, and epiphanies. These elements form the foundation of your characters, guiding their actions and decisions throughout the story.
Let’s take my protagonist, Bernie Brandon, as an example. He’s an ex-cop who lives alone, struggles with drinking, and has a soft spot for beautiful women. Yet, he can’t manage long-term relationships, which adds depth to his character. On the other hand, Amy Adderley, a rich girl who died before the story begins, is a classically trained singer with a brutal father. These contrasts create an engaging dynamic.
Here’s how I break it down:
- Motivation: What drives them in life?
- Goal: What do they want?
- Conflict: What stands in their way?
- Epiphany: How do they overcome that conflict?
By jotting down these elements, I often discover unexpected connections between characters and plot. For instance, Bernie’s cello playing and Amy’s love for Schubert lieder emerged organically as I explored their backgrounds. This musical bond deepens their relationship and enriches the narrative.
It’s important to remember that this stage is intentionally messy. Your characters don’t need to be fully formed yet. The act of writing down what you know often unlocks new insights. This iterative process allows you to refine both your characters and plot summary in a productive feedback loop.
Along the way, tools like Storyloft’s AI companion can help generate character prompts and creative notes. These assets make your cast feel real early in the process. You might even get a concept book cover visualizing your protagonist, which can be incredibly motivating.
The goal here isn’t to create a perfect character dossier. Instead, it’s about knowing enough about your characters that they start making their own choices. That’s when the real fun begins!
| Character | Motivation | Goal | Conflict | Epiphany |
|---|---|---|---|---|
| Bernie Brandon | Redemption | To solve a case | His drinking problem | Realizing he needs help |
| Amy Adderley | Freedom | To find peace | Her father’s control | Understanding her past |
Step 4: Breathing Life into Your Paragraph Summary: The One-Page Plot
Every great story begins with a spark, but turning that spark into a blazing fire requires some effort. In this step, we will take each sentence from your one-paragraph summary and expand it into a full paragraph. This process effectively creates a one-page plot summary that reads like a miniature version of your novel.
This is where your story starts breathing. I’ll show you how to add texture, dialogue snippets, and sensory details that transform a simple line like “Bernie investigates” into a vivid scene. Picture Bernie in his office, with whisky in the desk drawer, trying to resist the temptation. A big, scary guy walks in, ready to hire him. The stakes are high, and the tension is palpable.
Turning Five Sentences into Five Paragraphs of Narrative Muscle
Randy Ingermanson’s “disaster” rule is gold here. Ending each paragraph with a cliffhanger or major plot point creates natural propulsion that carries through to your actual chapters. For example, after Bernie refuses the job, he jots down the henchman’s registration plate and calls his former colleagues in the police. This simple action leads him to a nightclub where he discovers a connection to Dorcan Adderley, his past coming back to haunt him.
This stage typically takes a few hours, but the time investment pays off. You’re essentially stress-testing your plot to see if each act has enough meat to sustain reader interest. Using Storyloft’s workspace can help you flesh out chapter descriptions and subpoints without losing sight of the big picture.
The one-page plot becomes your working document—detailed enough to guide your writing yet flexible enough to accommodate the discoveries you’ll make during drafting. I’ll also address the common fear of “over-outlining.” This level of detail actually frees you to write better prose because you’re not simultaneously inventing plot.
By the end of this section, you’ll have a clear method for transforming your five-sentence summary into a robust one-page synopsis. This document will prove that your story has legs and is ready for the next phase of development.
Step 5: Crafting Character Bibles and Synopses
Crafting compelling characters is where the magic of storytelling truly begins. In this step, I’ll roll up my sleeves and get my hands dirty. Armed with your short character summaries and your one-page plot, you will create a one-page dossier for each major character. For minor characters, a half-page will suffice.
This isn’t just about listing favorite colors or hobbies. It’s about digging deep into backstory wounds, secret desires, and contradictory traits. These elements make your characters feel like real people you’ve actually met.
For each character, I’ll guide you through writing a personal synopsis. This synopsis will track their individual journey through the novel. It’s vital to note what they know at every key moment and how their knowledge—or ignorance—drives the plot.
The Secret Sauce Behind Motivations and Conflict
This step is absolutely critical for mystery and suspense writers. Mapping each character’s information timeline prevents those embarrassing moments where the detective magically knows something they shouldn’t. Using my cast—Bernie the lonely cellist, Amy the classical-singing ghost, Dorcan the monstrous father, and Paul Prettyboy the art-dealing thug—I’ll demonstrate how character bibles reveal hidden connections and conflicts.
Writing these dossiers often sends you back to revise earlier steps. This isn’t a bug; it’s a feature of the iterative design of this approach. Randy Ingermanson recommends spending a few hours on each character. This focused time investment yields exponentially richer scenes when you finally start drafting.
Also, consider how Storyloft’s AI companion can accelerate this stage. It generates character prompts and creative notes that spark ideas you might not have reached on your own.
By the end of this section, you’ll understand why character bibles are the secret weapon that separates professional-grade outlines from flimsy ones. You’ll also have a template to create your own.
| Character | Backstory | Motivation | Conflict | Knowledge Timeline |
|---|---|---|---|---|
| Bernie Brandon | Ex-cop with a troubled past | Redemption | His drinking problem | Knows the case but struggles with his demons |
| Amy Adderley | Classically trained singer, victim of her father’s control | Freedom | Her father’s influence | Knows her past but seeks peace |
| Dorcan Adderley | Wealthy, controlling father | Power | His daughter’s death | Knows more than he lets on |
| Paul Prettyboy | Art dealer with a shady side | Wealth | His connections to crime | Knows the underworld but plays both sides |
Step 6: Building a Four-Page Synopsis and Scene List
The journey from a brief summary to a comprehensive outline is where the real magic happens. In this step, I’ll guide you through the final expansion: taking each paragraph from your one-page plot and growing it into a full page. This results in a four-page synopsis that captures every major beat of your novel in rich detail.
This is where restraint matters. You might feel tempted to write lush prose, but I urge you to keep every sentence tight and purposeful. Focus on advancing the plot logic instead of embellishing the narrative.
From Paragraphs to Pages: The Final Expansion Before Drafting
The crown jewel of this step is the scene list. This is a comprehensive breakdown of every single scene in your book, detailing who’s in it, what happens, and how it moves the story forward. A well-crafted scene list functions as a diagnostic tool, helping you spot plot holes like a character being in two places at once or a clue appearing before it’s discovered.
Using examples from my detective story, I’ll demonstrate how the scene list transforms the abstract “Bernie investigates” into concrete, sequential moments that you can actually sit down and write. This is the point where the outlining process delivers on its promise: you’ll have a character bible, a four-page synopsis, and a scene-by-scene roadmap that eliminates the terror of the blank page.
Additionally, I’ll connect this to how Storyloft’s outline generator automatically produces a structured chapter-by-chapter breakdown with subpoints and descriptions. This tool essentially does the heavy lifting for you, making your outlining process even smoother.
Remember, the scene list isn’t a prison. It’s a living document you can revise as your characters surprise you during drafting. Having it means you’ll never wonder what to write next.
By the end of this section, you’ll understand how all six steps culminate in a complete novel foundation. This foundation will let you start your first draft with confidence instead of dread.
| Step | Description |
|---|---|
| Expansion | Transform each paragraph into a full page for a four-page synopsis |
| Scene List | Detail every scene’s characters, actions, and plot advancement |
| Diagnostic Tool | Spot plot holes and ensure logical flow |
| Living Document | Revise as needed to reflect character developments |
Avoiding the Pitfalls: Common Mistakes Writers Make When Outlining
Many writers trip over common pitfalls when trying to outline their stories. It’s all too easy to get caught up in the excitement of plotting a novel, only to find yourself tangled in a web of mistakes. I’ve seen this happen time and again while reviewing outlines for publishers and fellow writers. Some issues are predictable and can be fixed in advance if you pay attention to the details.
One of the biggest mistakes is creating a plot that drags characters from beat to beat without believable motivation. The how matters just as much as the what. For instance, if a detective finds a clue, it’s essential to establish why they searched that specific location. Skipping this logic can leave readers confused and disengaged.
Writers often fall into the trap of using genre beat sheets. They focus so much on hitting the required suspense beats that they forget their character’s personality. This can lead to actions that feel forced and inauthentic. It’s crucial to keep your characters’ motivations at the forefront of your outline.
Another common pitfall is over-outlining to the point of rigidity. You want your outline to be a guide, not a straitjacket. If your characters surprise you—and they will—you need the flexibility to adapt without scrapping everything. The iterative nature of the outlining process can become a procrastination tool if you’re not careful.
Perfectionism can also be a roadblock. Writers often cycle through the first three steps of outlining, waiting for their one-sentence summary to be flawless before moving on. This can stall your progress. Instead, aim for a solid outline that feels “good enough” to start drafting.
Don’t neglect the motivations of secondary characters either. Even minor players need clear reasons for their actions to avoid plot contrivances. I learned this the hard way with my second novel, where overlooked character motivations led to a messy narrative.
To help you avoid these pitfalls, here’s a checklist of red flags to watch for as you build your outline:
| Common Mistake | Description |
|---|---|
| Lack of Character Motivation | Characters should have believable reasons for their actions. |
| Over-Reliance on Genre Beat Sheets | Focus on character personality, not just suspense beats. |
| Rigid Outlining | Maintain flexibility to adapt as characters evolve. |
| Perfectionism | Aim for progress, not perfection in your outline. |
| Neglecting Secondary Characters | Ensure all characters have clear motivations. |
By being aware of these common mistakes, you can build a stronger outline that will support your writing process. Avoiding these pitfalls will save you from the heartbreak of realizing your plot doesn’t hold water at the 20,000-word mark.

Why Character Motivation Is Your Best Friend in Story Planning
Without strong character motivation, even the best plots can fall flat. When crafting a story, understanding who your characters are is crucial. Their motivations shape the choices they make, which in turn drives the plot forward. If your protagonist is selfish or selfless, their actions will reflect that. A character with a clear goal or a specific focus will influence their journey throughout the novel.
Neglecting character motivation can lead to a draft where actions feel arbitrary. If you haven’t thought about why your characters do what they do, readers will sense the disconnect. Planning character motivations in advance makes it easier to write authentically. When motivation is clear, it shines through in the writing, creating a more engaging story.
Let’s break down why character motivation is essential:
- Character motivation is the engine that drives every plot point. If you overlook it, your story risks collapsing into a series of random events.
- Take my detective, Bernie Brandon. His loneliness, drinking, and cello playing aren’t just quirks; they fuel his decisions and emotional journey.
- Understanding the difference between external goals (solving a murder) and internal needs (seeking connection) is vital for character arcs.
- The snowflake method’s character bibles help surface these motivations, ensuring your characters act in psychologically believable ways.
- Imagine discovering at the end of your draft that your protagonist had no real reason to pursue the villain. Front-loading motivation work prevents that nightmare.
- Conflict arises naturally from clashing motivations. When Bernie seeks justice but Dorcan wants to cover up the truth, the plot writes itself.
- For every major plot beat, ask, “Why does this character care?” If the answer is simply “because the plot needs them to,” you’ve got work to do.
- Motivation is the invisible architecture of your story, and the iterative loops of the snowflake method ensure your characters’ hearts beat beneath the action.
By the end of this section, you’ll never mistake a character’s quirk for their motivation again. Strong outlines lead to stronger narratives, making your story compelling and cohesive.
| Aspect | Description |
|---|---|
| Character Motivation | The driving force behind character actions |
| External Goals | What the character wants to achieve |
| Internal Needs | Emotional desires that shape character behavior |
| Conflict | Arises from opposing character motivations |
| Importance of Planning | Prevents arbitrary actions and enhances story depth |
Using the Snowflake Method with Storyloft’s AI Companion: A Match Made for Writers
Every writer knows the struggle of turning ideas into structured narratives, but what if there was a way to make it easier? Enter Storyloft’s Free Book Outline Generator, a modern writer’s secret weapon. This tool pairs perfectly with the snowflake method, helping to eliminate the blank-page paralysis that haunts every author.
Instead of staring at an empty document, you’ll work alongside Eddy, Storyloft’s AI writing companion. Eddy guides you through a series of simple questions, transforming your answers into a complete, structured outline in minutes. This process is not just about chapter titles; it creates a full workspace that includes sections, detailed subpoints, chapter descriptions, creative notes, reader direction, and supporting context.
The AI doesn’t just organize your thoughts—it generates creative assets like intelligent planning notes and a concept book cover inspired by your idea. This makes your project feel tangibly real from the very first session.
Using the snowflake method, you start with a simple idea. Then, as you answer a few questions, Storyloft expands it into a working book foundation you can continue developing. For writers who find the later stages of the snowflake process daunting, such as character bibles and scene lists, Storyloft’s guided experience handles the heavy lifting while still giving you full creative control.
This tool works for both fiction and non-fiction, making it versatile enough for novelists, memoirists, and even business authors who need structured planning. The real magic lies in speed: what took me hours of manual expansion in the snowflake method, Storyloft accomplishes in minutes. This frees you to focus on the creative decisions that truly matter.
By the end of this section, you’ll understand why combining the snowflake method’s proven framework with Storyloft’s AI assistance is the smartest way to go from a flicker of an idea to a manuscript-ready outline without the usual agony.
| Feature | Description |
|---|---|
| Guided Experience | Works alongside Eddy, the AI companion, to streamline outlining. |
| Complete Workspace | Generates sections, subpoints, and creative notes for your book. |
| Creative Assets | Creates intelligent planning notes and a concept book cover. |
| Speed | Transforms hours of manual work into minutes of efficient outlining. |
| Versatility | Suitable for fiction, non-fiction, and various genres. |
Tips for Keeping Your Outline Flexible and Fun
Writing a novel is an adventure, not a straight line. It’s a journey filled with twists, turns, and delightful surprises. The best outlines embrace this unpredictability. They leave room for those happy accidents that can make your story sing. So, how do you keep your outline both flexible and enjoyable? Let’s dive in!
Why the Best Outlines Leave Room for Happy Accidents
First, it’s essential to understand that creativity is often slow and jumpy. Unlike writing a report where you simply clock in hours, crafting a novel requires more than just time at the keyboard. Sometimes, the best ideas come when you’re not actively writing. Taking a walk, listening to music, or even swimming can spark those breakthrough moments.
Don’t be afraid to make mistakes; they are part of the creative process. Just like when you go clothes shopping, you have to try on different ideas to see what fits. Most of the time, you’ll look in the mirror and think, “Nope, not quite right.” But that’s okay! You won’t find what works without experimenting. Your first draft outline is a space to explore ideas and see what they can become.
Here are some practical tips to keep your outlining process lively:
- Think of your outline as a living document: The best outlines evolve. They aren’t set in stone. The iterative design of this process allows for revisions that can lead to wonderful discoveries.
- Give yourself permission to step away: If you’re stuck, take a break. Go for a walk or engage in a different activity. Breakthroughs often come when you least expect them.
- Celebrate the “bad” ideas: When you throw away an idea that didn’t work, remember it got you closer to something great. Each discarded concept is a step forward.
- Keep a “maybe later” document: Jot down ideas that don’t fit now but might inspire future projects. This way, you won’t feel like you’re wasting good material.
- Know when your outline is “done enough”: It’s okay to start writing without knowing every detail. Trust that some discoveries will happen during the drafting process.
- Maintain momentum: Treat each step as a playground rather than a chore. This mindset helps keep the fun alive in your writing.
By the end of this section, you’ll have a toolkit for keeping your outlining process joyful and flexible. Remember, the goal is to finish your plan, not abandon it in frustration. Embrace the journey, and let your outline be a guide that adapts as your story unfolds.
| Tip | Description |
|---|---|
| Living Document | Allow your outline to evolve as your story develops. |
| Take Breaks | Step away when stuck to encourage fresh ideas. |
| Celebrate Mistakes | Recognize that discarded ideas lead to better ones. |
| Maybe Later Document | Save ideas for future projects to avoid waste. |
| Done Enough | Start writing with a flexible outline, trusting the process. |
| Maintain Momentum | Keep outlining fun to prevent burnout. |
How the Snowflake Method Saved My Writing—and Can Save Yours Too
Reflecting on my early writing days, I realize I jumped into my first novel without a safety net. I didn’t write a plot outline. I didn’t sit down to plan my story. I simply sat down and wrote a book. Surprisingly, that book worked out well. It sold for plenty of money and became a bestseller. I thought, “Yep, I can do this. I’m a great writer. Of course, I don’t need to plan my next novel. I’ll just figure it out as I go along.” Big mistake.
My second book was so bad that my editor called me in and told me it was completely unpublishable in its current form. That moment was a wake-up call. I rewrote that novel, and this time it did fine. I date my writing career—my real writing career—from there. You’re reading this post because you’re smarter than I was back then. You’ve figured out not just that you want to start writing a novel, but that you want to plan it too.
Let me bring the story full circle. I went from a cocky debut novelist to a humbled second-book failure. Discovering the snowflake method marked the true beginning of my professional writing career. That moment of hitting Ctrl-A and deleting an entire manuscript wasn’t just a low point—it was the catalyst that forced me to respect the craft of planning.
Contrast the false confidence of my first novel’s accidental success with the earned confidence of my second novel’s deliberate construction. Sustainable writing careers are built on method, not magic. The snowflake method didn’t just give me a better outline—it provided a repeatable process I could trust for every subsequent book.
For instance, it helped me catch a timeline inconsistency before I wrote 50,000 words. It also revealed a character’s hidden motivation that transformed a flat antagonist into a complex villain. You’re already smarter than I was because you’re seeking out a planning method before you’ve crashed and burned. The snowflake method can be your shortcut to professional-grade storytelling.
Now, I acknowledge that no method is a silver bullet—you still have to do the work. But the snowflake method ensures that your work is directed toward building something solid rather than wandering in circles. If I could go from deleting an unpublishable manuscript to building a career I’m proud of, you can absolutely use these same tools to bring your story to life.
By the end of this section, I hope you’ll feel not just informed but inspired, ready to take the snowflake method and make it your own.
Conclusion
Every aspiring author knows that turning an idea into a full-fledged story can feel like climbing a mountain. But now, with the right plan in hand, you can conquer that peak. The snowflake method offers a systematic, brain-friendly way to transform your initial thought into a comprehensive outline.
The six steps we’ve explored—from crafting a one-sentence summary to developing a detailed scene list—aren’t just arbitrary tasks. They mirror the creative process itself, guiding you through each stage without overwhelming you.
What’s more, the true gift of this approach lies in the confidence it instills. You’ll know your story holds together before you dive into the lengthy drafting phase. For those eager to speed things up, Storyloft’s AI companion, Eddy, can help you generate a structured workspace in minutes.
Remember, planning doesn’t stifle creativity; it channels it, giving your imagination a framework to flourish. So, why wait? Open a document, jot down one sentence about your story, and let the momentum of the snowflake method carry you forward.
Every writer’s journey is unique, and feel free to adapt these steps to suit your rhythm. The only real failure is getting stuck at the blank page. With this method in your toolkit, you’ll never face that paralysis again. Your novel deserves a solid foundation, so go ahead and make some snowflakes!
FAQ
What is the Snowflake Method?
It’s a unique approach to story planning that helps writers develop their ideas from a single sentence to a full outline, making the process less daunting and more structured.
How can I get started with this outlining technique?
Begin by crafting a one-sentence summary of your story. From there, expand it into a paragraph, then outline your characters, and gradually build your way to a full draft.
Is this method suitable for all types of writers?
Absolutely! Whether you’re a seasoned novelist or a newbie, this technique can help clarify your thoughts and organize your narrative effectively.
Can I modify the steps to fit my writing style?
Of course! The beauty of this process is its flexibility. Feel free to adapt the steps to suit your creative flow.
What if I get stuck while outlining?
Take a break! Sometimes stepping away can provide fresh insights. Also, remember that outlines are meant to be adjusted, so don’t be afraid to change things up.
How long does it take to complete the Snowflake Method?
The time varies depending on your story complexity and personal pace. Some may finish in a few days, while others might take weeks. Just enjoy the journey!
Can I use this method for short stories too?
Definitely! While it’s often used for novels, the principles can be applied to any narrative length. It’s all about clarity and structure.
What if my characters change during the writing process?
That’s completely normal! Characters often evolve as the story unfolds. Just keep your outline flexible to accommodate these changes.
Do I need to follow every step strictly?
Not at all! Think of the steps as guidelines rather than rules. Feel free to skip or rearrange them based on what works best for you.
How does this method help with writer’s block?
By breaking your story down into manageable parts, it reduces the overwhelm that often leads to writer’s block. You’ll have a clear path to follow!