Novel Writing Outline Step-by-Step Guide for Success

Picture this: it’s October, and the excitement of National Novel Writing Month (NaNoWriMo) is in the air. I remember sitting at my desk, a steaming cup of coffee in hand, staring at a blank page. The clock was ticking, and I felt the pressure to create. Many writers, like me, face this moment of panic. Should I plan ahead or dive right in?
Some authors swear by their meticulous plans, crafting detailed structures before typing a single word. Others, the so-called “pantsers,” prefer to write spontaneously, letting their ideas flow without a roadmap. But what if I told you that you could blend both approaches? With the right tools, you can transform that initial spark of an idea into a solid plan, ensuring you won’t hit a wall halfway through your story.
That’s where Storyloft’s Free Book Outline Generator comes in. This amazing tool helps you work alongside Eddy, your AI writing companion, to build a comprehensive outline. No more blank pages or chaotic thoughts—just a clear path from concept to manuscript.
Let’s embark on this journey together and explore how to turn your ideas into a structured plan that will guide you every step of the way.
Key Takeaways
- Learn how to create a structured plan from your initial idea.
- Discover why an outline can enhance creativity instead of stifling it.
- Utilize Storyloft’s tools to streamline your planning process.
- Understand the balance between planning and spontaneity in writing.
- Explore various story structures to enhance your narrative.
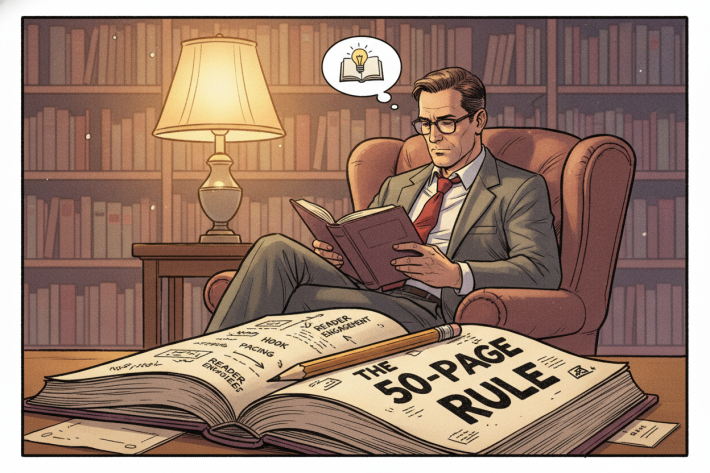
Why a Novel Writing Outline is Your Best Friend
Imagine staring at a blank canvas, where every stroke could create a masterpiece or a mess. That was me, once upon a time, grappling with the daunting task of crafting my first story. I remember the anxiety that crept in as I faced that empty page. My head was brimming with ideas, yet they vanished the moment my fingers touched the keyboard.
When I wrote my first draft without a plan, it felt like trying to solve a Rubik’s Cube blindfolded. The result? A tangled mess of plot points that didn’t align, and characters who forgot their motivations by chapter fifteen. I spent a year revising that draft, feeling like a literary serial killer as I had to *kill my darlings* left and right.
A solid plan, or outline, provides the necessary structure that keeps your story from wandering off into the weeds. Trust me, that’s where most manuscripts go to die. It tempers your pacing, ensuring you don’t end up with three chapters of exposition followed by a dizzying sprint to the climax. Instead, it helps you maintain a steady rhythm that keeps readers engaged.
Character development becomes intentional rather than accidental. With a clear outline, you can map out how your protagonist grows, instead of hoping they figure it out on their own. This foresight saves you time in the long run, allowing you to catch fatal flaws before you’ve written 50,000 words in the wrong direction.
Here’s the plot twist: outlining doesn’t strangle creativity; it actually frees up your mental bandwidth. You can focus on crafting gorgeous prose instead of frantically solving plot holes. Tools like Storyloft’s Free Book Outline Generator and Eddy, your AI writing companion, help you build a complete, usable outline in minutes rather than weeks.
In my experience, a novel outline is less like a straitjacket and more like a safety net. It catches you when your story takes an unexpected leap, guiding you back on track while you explore the wild terrain of your imagination.
Understanding the User Intent: Writing With a Plan
Every writer knows the thrill of starting a new journey, but without a map, it can quickly become overwhelming. Crafting a story is not just about pouring words onto a page; it’s about navigating through a labyrinth of ideas and emotions. This is where a structured plan comes into play, providing clarity and direction for your long-term projects.
Clarity and Direction for Long-Term Projects
Writing a book is a marathon, not a sprint. Without a plan, you’re essentially trying to build a house without blueprints—possible, but you might end up with a door on the ceiling. An outline acts as your story’s compass, keeping you on track when the journey gets confusing. Instead of constantly thinking about what happens next or how to weave subplots together, you can focus on the actual writing.
With a structured outline, you free up mental space. You can channel your energy into crafting compelling characters and vivid scenes. This clarity saves time and prevents the frustration of plot holes. A well-thought-out plan helps you identify which elements of your story need more research before you dive into the draft.
Balancing Structure and Flexibility
Balancing structure and flexibility means your outline is a guide, not a prison sentence. You can take detours when inspiration strikes without getting hopelessly lost. It’s essential to maintain a clear goal for each chapter. This approach prevents you from writing scenes where characters just drink coffee and contemplate their feelings for three pages.
As you answer a few simple questions, Storyloft builds a complete, usable outline—not just chapter titles. Your generated workspace includes a structured outline with sections and chapters, detailed subpoints, chapter descriptions, creative notes, reader direction, and supporting context to help you move from planning into writing.
Keeping Your Readers Hooked
Keeping readers engaged requires intentional pacing. An outline lets you see the big picture, helping you know exactly where to plant those cliffhangers. Trust me, there’s nothing quite like the confidence of sitting down to write, knowing exactly where your protagonist is headed and why.
| Benefit of Outlining | Description |
|---|---|
| Clarity | Helps you understand the flow of your story and character arcs. |
| Time-Saving | Reduces the need for extensive revisions by identifying issues early. |
| Focus | Allows you to concentrate on writing instead of problem-solving. |
| Engagement | Ensures that pacing keeps readers interested throughout the story. |
My Take on Pantsers vs Outliners
As I navigated my writing journey, I discovered that writers often fit into two intriguing categories. On one side, we have the pantsers, who write by the seat of their pants. On the other, we find the outliners, who meticulously plan every detail. Both approaches have their charm, and understanding them can help you find your unique path.
Who Are Pantsers and Why I Could Relate
Pantsers, like Stephen King and Jerry Jenkins, embrace spontaneity. They throw their characters into challenging situations and see what unfolds. I used to be a die-hard pantser, convinced that outlining would suck all the joy out of writing. To me, it felt like turning my novel into a paint-by-numbers disaster.
But here’s the kicker: about half of all novelists are pantsers. They thrive on the thrill of discovery, crafting stories as they go. And honestly, that sounds romantic as hell!
What Outliners Bring to the Table
On the flip side, outliners bring precision to the writing process. They know their characters’ backstories and have mapped every plot twist. This method can save time and effort, as outliners rarely waste months on scenes that end up in the trash.
While I appreciate the spontaneity of pantsing, I’ve learned that outliners can create a solid foundation for their stories. They prevent confusion and ensure a coherent flow, making it easier to engage readers.
Finding Your Hybrid Writing Style
The truth is, most writers are hybrids. I’ve found my sweet spot by doing just enough planning to avoid disaster while leaving room for serendipity. If you try outlining and feel an overwhelming urge to just start writing, congratulations, you’re probably a pantser—and that’s perfectly fine.
However, if you dive into a draft and feel lost because you don’t know your characters well enough, you might be an outliner who needs to back up and plan. This is where Storyloft’s Free Book Outline Generator comes into play. It helps both pantsers and outliners find their groove, whether you need a loose roadmap or a detailed chapter-by-chapter plan.
Ultimately, the pantser vs. outliner debate is less about right and wrong. It’s about finding the process that keeps you writing. The goal isn’t to conform to some writerly identity; it’s to finish a story you’re proud of, using whatever combination of planning and pantsing gets you there.
The Classic Three-Act Structure Explained
Have you ever wondered how the best stories unfold with a perfect rhythm? The classic Three-Act Structure is the granddaddy of story frameworks. Once you grasp it, you’ll start spotting it everywhere—from blockbuster movies to the novels on your nightstand.
Act One is all about setup. You introduce your protagonist in their ordinary world, establish the stakes, and then hit them with an inciting incident that changes everything. Think of Bilbo Baggins in The Hobbit. He’s living his best hobbit life until Gandalf shows up and suddenly he’s hosting thirteen dwarves and signing up for dragon-related danger.
Act One: Setup and Inciting Incident
The turning point at the end of Act One is crucial. This is when your protagonist commits to the journey, and there’s no going back. Bilbo literally runs out of Bag End without his pocket handkerchief! This moment sets the stage for the adventure that follows.
Act Two: Rising Action and Midpoint
Act Two is the meaty middle where rising action piles on the obstacles. Your character faces a midpoint that’s either a false victory or a crushing defeat. In The Hobbit, Bilbo’s midpoint occurs when he successfully steals the jewel from Smaug but accidentally awakens a dragon who then burns Lake Town to the ground—talk about mixed results!
Act Three: Climax and Resolution
Finally, Act Three delivers the climax, falling action, and resolution. Here, your protagonist returns home fundamentally changed. Just like Bilbo, who comes back to Hobbiton with a magic ring and a spine of steel, your character’s journey should reflect significant growth.
This story structure works because it mirrors the natural arc of storytelling that readers instinctively recognize and crave. When you use Storyloft to build your outline, you can map your entire three-act structure with detailed subpoints and chapter descriptions that keep you on track.
I love this structure because it’s simple enough to remember but flexible enough to accommodate everything from literary fiction to space operas.

Breaking Down Save the Cat’s 15 Beats
Crafting a compelling story requires a roadmap, and Save the Cat provides just that. This structure, originally designed for screenplays, adapts beautifully to novel writing. It offers a beat-by-beat guide that can elevate your storytelling.
Let’s explore the key beats in this structure, breaking them down into three acts that guide your protagonist’s journey.
Act I: Exposition Beats
- Opening Image: This beat shows your protagonist in their natural habitat. It often includes the “Save the Cat” moment, where the hero does something likable, ensuring readers root for them from the start.
- Theme Stated: Here, you subtly plant the life lesson your hero must learn. If done right, readers won’t even notice the profundity.
- Setup: Present the current circumstances and introduce side characters that will play pivotal roles.
- Catalyst: This moment sets off the major events of your story, acting as the spark that ignites the action.
- Debate: Your hero wavers, asking, “Should I really do this?” This is the classic existential crisis moment.
Act II: Fun & Games to Dark Night of the Soul
- Break Into Two: The hero takes action, leaving their ordinary world behind.
- B Story: This subplot often involves a love interest or mentor, adding depth to the narrative.
- Fun & Games: This is the longest beat, where your hero faces a series of challenges, exploring the new world and often getting into trouble.
- Midpoint: Here, you deliver either a false victory or defeat, raising the stakes for your protagonist.
- Bad Guys Close In: The tension escalates as things either worsen or improve, depending on the midpoint.
- All is Lost: This beat pushes your hero to their absolute lowest point, creating a moment of despair.
- Dark Night of the Soul: This is where the protagonist faces utter defeat, often stemming from their own flaws. It’s a brutal but necessary moment for character growth.
Act III: Break Into Three and Finale
- Break Into Three: The hero realizes that all isn’t lost, leading to a new understanding.
- Finale: This is where the hero proves they’ve changed, showcasing their growth throughout the story.
- Final Image: Paralleling the Opening Image, this moment shows how your protagonist has transformed, providing a satisfying conclusion.
Using Storyloft’s structured outline with detailed subpoints and creative notes makes mapping these 15 beats feel less like homework and more like assembling the blueprint for a page-turner. With this roadmap, you’ll be well on your way to crafting stories that captivate and resonate with readers.
Journey through The Hero’s Journey
Understanding the steps of a hero’s journey can transform your story from ordinary to extraordinary. This framework, popularized by Joseph Campbell, serves as a vital tool for any storyteller. It provides a roadmap that helps shape your characters and their arcs, guiding them through trials and tribulations.
The Hero’s Journey unfolds in three acts, each filled with pivotal moments that drive the plot forward. Let’s dive into these stages, starting from the Ordinary World to the Meeting of the Mentor.
Ordinary World to Meeting the Mentor
Every great story begins in the Ordinary World, where your protagonist lives their daily life, blissfully unaware of the adventure ahead. This stage is crucial for establishing your character’s normalcy and setting the stage for the transformation to come.
Then comes the Call to Adventure, an event that forces your hero outside their comfort zone. Often, they may experience a Refusal of the Call, which is wonderfully relatable. Who hasn’t hesitated when destiny comes knocking?
Finally, the Meeting of the Mentor occurs. This is where your hero receives the guidance they need to face the challenges ahead. Whether it’s a wise old wizard or a seasoned warrior, the mentor’s role is to prepare the protagonist for the journey.
Tests, Ordeals, and Rewards
Once the hero crosses the First Threshold, they fully commit to the journey. This is where the real fun begins! Your protagonist will encounter Tests, Allies, and Enemies, populating the story with interesting characters and obstacles.
The Ordeal represents the hero’s greatest challenge, a confrontation with their deepest fears. Surviving this test leads to the Reward, which isn’t just a shiny object but often a deeper understanding of themselves or their purpose.
Return and Transformation
The Road Back is fraught with dangers as the hero makes their way home. This isn’t a leisurely stroll; it culminates in a Resurrection, where they face one final test before the happy ending.
Finally, the hero Returns with the Elixir, transformed and carrying valuable insights or powers that change their world. This structure provides a strong framework for character arcs and conflict resolution, making it ideal for epic stories.
Along the way, Storyloft generates creative assets to make your project feel real early in the process. You’ll receive intelligent planning notes and a concept book cover inspired by your idea, setting the stage for your unique journey.
| Step | Description |
|---|---|
| Ordinary World | Establishes the hero’s everyday life before the adventure begins. |
| Call to Adventure | An event that forces the hero to leave their comfort zone. |
| Meeting the Mentor | The hero receives guidance to face upcoming challenges. |
| Tests, Allies, Enemies | Obstacles and new characters that shape the hero’s journey. |
| Ordeal | The confrontation with the hero’s greatest fear. |
| Return with the Elixir | The hero returns home changed, carrying valuable insights. |
The Snowflake Method: Building Complexity Step-by-Step
When it comes to crafting a compelling story, structure is key. The Snowflake Method, developed by Randy Ingermanson, is a brilliant way to build your plot layer by layer. This method starts with a simple one-sentence summary and expands it into a detailed outline, much like a snowflake accumulating complexity.
Let’s break down the steps of this process. First, you begin with a one-sentence summary that captures the essence of your story. For example, “Bilbo Baggins, a hobbit, is persuaded by the wizard Gandalf to join a quest to reclaim a dragon’s hoard of treasure.” This sentence serves as the seed for everything that follows.
One-Sentence Summary and Expanded Plot
Next, you expand that single sentence into a paragraph. This paragraph should cover the core conflict, the protagonist’s journey, and the beginning, middle, and end of your narrative. This step helps clarify your story’s direction and keeps you focused on the main ideas.
Character Summaries and Profiles
After establishing your plot, it’s time to dive into your characters. Create brief profiles that identify each major character’s core traits, roles, and motivations. Following this, develop full character profiles that explore backstory, personality traits, and relationships. This ensures that your characters are well-rounded and relatable.
From Multi-Page Synopsis to Final Outline
The next step is crafting a multi-page synopsis. Here, outline major scenes, key plot points, and character arcs. This detailed map of your story helps you see how everything fits together. Finally, you can create a complete outline that includes detailed subpoints and chapter descriptions, ensuring that you have a solid framework to guide your writing.
The Snowflake Method is perfect for those who have a concept but feel overwhelmed by the details. It allows complexity to emerge naturally, making the writing process feel more manageable. Plus, with Storyloft’s Free Book Outline Generator, you can turn your initial idea into a complete, usable outline in just minutes. This tool helps streamline your planning process, providing you with everything from structured outlines to creative notes.
In essence, the Snowflake Method transforms the daunting task of story creation into a step-by-step process. It reassures you that even the most intricate tales start with a simple idea. So, when you find yourself staring at a blank page, remember that every great story begins with just one sentence.
Freytag’s Pyramid and Plot Pacing
Have you ever noticed how some stories flow seamlessly from beginning to end? That’s the magic of Freytag’s Pyramid, a plot structure developed by novelist Gustav Freytag. This five-stage model serves as a roadmap for pacing your story effectively. It helps you ensure that every twist and turn is purposeful, keeping readers engaged throughout.
The first stage is the Exposition. This is where you introduce your setting, characters, tone, themes, and the major conflict. Think of it as the “once upon a time” portion of your tale. Here, readers get their bearings and understand the stakes involved.
Exposition and Inciting Incident
Next comes the Inciting Incident, the spark that propels your story into action. This moment is crucial as it shifts the narrative from the calm of exposition into the rising action. It’s the point where everything changes, and your protagonist is thrust into a new reality.
Rising Action, Climax, and Falling Action
As the story progresses, you enter the Rising Action phase. This is where you deepen the plot, reveal more character backstory, and steadily crank up the tension. Imagine tightening a screw; each twist adds pressure and excitement.
The Climax is the peak of your story. This is the moment where the conflict comes to a head, and your protagonist’s fate hangs in the balance. It’s what readers have been waiting for, the ultimate showdown that keeps them on the edge of their seats.
Following the climax, you transition into the Falling Action. Here, you resolve the consequences of the climax and tie up loose ends. This stage allows readers to catch their breath after the emotional rollercoaster they’ve just experienced.
Resolution That Resonates
Finally, you reach the Resolution. This is your story’s final bow, where everything ties in thematically with what came before. A satisfying ending resonates long after the last page is turned, leaving readers with a sense of closure.
Freytag’s Pyramid is less character-focused and more plot-driven, making it a perfect tool for getting major events down without overthinking every emotional nuance. I find it especially useful for ensuring my story has proper pacing—no saggy middles or rushed endings that leave readers feeling cheated.
With Storyloft’s working book foundation, you can map your entire pyramid and continue developing your manuscript without ever facing a blank page again. No complicated setup—just a faster way to go from idea to outline to manuscript.
Scene and Sequel: Making Every Scene Count
Scenes are the heartbeat of your story, and each one must pulse with purpose and intensity. The Scene and Sequel Method helps writers think of scenes as action units within the narrative. Each scene must have three critical elements: a goal, conflict, and disaster.
The goal is straightforward. Every character present should have a desire, want, or aim in every scene. This drives the action and keeps the plot moving. Your protagonist should want something, even if it’s just a glass of water—desire drives action, and action propels your story forward.
Next comes conflict. This arises from obstacles that prevent characters from achieving their goals. The best conflict stems naturally from who your characters are and what they face. It’s essential for creating tension and engagement.
Finally, the disaster wraps up the scene. It doesn’t have to be catastrophic; it just needs to propel the story forward and raise the stakes. A well-placed disaster keeps readers on their toes and eager to turn the page.
Sequels follow scenes and consist of three parts: reaction, dilemma, and decision. Here, your character processes what happened, faces a quandary, and chooses a new course of action. This rhythm of scene and sequel creates a natural ebb and flow, keeping readers engaged without overwhelming them with nonstop action.
I’ve found that defining scene goals and conflict in my outline prevents me from writing those meandering chapters where nothing happens except characters drinking tea. Storyloft’s detailed subpoints and chapter descriptions help you map out the goal, conflict, and disaster for every scene before you write a single word of prose.
When every scene counts, your story becomes a lean, mean, page-turning machine—and that’s exactly what readers and publishers are looking for.
Choosing the Right Outlining Method for You
Finding the perfect outlining method is akin to choosing the right ingredients for a delicious recipe. Each writer has their unique flavor, and what works for one may not suit another. The good news? There are various methods available, and it’s all about discovering what resonates with you.
Understanding your writing personality is crucial. If you thrive on details, a traditional chapter-by-chapter breakdown might feel like coming home. On the other hand, if you’re more visual, a mind map could unlock everything you need to create a captivating story.
Matching Methods to Your Writing Personality
Choosing the right outlining method is like finding the perfect pair of writing pants—what works for your favorite author might be completely wrong for you, and that’s okay. Experimenting with different approaches is part of the process. Try the Three-Act Structure for one project, the Beat Sheet for another, and see what sticks.
Experimenting with Traditional and Alternative Approaches
Alternative approaches can spark creativity when traditional methods feel stale. For instance, focusing on emotional arcs or outlining in reverse from your ending can lead to exciting discoveries. For multiple POV stories, color coding your outline by character helps you balance narratives and ensure no one disappears for fifty pages.
Tools and Resources to Help
Storyloft’s Free Book Outline Generator and Eddy, the AI writing companion, make experimentation easy. You can generate a complete, usable outline in minutes and tweak it to match your style. Tools like Scrivener, Plottr, and Dabble offer visual outlining features, but Storyloft goes further by generating creative assets like a concept book cover inspired by your idea.
Craft books like Save the Cat! Writes a Novel by Jessica Brody and Story Genius by Lisa Cron can deepen your understanding of story structure and character-driven plotting. Remember, the best outlining method is the one that gets you excited to write. If your outline feels like a chore, you’re using the wrong approach.
Your outline is a tool, not a tyrant; it should serve your story, not the other way around. So, embrace the process, experiment, and find the method that feels just right for you!
Six Practical Steps to Craft Your Novel Outline
Every great story begins with a single spark of inspiration, and that spark needs to be nurtured into a full-fledged plan. To guide you through this process, here are six practical steps to help you craft a solid outline for your story.
Step 1: Distill Your Idea into One Sentence
Step one is deceptively simple: distill your entire story idea into one sentence that captures its essence. Think of it as your elevator pitch for when you corner a literary agent at a party. For instance, Jerry Jenkins once wrote a novel based on the sentence, “A judge tries a man for a murder that the judge committed.” This single line became the novel Margo—proof that a strong premise can fit in one sentence.
Step 2: Pick Your Story Structure
Step two involves picking your story structure from a buffet of options. You could choose Dean Koontz’s Classic Story Structure, the Three-Act Structure, the Hero’s Journey, or even the Snowflake Method. Each structure offers a unique way to organize your plot and characters, so select one that resonates with your vision.
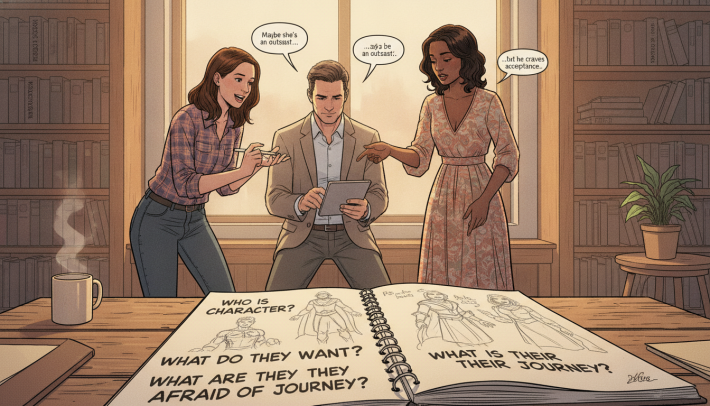
Step 3: Flesh Out Characters
Step three is where you flesh out your characters until they feel like real people. Conduct imaginary interviews, map their backstories, and make them human, vulnerable, and deeply flawed. This step is crucial because relatable characters drive your story forward.
Step 4: Map Your Plot
In step four, map your plot using a type that fits your genre. Whether it’s Adventure, Change, Romance, Mistake, Lure, Race, or Gift, each type gives your story a different flavor and momentum. Knowing your plot type helps you maintain focus and direction.
Step 5: Decide on Setting and Details
Step five is about deciding on your setting. Layer in sensory details as part of the narrative rather than dumping description like a travel brochure. Show, don’t tell, and make the world feel lived-in. This adds depth and richness to your story.
Step 6: Synopsize Chapters for Clarity
Finally, step six is synopsizing your chapters in third person, present tense. Leave no mysteries or teasers—this reveals fatal flaws in your story before you invest months in writing. This step ensures clarity and order in your narrative.
Storyloft’s Free Book Outline Generator walks you through these exact steps with Eddy, the AI companion. It builds a complete outline with detailed subpoints and chapter descriptions as you answer simple questions. By the end of these six steps, you’ll have a working book foundation and zero excuses to keep staring at a blank page.
The beauty of this process is that it works whether you’re a meticulous outliner or a pantser who just needs a loose roadmap to follow.
Tips for Balancing Planning with Creative Freedom
Every writer knows that the path to creativity is often a winding road filled with unexpected twists. To navigate this journey, it’s essential to find a balance between planning and the freedom to explore. Your outline should be fluid—able to change as you write and your plot develops. Its purpose is to keep you on track, prevent stalling, and provide a safety net.
Allowing for Flexibility in Your Outline
Think of your outline as a roadmap rather than a prison sentence. This flexibility allows you to take scenic detours without abandoning your destination. I’ve learned that the best outlines leave room for those magical moments of discovery where your character does something you never planned but feels absolutely right.
Revising Your Outline as Your Story Evolves
Revising your outline as your story evolves isn’t a sign of failure—it’s a sign that you’re paying attention to what your narrative actually needs. K.M. Weiland recommends reverse outlining for pantsers: start at the end and work backward, asking questions about how each event came to be. It’s like detective work for your own story!
Keeping Momentum Without Losing Direction
Keeping momentum without losing direction is the balancing act every writer faces. A flexible outline serves as your safety net when you’re walking that tightrope. When you hit the inevitable mid-draft slump, revisiting and refreshing your outline can reignite your excitement and help you push through creative blocks.
Along the way, Storyloft generates creative assets like intelligent planning notes and a concept book cover early in the process. This makes your project feel real and keeps your enthusiasm high. The goal is to find the sweet spot where planning supports your writing without suffocating the spontaneity that makes storytelling fun.
Remember, even Stephen King—the ultimate pantser—has an idea where he’s headed before he begins. An outline just makes that direction explicit.

Conclusion
As we reach the end of our exploration, it’s time to reflect on the journey we’ve taken together. We’ve traversed the landscape of story crafting, from classic structures to innovative methods. Remember, there’s no single right way to shape your narrative. The best approach is the one that fuels your excitement and keeps you motivated to type “The End.”
Whether you’re a meticulous planner or someone who thrives on spontaneity, the goal remains the same: to finish a book you can be proud of. With Storyloft’s Free Book Outline Generator and Eddy, your AI writing companion, transforming your idea into a structured plan is just minutes away. No more blank pages or complicated setups—just a seamless transition from concept to manuscript.
Your outline should be a helpful tool, not a constraint. It should adapt as your characters come to life and your plot unfolds. A little planning can save you time and heartache down the road, so embrace the process and enjoy the ride. Now, go forth, outline boldly, and write the story only you can tell. I’ll be cheering you on from the other side of the page!