How to Write a Book A Friendly Guide for Beginners

In 2005, Sara Gruen started writing “Water for Elephants” during National Novel Writing Month. She wrote 50,000 words in 30 days. This rough draft became a bestseller and a movie.
Starting to write a book can seem scary. Novels usually have about 100,000 words. That’s a lot of pages.
When I first wanted to write a book, I didn’t know where to begin. I was unsure if I should plan everything or just write freely. I worried if my story was good enough.
There’s no one right way to write a book. Some people plan everything out. Others just write as they go. You can write about anything you want.
This guide will share tips I wish I knew when I started. We’ll cover everything from finding your motivation to publishing your book. Whether you dream of writing a novel or a how-to guide, this guide will help.
Let’s get started.
Key Takeaways
- You can write a book no matter your experience level — every bestselling author was once a beginner with a blank page.
- A typical novel is about 100,000 words, but breaking it into daily writing goals makes the project manageable.
- Your motivation matters — knowing why you want to write a book keeps you going when the process gets tough.
- There’s no single correct approach; structured outlines and free-flowing drafts both produce great results.
- Practical book writing tips like setting schedules, using placeholder notes, and working with beta readers save time and stress.
- Learning how to write a book is a step-by-step journey that covers drafting, revising, editing, formatting, and publishing.
Understanding What You Want to Write and Why
Before you start writing, take a moment to think. Ask yourself why you want to write a book. Your reason will guide all your choices. A key piece of advice is to know your purpose clearly.
Identifying Your Writing Goals and Motivation
Your motivation is very important. Some writers have a story they can’t wait to share. Others aim to build a business or share their knowledge. Write down your purpose in one sentence. Keep it near your desk for motivation.
- Telling a personal story or memoir
- Entertaining readers with fiction
- Building authority in your field
- Generating business leads and revenue
- Leaving a legacy for family or community
Choosing Between Fiction and Nonfiction
Choosing fiction or nonfiction changes your project a lot. Fiction can be novels, novellas, or short stories. Nonfiction includes memoirs, journalism, history, and how-to books.
| Category | Example | Typical Word Count |
|---|---|---|
| Novel | Literary or genre fiction | 80,000–120,000 |
| Novella | Compact single-arc story | 17,000–40,000 |
| Memoir | Eat, Pray, Love by Elizabeth Gilbert | 70,000–100,000 |
| How-To | The 7 Habits by Stephen R. Covey | 50,000–70,000 |
Setting Clear Expectations for Your Book Journey
Knowing your goal is crucial. Do you want a traditional deal or self-publish? Choose your path early. This helps your research stay focused.
Different Types of Books You Can Create
Before starting your manuscript, it’s wise to look at all book types. Each one needs a special approach. Choosing the right one changes your writing path. Let’s explore the main categories together.
Fiction Options: Novels, Novellas, and Short Story Collections
Fiction offers a big playground. Novels are the most common choice. Think of classics like One Hundred Years of Solitude by Gabriel García Márquez or Beloved by Toni Morrison. Writing novels takes practice, but it’s rewarding.
Novellas are between short stories and novels. Works like Heart of Darkness by Joseph Conrad and The Alchemist by Paulo Coelho show its power. But, novellas can be hard to publish traditionally.
Short story collections, like Unaccustomed Earth by Jhumpa Lahiri, let you try different voices and themes in one book.
Nonfiction Categories: Memoirs, How-To, and Popular Nonfiction
Nonfiction covers many topics and styles. Here are some examples:
| Category | Example | Author |
|---|---|---|
| Biography | Lincoln | David Herbert Donald |
| Journalism | Nomadland | Jessica Bruder |
| History | Endurance: Shackleton’s Incredible Voyage | Alfred Lansing |
| How-To | The Joy of Cooking | Irma S. Rombauer |
| Science | The Origin of Species | Charles Darwin |
Digital Formats: Ebooks and Technical Manuals
Don’t forget about digital formats. Ebooks build trust and show expertise. Technical manuals add value to products. Both need clear, easy-to-read content.
Now you know your options. It’s time to prepare your manuscript for success.
Pre-Writing Research and Preparation
Before I start writing, I do a lot of research. This is a key step many miss. Whether it’s a thriller or a self-help book, good prep makes writing easier and faster.
For nonfiction, I read papers, interview experts, and visit places. If I’m writing about therapy, I study studies and talk to therapists. For fiction, I research real events and people to make my story believable.
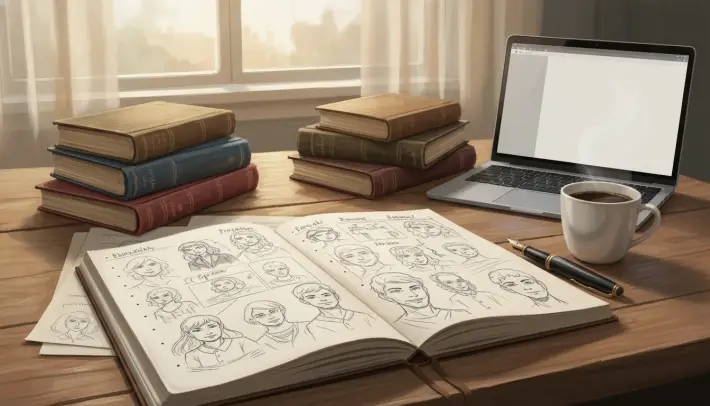
I also make character sketches and build my world. I plan out emotional arcs that feel real.
Reading a lot in my genre is one of my favorite tips. If I’m writing a space opera, I read Becky Chambers and Ann Leckie. This helps me understand what readers want and find new ideas.
Here’s a list of research tasks for different types of books:
| Research Task | Fiction | Nonfiction |
|---|---|---|
| Genre reading | Study similar novels for structure and tone | Review bestsellers in the same category |
| Expert interviews | Consult professionals for authentic details | Interview subject-matter experts for credibility |
| Internal development | Character sketches and world-building notes | Outline key arguments and unique perspectives |
| Theme exploration | Define emotional arcs like love or loss | Identify fresh angles on established topics |
Good prep helps me find unique themes and perspectives. After this, I’m ready to plan my book’s structure.
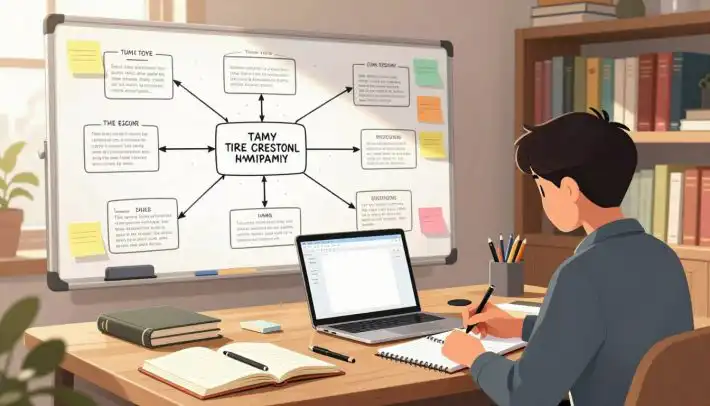
Planning Your Book Structure
Before you start writing a book, you need a plan. Some writers jump right in without a plan. Others need every chapter mapped out first. A good structure saves time and reduces stress.
Traditional Outlines and Their Benefits
A classic outline uses bullet points for each chapter. Start with the big picture — the beginning, middle, and end. Then, break each part into smaller pieces. This method helps you see your whole book at once.
It’s great for books with complex themes or many storylines.
Using Index Cards for Scene Organization
Index cards are a game-changer for writing. Write one scene or idea on each card. Spread them out to rearrange your book’s structure.
Apps like Scrivener offer virtual index cards for those who prefer digital.
Writing Treatments for Better Flow
A treatment is a short version of your book. It’s more natural than an outline and covers all key points. Start with a treatment to get the feeling of your story.
Then, break it into scenes on index cards for easier work.
| Planning Method | Best For | Level of Detail | Format |
|---|---|---|---|
| Traditional Outline | Structured thinkers | Moderate | Bullet points by chapter |
| Index Cards | Visual organizers | Scene-level | Physical or digital cards |
| Treatment | Narrative-driven writers | High-level flow | Short prose summary |
Choose the method that fits your style. Or mix them for a strong foundation before you start writing.
How to Write a Book Through Your First Draft
Your outline is ready. Your research is done. Now it’s time to write your first draft. This draft won’t be perfect. It just needs to exist.
I think of the first draft as a conversation with myself. I’m just telling the story from start to finish.
Setting a Consistent Writing Schedule
The best writing coach advice I ever got was simple. Pick a schedule and stick to it. Some writers wake up early to write before work. Others join NaNoWriMo each November.
Even writing on weekends can help.
Here’s what different schedules look like in practice:
| Writing Pace | Pages Per Week | Time to Complete a Draft |
|---|---|---|
| Daily sessions (1 hour) | 20–25 pages | 3–4 months |
| Weekend writing only | 10 pages | About 10 months |
| NaNoWriMo intensity | 40+ pages | 1 month (rough draft) |
Ten pages a week means you’ll finish a draft in under a year. That’s a real book from just weekends!
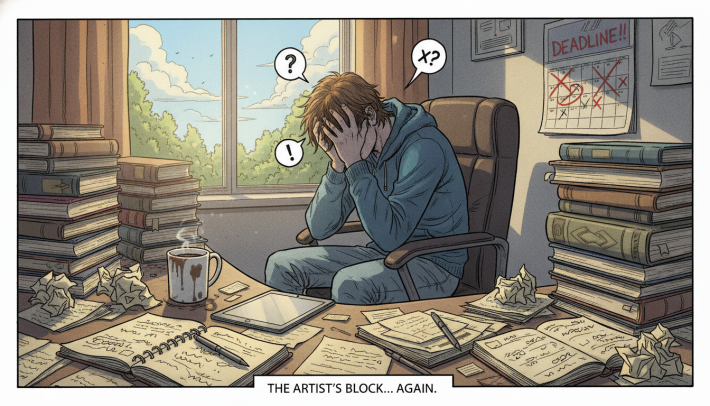
Dealing with Writer’s Block and Scene Challenges
When I hit a scene that feels impossible, I skip it. Seriously. I drop in placeholder text like “a bunch of scary stuff happens here” and keep moving forward.
Great writing coach advice centers on momentum. Don’t let one tricky scene stall your entire project.
I keep a running list of fixes I spot mid-draft. Notes like “change the sister to a brother before the boat scene” go on my revision list. I never stop to rewrite during the first draft.
Using TK Notes for Research Gaps
When you’re learning how to write a book, you’ll hit moments needing facts you don’t have yet. Use TKTK as a placeholder — short for “to come.” The letter combination TK rarely appears in English, so pressing Ctrl+F during editing finds every gap instantly.
- Write TKTK wherever you need a date, statistic, or name
- Keep writing without breaking your flow
- Search and fill all TKTK placeholders during revision
Once your first draft is complete, you’ll step into a crucial waiting period before diving into revisions.
The Waiting Period After Your First Draft
You just typed “The End” on your first draft. Congratulations! Now comes the hardest part for most writers — stepping away. It feels hard to wait. You want to fix things right away. But one of the best tips is to wait before you revise.
This waiting time is called the “resting period.” It lets your brain rest. When you come back, you’ll see things you didn’t before. You’ll spot plot holes, weak dialogue, and pacing issues.
“I always put a manuscript away after I finish it and start working on something else. When I come back, I can see the flaws.”
— Neil Gaiman
How long to wait? It depends on your schedule and writing style. Here’s a quick guide I found helpful:
| Wait Time | Best For | Level of Fresh Perspective |
|---|---|---|
| 1–2 weeks | Short stories or tight deadlines | Moderate |
| 4–6 weeks | Novels and memoirs | High |
| 3+ months | Complex multi-plot manuscripts | Very high |
While waiting, stay busy. You can:
- Start brainstorming your next project
- Read books in your genre for inspiration
- Journal about what felt easy and hard during your draft
- Study novel writing techniques from craft books like On Writing by Stephen King
The main tip is to be patient. Don’t rush. When you read your manuscript again, you’ll see what needs fixing more clearly.
Reading Your Manuscript for Major Revisions
You’ve waited and now it’s time to read what you wrote. This part can feel scary. But don’t worry, it’s not about fixing every sentence. It’s about seeing the big picture.
Grab a pen and print your draft if you like paper. Try not to rewrite as you go. Just circle awkward spots and keep reading.
One great tip is to use notecards to map out scenes after reading. If you skipped outlining, this is where structure shows up. You can move cards around until the story feels right.
Checking for Logical Inconsistencies
Look for details that don’t match. Did a character drive a blue car in chapter two and a red one in chapter ten? Did a timeline jump that doesn’t make sense? These mistakes happen during fast drafting. Write them down as you find them, but don’t fix them yet.
Evaluating Pacing and Structure
Notice where you feel bored or rushed. Slow parts might need cutting. Scenes that zip by might need more detail. Finding the right rhythm is key.
Ask yourself:
- Does the middle sag or lose momentum?
- Are there scenes that repeat the same emotional beat?
- Does the ending feel earned or abrupt?
Assessing Character Development
For fiction writers, this step is crucial. Follow your main character’s journey from start to end. Do they grow, change, or learn something important? Remember, readers forgive plot holes faster than flat characters. Make sure your characters feel real.
Write your second draft with the door still closed, but now you know where the walls are.
By the end of this read, you’ll have a clear plan for your second draft. And that’s where we’re headed next.
Writing Your Second Draft
Your first draft is complete, and you’ve had time to look at it again. Now, it’s time for the real magic. The second draft is where you make your book truly shine. It’s not just about fixing small things. It’s about changing your whole manuscript.
Think of the second draft like rebuilding a house. You might add new chapters or cut characters. The best advice is to make big changes.
Here’s what a strong second draft often involves:
- Writing new scenes or chapters to fix weak spots
- Removing subplots or characters that get in the way
- Doing more research to fill in gaps
- Changing the order of events for better flow
- Deepening emotional arcs based on your notes
Remember, you might need to go through this process many times. Stephen King says rewriting is key to writing.
Each time you revise, you get closer to your dream book. So, be bold in your second draft. Cut what’s not needed and add what’s missing. Aim for progress, not perfection.
Once you’re happy with the big picture, focus on the small details next.
Self-Editing for Grammar and Style
Your second draft is done. Now, it’s time to focus on the small details. Self-editing is all about making every word perfect. It’s like cleaning your house after a big renovation.
Fixing Grammar, Spelling, and Punctuation
I use Grammarly to check for mistakes. It finds typos and other errors my eyes might miss. Remember, never rely on a single tool. Read your work out loud after checking it with software. Your ears will catch things computers don’t.
- Check for homophones (their/there/they’re)
- Watch for inconsistent punctuation in dialogue
- Verify proper noun spelling throughout the manuscript
Improving Sentence Flow and Variety
Readers get bored with sentences that sound the same. I mix short and long sentences to keep things interesting. This makes the story flow better.
Reading your work out loud helps you find the right rhythm. It makes sure your story keeps readers engaged.
“Good writing is rewriting. The first draft is just you telling yourself the story.” — Terry Pratchett
Adjusting Language and Tone
The language should fit your audience. For example, if you’re writing for business owners, avoid jargon. Make sure your characters speak like they should.
In nonfiction, aim for a tone that’s both knowledgeable and friendly. Grammarly’s tone detector can help you see how your writing comes across.
After you’ve self-edited, it’s time to share your work with others. Your beta readers will give you fresh feedback.
Working with Beta Readers
After I’ve made my second draft shine, it’s time for fresh eyes. Beta readers give me real feedback before I publish. This step is crucial. The right feedback can turn a good book into a great one.

Choosing the Right Beta Readers
I choose beta readers who match my intended audience. For a marketing guide, I pick beginners, not experts. They help me spot confusing terms. I look for readers who understand my target audience, even if they’re not part of it.
Providing Clear Feedback Guidelines
I guide my beta readers without telling them what to say. Asking “How did chapters three through five feel?” is better than “Was chapter four slow?” The first question lets them share their true thoughts. The second might influence their answer. I ask broad questions about pacing, clarity, and emotional connection.
- Pacing and flow throughout the story
- Clarity of key ideas or plot points
- Emotional engagement with characters or content
- Sections that felt confusing or boring
Making the Process Easy for Your Readers
I make things easy for each reader. Some like paper, others ebooks. A small thank-you, like pizza or coffee, means a lot.
| Reader Preference | Format to Provide | Appreciation Idea |
|---|---|---|
| Reads on paper | Printed manuscript | Homemade treats |
| Uses a tablet | EPUB or MOBI file | Coffee gift card |
| Prefers a computer | PDF or Google Doc | Pizza night |
One of the best tips: if I can, I hire a professional editor too. They offer different views that make my book stronger. Then, I use their feedback to improve my manuscript.
Incorporating Feedback Effectively
Learning to write a book means facing feedback’s sting. You’ve poured your heart into it. But, criticism is a powerful tool. The trick is to listen first and react later.
When beta readers share their thoughts, don’t defend your choices. Ask questions instead. If a reader dislikes a character, find out why. Was the character supposed to be unlikeable? Did it serve your story’s purpose?
Not all feedback is equal. One reader’s opinion might just be their taste. But if many readers point out the same problem, listen. This is where good writing shines.
“You don’t have to take every piece of advice, but you do have to hear every piece of advice.” — Stephen King
I sort feedback before making changes with a simple system:
| Feedback Type | Example | Action |
|---|---|---|
| Repeated by multiple readers | “The ending felt rushed” | Revise this section — it’s a real issue |
| Single reader preference | “I wish the story had a romance subplot” | Consider, but likely skip |
| Factual or logical error | “This timeline doesn’t add up” | Fix immediately |
| Emotional reaction | “This scene made me uncomfortable” | Evaluate if discomfort was intentional |
To write a book that touches readers, be honest with yourself. Separate your ego from your work. Your story will improve, and you’ll grow as a writer with each feedback round.
Creating Front and Back Matter
Your manuscript is ready to shine. Before you start on page layout, set up your front and back matter. This step keeps your page count right from the start. Even simple gift books need these pages, and they’re quick to make.
Essential Front Matter Elements
Front matter comes before your main content. It guides readers into your book. Amazon KDP’s guidelines say a good front matter has:
- Half-title page — always on a right-facing page, showing only the book title
- Title page — right-facing, with your title, subtitle, and author name (skip the word “by”)
- Copyright page — the first left-facing page after the title page
- Dedication page — right-facing, kept simple
- Table of Contents — right-facing, matching chapter names exactly as they appear in the body text
None of these pages should carry page headers. Your half-title and copyright pages skip page numbers entirely.
Back Matter Components
Back matter wraps up the reader’s experience. It’s like your book’s closing handshake. Key elements include a bibliography, an author bio, and an index — each starting on a right-facing page. Your index should use a flush-and-hang style, where the first line sits flush left and continuation lines are indented.
ISBN and Copyright Considerations
Every self-publishing guide will tell you this: an ISBN is your book’s unique fingerprint. Retailers and distribution platforms need it to list and sell your work. Platforms like Lulu offer free ISBNs, or you can purchase one through Bowker, the official U.S. ISBN agency. Without an ISBN, your publishing process hits a wall at retail distribution. Grab one early and save yourself the headache.
Book Formatting and Design Basics
After you finish your manuscript, it’s time to make your book look like a real one. Formatting turns your text into a polished PDF. This PDF is ready for print and easy to read.
Choosing the Right Software
The tool you choose is very important. Think about your budget, skill level, and project needs. Here’s a quick look at some popular options:
| Software | Cost | Skill Level | Best For |
|---|---|---|---|
| Adobe InDesign | $22.99/month | Advanced | Industry-standard print layouts |
| Affinity Publisher | $69.99 one-time | Intermediate | Affordable pro-quality design |
| Atticus | $147.99 one-time | Beginner | Fast web-based formatting |
| Scribus | Free | Intermediate | Budget-friendly open-source option |
| Microsoft Word | Included with Office | Beginner | Simple ebook layouts |
Understanding Page Layout Elements
A clean layout uses consistent heading styles for chapter titles and body styles for main text. Any good self-publishing guide will tell you these basics:
- Headers and footers with page numbers and your book title
- Body text set between 10–14 point font size
- Justified text alignment for a professional look
- Proper page breaks instead of hitting “Enter” repeatedly
In the U.S., standard novel sizes are 5″×8″ or 6″×9″. Choose one early to keep your layout consistent.
Setting Up Margins and Gutters
Margins frame your text on the page, and the gutter is the inner margin where pages meet at the spine. If your gutter is too narrow, readers will struggle to read words hidden in the binding. I suggest at least 0.75 inches for the gutter and 0.5 inches for outer margins.
Getting these details right during manuscript creation sets you up for a smooth transition into choosing your publishing path — which is exactly what I’ll cover next.
Publishing Options for Your Completed Book
You’ve written, revised, and formatted your manuscript. Now, it’s time to share it with readers. There are many ways to publish, each suited to different goals and lifestyles.
- Traditional publishing — You pitch your book to literary agents. They work with big houses like Penguin Random House. They handle everything, and you get a share of the profits.
- Self-publishing — You do it all yourself, from cover design to marketing. You can earn up to 70% on ebooks.
- Online distribution — You publish books online for free. This helps you build an audience.
- Personal fulfillment — Some write for family, friends, or the joy of it.
Any good self-publishing guide will tell you that genres like science fiction and romance do well on their own. Writers in these fields often make more by publishing themselves and connecting with readers.
| Factor | Traditional Publishing | Self-Publishing |
|---|---|---|
| Timeline to Publication | 1–3 years | 1–3 months |
| Royalty Rate | 10–15% | 35–70% |
| Upfront Cost to Author | $0 | $500–$5,000 |
| Creative Control | Limited | Full |
| Marketing Responsibility | Shared with publisher | Entirely yours |
If money is your goal, do your research first. Know what readers want and where to find them. This advice is for both self-publishing and traditional publishing.
After choosing your path, design a cover that stands out. It needs to catch eyes on shelves and screens.
Creating a Compelling Book Cover
Your book cover is the first thing readers see. It makes a big impression in just a few seconds. A strong cover is very important. Before you share your book, it should look great on shelves and screens.

Design Elements That Attract Readers
A great cover has bold typography, a clear color scheme, and the right images. Different genres have different looks. Check out bestsellers in your genre to see what works.
- Use high-contrast fonts that stay readable at thumbnail size
- Pick two or three colors that evoke the right mood
- Keep the layout clean and uncluttered
Working with Graphic Designers
If you can, hire a pro for your cover. Sites like 99designs and Reedsy have great designers. Tell them about your genre, audience, and any image ideas you have. Good communication is key.
Cover Requirements for Print and Digital
Print covers need to be at least 300 DPI to look sharp. Ebook covers should load fast without losing quality. These tips will help you prepare your files.
| Specification | Print Cover | Ebook Cover |
|---|---|---|
| Resolution | 300 DPI minimum | 72–150 DPI |
| File Format | Flattened PDF | JPEG or PNG |
| Recommended Dimensions | 6″ x 9″ with bleed | 2,560 x 1,600 pixels |
| Font Embedding | All fonts embedded | Rasterized in image |
| Recommended Software | Affinity Designer, Adobe InDesign | Canva, Affinity Designer |
These tips on cover specs help your book look professional everywhere. With a great cover, you’re ready for launch day.
Conclusion
Learning to write a book is a journey. It starts with an idea and goes through many steps. I’ve shown you each step in this guide. Now, you’re ready to start your own project.
Stay consistent and trust the process. Keep moving forward, even when it’s hard. This is key.
After you finish your manuscript, the real work begins. Give it a final proofread to catch errors. If you’re submitting to agents or editors, use Times New Roman, 12-point font, double-spaced with 1-inch margins.
If you’re self-publishing, each platform has its own ebook formatting rules. Follow these to make your book look great.
Choosing a path is important, but starting is more important. You now know how to write a book from scratch. Open your document, set a writing schedule, and start telling your story. Your readers are waiting.