How to Write a Book: A Friendly Guide for Beginners

A writer sat by his wife’s bedside during her illness. He had no fancy office or ideal conditions. But he had a story burning inside him.
He typed away every night while she rested. By the time she recovered, he had a 190,000-word manuscript. This landed him a six-figure deal with HarperCollins and made his book a bestseller.
His story shows you don’t need perfect conditions to write a book. You just need a great idea and the will to see it through.
If you’re looking for a guide that’s easy to follow, you’re in the right place. This guide is for anyone with a dream and a blank page. Learning to write a book can seem hard at first.
But it starts with a simple idea that excites you enough to start writing.
Think of Stephenie Meyer’s Twilight. Critics didn’t praise the writing. But the idea was so strong. The same goes for Dan Brown, Stieg Larsson, and Stephen King.
Literary agents say a strong premise is key. Your idea is more important than perfect sentences in your first draft.
Where do great ideas come from? They come from the books you love and your passions. Think of settings, heroes, and challenges that fascinate you. Write them all down.
Choose from a place of abundance, not scarcity. One of my favorite tips is to take familiar ingredients and add an unexpected twist. Picture a 1940s detective story with a ghost. Or a romance in an unexpected place. That surprise is what grabs readers.
Before you start writing, read five or six recently published novels in your genre. Count the words on a typical page and multiply by the page count. This gives you a word count target for your book. It’s a small step, but it sets you on the right path from day one.
This friendly guide will take you through every stage of writing a book. From finding your idea to celebrating your finished manuscript. I’ll share practical tips that real authors use. Let’s get started.
Key Takeaways
- You don’t need perfect conditions to learn how to write a book — just a compelling idea and commitment.
- A strong concept matters more than flawless prose; bestsellers like Twilight prove this point.
- Great ideas come from your passions, your reading life, and mixing familiar elements with one unexpected twist.
- Calculate your target word count by studying recently published books in your specific genre.
- Brainstorm many ideas for characters, settings, and conflicts so you can choose from abundance.
- This write a book guide covers every step from first spark to final celebration.
Finding Your Inspiration and Idea for the Book
Every great book starts with a spark. Finding an idea that excites and scares you is key. Think of it as the “what if” test. What if a boy was a wizard? That’s Harry Potter.
What if a wife framed her husband for murder? That’s Gone Girl. Your best idea is hidden in a bold question.
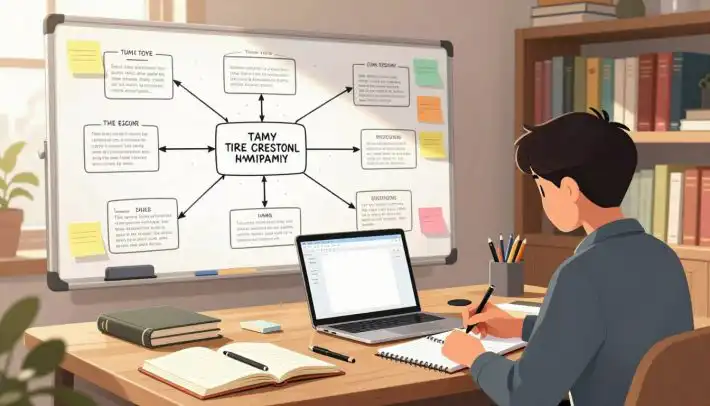
Brainstorming Techniques
Two great tools for ideas are mind mapping and freewriting. Start with a theme and branch out with mind mapping. For example, “sustainable living” can lead to many topics.
Freewriting for ten minutes can reveal hidden passions. Let your pen run wild without stopping or judging.
Exploring Genres
Each genre has its own rules and expectations. Choosing the right one is crucial for a book that resonates.
| Genre | Key Convention | Typical Word Count |
|---|---|---|
| Literary Fiction | Deep exploration of the human condition | 70,000–100,000 |
| Romance | Central love story with a satisfying ending | 50,000–90,000 |
| Thriller | Fast pace and high stakes throughout | 70,000–90,000 |
| Fantasy | Magic systems and invented worlds | 90,000–120,000 |
Identifying Your Audience
Before writing, create an audience persona. Imagine your ideal reader. Are they professionals aged 28–45 looking for productivity tips? Do they feel overwhelmed and guilty?
Knowing their goals and pain points helps you create content that feels personal. Many tools, like demographic surveys and social media analytics, can help you focus from the start.
Developing a Writing Routine
Once you’ve found your book idea and know who you’re writing for, it’s time to create a routine. Writing needs consistency, not just random ideas. A good routine is key to finishing your manuscript.
Setting Realistic Goals
Start with goals you can reach. Use the SMART framework — Specific, Measurable, Achievable, Relevant, and Time-bound. Aim for 500 to 1,000 words a day. This can get you a first draft in about six months.
Break your manuscript into weekly goals, like one chapter a week. Use tools like Pacemaker to track your word count. Add buffer days so missing one day won’t mess up your whole plan.
“You don’t start out writing good stuff. You start out writing crap and thinking it’s good stuff, and then gradually you get better at it.” — Octavia E. Butler
Creating a Comfortable Workspace
Your environment is very important. Get a comfy chair, a clean desk, and noise-canceling headphones. I use ambient music apps like Noisli to block distractions. Treat your workspace like an office to signal it’s time to write.
Establishing a Daily Writing Habit
Find your best writing hours. For many, it’s early morning — say 7:00 to 9:00 AM. Try the Pomodoro Technique: 25 minutes of writing followed by a 5-minute break. Three blocks can get you about 1,500 words.
Here’s a weekly schedule that works well:
| Day | Time Block | Word Count Goal | Focus Area |
|---|---|---|---|
| Monday–Friday | 7:00–8:00 AM | 500–1,000 words | Drafting new chapters |
| Saturday | 9:00–11:00 AM | 1,500–2,000 words | Extended drafting session |
| Sunday | 10:00 AM–12:00 PM | Review only | Weekly goal check-in and planning |
If you want a challenge, try NaNoWriMo. It’s a 50,000-word draft in 30 days. The community support is amazing. Use project boards in Trello or Asana to organize your tasks. This advice can save you months of trouble.
Outlining Your Book Effectively
Learning to write a book starts with a strong outline. Think of it as your personal roadmap. A solid outline keeps you focused and reduces overwhelm. It makes sure every chapter has a purpose.
Once you’ve built your writing routine, map out your entire book. This is before you start writing the draft.
Different Types of Outlines
Not every outline looks the same. For fiction, many writers use the Three-Act Structure. Act 1 introduces characters and conflict. Act 2 builds tension through challenges. Act 3 resolves everything.
Suzanne Collins used this in The Hunger Games. She introduced Katniss’s world, escalated the competition, and resolved her survival arc.
For non-fiction, outlines focus on themes. Each chapter explores one central idea. James Clear’s Atomic Habits is a great example of this.
Here are some useful tools for building your outline:
- Scrivener — corkboard view with customizable templates
- Milanote — visual mind maps for creative planning
- Notion — dynamic, shareable outlines you can edit anywhere
The Importance of Structure
One of the best tips for book publishing is this: structure is everything. Write a one-sentence summary for each chapter. Add bullet points for key concepts and turning points.
This gives you clarity before you start writing.
How to Stay Flexible with Your Outline
Your outline is a guide, not a cage. Characters grow and plots shift. The Snowflake Method, by Randy Ingermanson, starts small and grows naturally.
This approach fits well with tips that emphasize organic storytelling. Knowing how to write a book means trusting the process. Let your outline evolve with your story.
Crafting Compelling Characters
Characters are the heart of any story. Without characters we care about, even the best plot fails. I’ve learned that great characters and stories push against each other.
If your character fears spiders, put them in a room full of them. This tension is where magic happens.

Understanding Character Development
Every strong protagonist needs three things: an external goal, an internal need, and a flaw to overcome. Think of Katniss Everdeen. She wants to protect her sister and survive the Games. She also grows emotionally to lead a revolution.
The best characters want something badly and face real obstacles getting it.
Your antagonist needs attention too. They should have a goal that clashes with your protagonist’s. They should believe they’re justified and have real vulnerabilities. An antagonist isn’t always a villain. It could be a rival love interest or nature itself in a survival story.
Creating Character Backstories
Building detailed character profiles is a favorite tip of mine. Include physical traits, backgrounds, fears, desires, and defining past moments that shape current behavior. Small details make characters feel human.
Stieg Larsson’s Lisbeth Salander is a great example. She’s a genius hacker with a traumatic past, complex family issues, and a fierce hostility toward authority. Every layer makes her unforgettable.
Tips for Writing Authentic Dialogue
Authentic dialogue reveals character from the inside out. Show what they think and feel through specific physical sensations. Instead of saying “she felt revolted,” describe a tightening throat or a clenching stomach.
| Character Element | Protagonist Example | Antagonist Example |
|---|---|---|
| External Goal | Survive the conflict | Gain power or control |
| Internal Need | Emotional growth | Validation or acceptance |
| Key Flaw | Self-doubt or distrust | Arrogance or obsession |
| Backstory Influence | Past trauma drives caution | Past betrayal fuels revenge |
“Every character should want something, even if it is only a glass of water.” — Kurt Vonnegut
Use this approach to print out your first 20,000–30,000 words. Check for inner life indicators. If your characters lack emotional depth, dig deeper. These tips will help you build your plot next.
Building a Gripping Plot
A great plot keeps readers up late. Learning about plot structure is key. Think of plot as a promise to your reader: stick with me, and I’ll take you somewhere worth going.
The Basics of Plot Development
I divide every story into three parts. Each part has a special job to keep readers interested.
| Story Section | Percentage of Book | Purpose |
|---|---|---|
| Beginning | First 25% | Introduce protagonist, present the inciting incident, establish the goal |
| Middle | Middle 50% | Raise the stakes, test the protagonist, force difficult choices |
| End | Final 25% | Climactic confrontation, character transformation, emotional resolution |
Your inciting incident should appear in the first chapter. It’s the spark that changes your protagonist’s world. Know what your main character wants early — and don’t solve it until the end.
Using Conflict to Drive the Story
Every chapter must change the balance between your protagonist and their goal. If nothing changes, the chapter is unnecessary. I delete pages that don’t move the story forward. Tools like Plottr and Scrivener can help you see what’s not needed.
“The cat sat on the mat is not a story. The cat sat on the dog’s mat — that is a story.” — John le Carré
Incorporating Twists and Turns
A crisis moment — where everything seems lost — is what readers love. The protagonist makes one last effort, and things get better. Plan your major turning points, but stay open to surprises.
Use tools to outline these key moments. Stick with one protagonist for your first book. Show you care about that character, and your readers will too. These steps will make your plot exciting and satisfying.
Establishing Your Writing Voice
Your writing voice makes your book yours. It’s what sets your story apart. Now, focus on how you tell your story. Your voice, tone, and perspective will make writing easier.
Finding Your Unique Style
Choose three books like yours. These are comp titles. Study their words, rhythms, and pace. You’re learning what readers want.
A romance needs a warm tone. A business book should be direct. Knowing your audience is key.
Understanding Tone and Mood
Tone is your attitude. Mood is what readers feel. A playful tone is light. A sharp tone is tense.
Write the same scene twice. Once funny, once suspenseful. You’ll see how tone changes everything.
The Role of Point of View
POV and tense change how readers connect. Here’s a comparison:
| Point of View | Example | Effect on Reader |
|---|---|---|
| First Person, Past Tense | “I walked into the room and sensed something wrong.” | Intimate and reflective |
| Third Person Limited, Past Tense | “Sarah walked into the room and sensed something wrong.” | Focused yet slightly distant |
| Third Person Omniscient, Past Tense | “Sarah sensed something wrong, unaware the intruder held his breath behind the curtain.” | Expansive and suspenseful |
| First Person, Present Tense | “I walk into the room and sense something wrong.” | Urgent and immediate |
Write the same scene in different POV and tense. You’ll find the best fit. This will guide you in writing your first chapter.
Writing the First Draft
Learning to write a book means accepting a big truth: your first draft won’t be perfect. That’s okay. The goal is to get words down and keep going. Think of the first draft as raw clay — it needs to exist before it can be shaped.
Embracing the Messy Process
Ernest Hemingway said, “The first draft of anything is garbage.” If a great writer felt that way, I can too. Focus on quantity first, not quality. Just keep writing.
Overcoming Writer’s Block
Writer’s block is common. The Pomodoro Technique helps. Write for 25–30 minutes, then take a break. Do this four times to write 1,000 words.
Dictation software is also great. Tools like Dragon NaturallySpeaking or Google Docs Voice Typing help you write faster. Author Kevin J. Anderson dictates novels while hiking. Start each session with a goal, like finishing a chapter.
Establishing Milestones and Rewards
Break your draft into smaller goals to stay motivated. Here’s a simple system:
- Every 5,000 words — treat yourself to a favorite snack or show
- Every 25,000 words — celebrate with a night out or a new book
- Completed first draft — plan something special, like a weekend trip
Small rewards make the long process easier. Add a comfy writing space, and you’ll look forward to drafting.
Revising and Editing Your Manuscript
You’ve finished your first draft — congratulations! Now the real magic begins. Revising and editing turn a rough manuscript into a polished piece. This stage is crucial. Before diving in, take a break for a few days. A fresh perspective makes all the difference.

The Difference Between Revising and Editing
Many writers confuse these two steps, but they serve distinct purposes. Revising is the big-picture work — restructuring chapters, fixing plot holes, improving pacing, and ensuring your argument or story flows logically. Editing zooms in on grammar, sentence clarity, and word choice. I recommend tackling revising first, so you don’t waste time polishing paragraphs you might cut later.
As part of my write a book guide process, I rely on these tools:
| Tool | Best For | Cost |
|---|---|---|
| Hemingway Editor | Simplifying sentences, spotting passive voice | Free (web version) |
| ProWritingAid | Grammar, style, and structural feedback | Free & premium plans |
| Microsoft Word Track Changes | Making edits while preserving original text | Included with Microsoft 365 |
One of my favorite book writing tips: read your manuscript aloud. It reveals awkward phrasing and repetitive sentences your eyes might skip.
Getting Feedback from Beta Readers
Beta readers are invaluable. Choose readers who match your target audience. A sci-fi enthusiast, for example, will catch genre-specific issues in a futuristic novel. You can find great beta readers through platforms like Scribophile, Critique Circle, or Reedsy Discovery.
- Give clear instructions — ask them to focus on plot holes, character development, and readability
- Hire sensitivity readers for cultural or gender authenticity
- Consider a book coach or manuscript evaluator for high-level critiques
Common Pitfalls to Avoid
In any write a book guide, you’ll find these warnings — and for good reason:
- Editing and revising at the same time (focus on one layer at a time)
- Relying only on spell-check software
- Ignoring beta reader feedback that stings
- Skipping a printed read-through — marking edits by hand catches errors you miss on screen
“I’m not a very good writer, but I’m an excellent rewriter.” — James Michener
Once your manuscript is revised and polished, you’re ready to move into formatting it for publishing. That step brings you even closer to holding your book in your hands.
Formatting Your Book for Publishing
You’ve written your manuscript and edited it well. Now, it’s time to make your book look like a real one. Formatting is key but often overlooked. It can make or break a reader’s experience. Let’s go over what you need to know before publishing.
Understanding Different Formats
Your book can be in several forms, each with its own needs. eBooks need EPUB or MOBI files. Print books need margins and bleed settings for a professional look. Audiobooks require a different manuscript setup. The right format depends on where you sell your book.
| Format | File Type | Key Requirement | Recommended Author Tools |
|---|---|---|---|
| eBook | EPUB, MOBI | Reflowable text, embedded fonts | Vellum, Calibre |
| Print Book | PDF (print-ready) | Proper margins, bleed, trim size | Adobe InDesign, Atticus |
| Audiobook | MP3, M4B | Clean audio, chapter markers | ACX, Findaway Voices |
The Importance of Professional Layout
Interior layout is more than looks. It’s about font sizes, chapter breaks, and page numbers. It keeps your text easy to read. Tools like Vellum make this easier for eBooks and print books. A bad layout looks amateurish and readers notice.
Preparing a Final Draft
Before you submit, review your manuscript for consistency. Make sure all changes are accepted or rejected. Check that your formatting meets your chosen platform’s needs. If self-publishing, create both digital and print-ready versions. These steps are crucial for a professional-looking book.
“Design is not just what it looks like and feels like. Design is how it works.” — Steve Jobs
With your book formatted well, you’re ready to explore publishing options. That’s what I’ll cover next.
Exploring Publishing Options
Once you’ve finished writing and polished your manuscript, it’s time to share it with the world. This step can feel overwhelming. There are many ways to publish, each with its own trade-offs. Let’s look at the main options so you can choose confidently.
Traditional vs. Self-Publishing
Traditional publishing means a big company like HarperCollins handles everything. You get into bookstores and have a big network. But, you might lose control and wait a long time.
Self-publishing gives you total control over your book. You can set your own price and release date. Use platforms like Amazon Kindle Direct Publishing for easy global reach. You can also find full-service self-publishing that handles editing and marketing for you.
| Feature | Traditional Publishing | Self-Publishing | Hybrid Publishing |
|---|---|---|---|
| Creative Control | Limited | Full | Shared |
| Time to Market | 12–24 months | 1–6 months | 6–12 months |
| Upfront Cost to Author | None | Varies widely | Moderate investment |
| Royalty per Sale | 5–15% | 35–70% | 15–50% |
How to Prepare a Query Letter
A good query letter is key for traditional publishing. It should be one page long. Start with a compelling hook that sums up your book in one paragraph. Include your bio, credentials, and three similar books to show where yours fits.
“A query letter is a business letter, not the place to be modest — or vague.”
Navigating Literary Agents
Agents help get your book to publishers. Look up agents in your genre on Publishers Marketplace or QueryTracker. Follow their submission rules carefully — usually a query letter, synopsis, and first three chapters.
- Personalize every query by mentioning a book the agent represented.
- Track submissions in a spreadsheet with dates and responses.
- Expect rejections — Stephen King’s Carrie was rejected 30 times before acceptance.
Rejections are part of the journey. Small presses and university presses offer personal attention. Stay patient and persistent, and your book will find its home.
Marketing Your Book
Learning to write a book is just the start. Getting it to readers needs a good marketing plan. I’ll share some top tips to help you get your book noticed and create excitement.
Building an Author Platform
Your author platform is your base. Start with a simple website on WordPress, Squarespace, or Wix. Add your bio, book info, a blog, and a newsletter signup. An email list lets you reach your readers directly.
Offer a free chapter or a writing guide to get people to sign up. This helps you connect with readers before your book comes out.
Utilizing Social Media Effectively
Choose two or three social media platforms and get good at them. Trying too many can burn you out. Here’s a quick guide to match platforms with your goals:
| Platform | Best For | Content Style |
|---|---|---|
| Visual genres (travel, cooking, lifestyle) | Photos, Reels, Stories | |
| Facebook Groups | Niche reader communities | Discussions, polls, events |
| X (formerly Twitter) | Publishing news, quick updates | Short posts, threads, links |
| Goodreads | Direct reader interaction | Q&As, giveaways, reviews |
Strategies for Book Launch
A strong launch is key. Here are some tips that have worked for me and many authors:
- Send advance reader copies for early reviews and buzz.
- Plan a blog tour with guest posts and interviews.
- Do local bookstore readings and signings to connect with your community.
- Optimize your Amazon categories and keywords for better visibility.
- Use sites like BookBub and Freebooksy to reach more readers.
“A book launch is not a single event — it’s a season of showing up for your readers.”
Writing a book is just the beginning. Marketing is crucial to get it read. Work hard on marketing early, stay consistent, and you’ll build a loyal audience for all your future projects.
Handling Critiques and Rejections
Every writer faces criticism and rejection at some point. It’s a normal part of the journey. How you handle tough feedback can shape your growth. Any good guide will tell you that rejection is not the end — it’s a stepping stone.
Before you market your book or celebrate, you need to build mental strength. This helps you handle what comes your way.
Learning to Accept Feedback
Not all feedback is equal. I’ve learned to separate subjective preferences from real improvements. If one beta reader dislikes a character’s quirk, that’s personal taste. But if five readers say the pacing drags in chapter three, that’s a pattern worth addressing.
When seeking feedback, I match beta readers to my target audience and genre. I give them clear instructions and ask pointed questions. For example, a romance writer might ask, “Did the romantic progression feel authentic?” These specific prompts give you useful tips you can act on right away.
“You can always edit a bad page. You can’t edit a blank page.” — Jodi Picoult
Developing Resilience as a Writer
Rejection is normal in publishing. Even bestselling authors like Stephen King faced many rejections early on. One strategy is setting a rejection goal — aiming for 100 rejections per year shows you’re actively submitting work.
Joining writer support groups helps during tough times. Being around people who understand the struggle makes a big difference.
Shifting Focus to Future Projects
I keep writing new material while querying or submitting manuscripts. Creative momentum is key. Dwelling on one project’s fate drains energy. Starting something new reminds me why I love writing.
| Feedback Type | Source | Best Used For |
|---|---|---|
| Beta Reader Feedback | Target audience readers | Plot pacing, character clarity, emotional impact |
| Professional Editing | Freelance editors | Narrative arc, grammar, structure |
| Sensitivity Reading | Cultural consultants | Authentic representation, avoiding stereotypes |
| Book Coaching | Writing coaches | High-level book writing tips, story vision |
Persistence is what separates published authors from aspiring ones. Use every critique as fuel, and keep moving forward.
Celebrating Your Achievement
Finishing a book is a huge win. It doesn’t matter if you went the traditional or self-publishing route. The end of your manuscript is a big deal. You learn so much from starting with a blank page to a finished draft.
Acknowledging Your Journey
Looking back, I see how far I’ve come. Keeping a journal or writing blog posts helps me remember the hard times and the good moments. The tools I used, like outlining software and editing apps, are still with me.
Sharing Your Book with the World
When my book is ready, I love to share it. I might host a launch party, online or in person. Making a book trailer or sharing my writing process helps readers connect with me.
Planning Your Next Writing Adventure
I start thinking about my next project right away. Authors like Colleen Hoover and Brandon Sanderson built big followings by writing series. I can try new things, like a novella or a screenplay. Each time, writing gets easier, and using my tools is more fun.