
What is the best all-in-one writing app for authors?
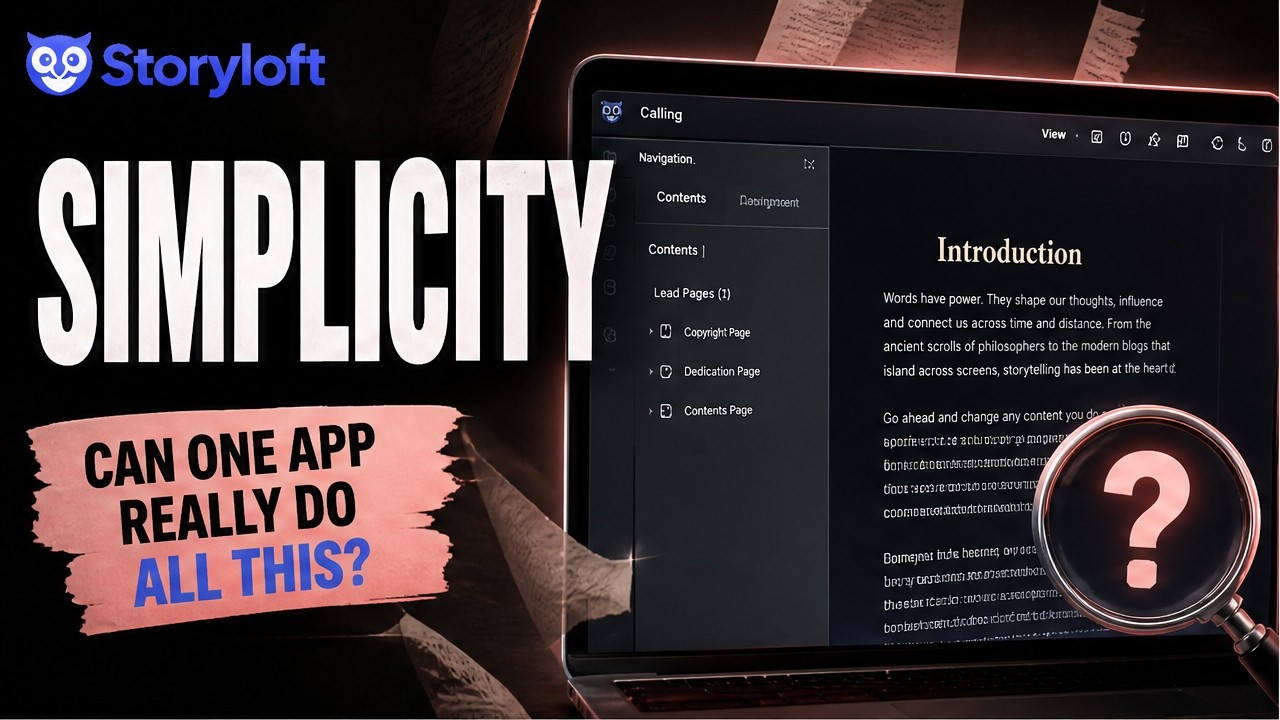
Storyloft Overview: See the Complete Book Writing Platform in Action
Watch a complete walkthrough of Storyloft and see how authors can write, organize, illustrate, format, and prepare books for publication—all within one connected platform.
Storyloft is an AI-powered book writing platform built specifically for authors. Unlike general writing tools, Storyloft brings the entire book creation process together in one workspace. Authors can develop ideas, organize research, write full-length manuscripts, collaborate with manuscript-aware AI, create original illustrations, format professional print books and ebooks, and prepare their work for publishing.
The full Storyloft overview video below provides an in-depth tour of the platform, including its core writing, AI, design, illustration, formatting, and publishing features.
What Is Storyloft?
Storyloft is an all-in-one book writing and publishing platform designed for fiction and nonfiction authors.
Most authors rely on several disconnected tools to complete a book. They may write in Google Docs or Scrivener, use ChatGPT for brainstorming, organize research in Notion, generate visuals in a separate image platform, format the manuscript in Atticus, and move files between programs throughout the publishing process.
Storyloft brings these tools and workflows together.
- Plan and organize books
- Write and edit full-length manuscripts
- Work with AI that understands the manuscript
- Build a personalized author voice profile
- Organize notes, research, sources, and citations
- Generate original book illustrations
- Format books for print
- Create professional ebooks
- Export files for publishing and distribution
Storyloft is built around books—not isolated documents, short-form content, or generic AI conversations.
Watch the Complete Storyloft Demo
This full-length Storyloft walkthrough explores the platform from an author’s perspective. Rather than focusing on a single feature, the video follows the broader process of creating a book—from the first idea to a professionally formatted manuscript.
During the demonstration, you will see how Storyloft helps authors move through the major stages of book creation without constantly switching between unrelated applications.
The overview includes:
Book Planning and Organization
See how authors can create books, organize chapters, develop outlines, manage notes, and keep important ideas connected to the manuscript.
Storyloft provides a book-native workspace designed to support long-form fiction and nonfiction projects.
Manuscript Writing and Editing
Explore Storyloft’s full manuscript editor and see how authors can write, structure, revise, and navigate long books.
The writing environment is designed around chapters and complete manuscripts while giving authors control over their words, structure, and creative decisions.
Eddy: A Manuscript-Aware AI Writing Assistant
Meet Eddy, Storyloft’s built-in AI assistant for authors.
Unlike a general AI chatbot that only sees the text pasted into a prompt, Eddy can work with the broader context of a book. Authors can ask questions about their manuscript, brainstorm ideas, review passages, develop scenes, improve clarity, and receive suggestions informed by their existing work.
Eddy suggests. You decide.
Storyloft is designed to keep the author in control while making AI more useful for long-form writing.
Personalized Author Voice
See how Storyloft can analyze an author’s writing and build a personalized voice profile.
The voice profile helps AI suggestions better reflect the author’s existing tone, sentence patterns, pacing, and writing style. Instead of pushing every manuscript toward the same generic AI voice, Storyloft is designed to support the voice already developing within the book.
Research, Notes, Sources, and Citations
Explore tools for organizing research alongside a manuscript.
Authors can collect notes, save useful information, manage sources, and keep supporting material connected to the book they are writing. These tools are especially useful for nonfiction authors, historical writers, researchers, and anyone working with source-based material.
AI Book Illustration
See how authors can create original illustrations without leaving the platform.
Storyloft includes AI-assisted illustration tools for generating book artwork, visual concepts, characters, and supporting images. Authors can add images directly to their projects and prepare illustrated content for print and digital books.
Print Book Formatting
Learn how Storyloft turns a manuscript into a professionally formatted print book.
Authors can choose book dimensions, adjust typography, control page layouts, customize chapter styling, manage margins and spacing, and preview how the finished book will appear.
Storyloft can export print-ready PDF files for publishing platforms, print-on-demand services, and professional printers.
Ebook and EPUB Formatting
See how the same manuscript can be prepared for digital publication.
Storyloft includes ebook formatting and EPUB export tools designed to help authors create flexible, reader-friendly ebooks without rebuilding the manuscript in another application.
Publishing and Export
Explore how authors can prepare completed books for publishing.
Storyloft helps bring writing, design, formatting, and export into one connected workflow. Authors can create files for print and ebook distribution while keeping the manuscript and book assets together in a single project.
Who Is Storyloft For?
Storyloft is designed for authors who want a more connected way to create books.
The platform can support:
- Fiction authors writing novels and series
- Nonfiction authors developing educational or professional books
- Self-published and independent authors
- First-time authors who want a guided workflow
- Experienced authors looking to reduce tool switching
- Authors using AI while maintaining creative control
- Writers creating illustrated books
- Authors preparing books for print and ebook publication
Whether you are beginning with an idea or preparing a completed manuscript for publishing, Storyloft is designed to support the full book creation process.
How Is Storyloft Different From General Writing Software?
Many writing applications focus primarily on drafting. Other platforms specialize in AI generation, book formatting, research, illustration, or project organization.
Storyloft connects these parts of the author workflow.
Instead of moving a manuscript between multiple applications, authors can work within a book-centered environment where writing, AI assistance, research, illustrations, formatting, and publishing tools share the same project context.
This allows authors to spend less time managing software and more time working on their books.
Does Storyloft Write the Book for You?
Storyloft is designed to assist authors—not replace them.
Authors remain responsible for their ideas, creative direction, decisions, and final manuscript. Eddy can help brainstorm, analyze, explain, suggest, revise, and explore possibilities, but the author chooses what belongs in the book.
AI features are integrated into the writing process so authors can request help when they need it without giving up control of their work.
Can Storyloft Handle Full-Length Books?
Yes. Storyloft is designed specifically for long-form book projects rather than short documents or isolated AI prompts.
The platform supports complete manuscripts with chapters, notes, research, images, book structure, formatting settings, and publishing assets organized within a single project.
Can Storyloft Create Both Print Books and Ebooks?
Yes. Authors can use Storyloft to prepare books for both print and digital publication.
Storyloft includes tools for professional print formatting and print-ready PDF export, as well as ebook formatting and EPUB export. This allows authors to prepare multiple publishing formats from the same manuscript.
Is Storyloft Free to Try?
Yes. You can start using Storyloft for free without entering a credit card.
Create a book, explore the writing platform, and see how Storyloft fits your author workflow.
Start your book free. No credit card required.
Full Storyloft Overview Video Transcript
The complete transcript from the Storyloft overview video is included below.
The transcript provides a searchable, text-based version of the walkthrough and makes it easier to find specific features, follow individual sections, or review parts of the demonstration without replaying the entire video.
[00:00:06] Hello authors, writers, novelists, and creatives everywhere. This is Pierce Brantley. I’m so excited that you all chose to stop by here today because we’ve got some really cool stuff to show you. So if you’ve been looking for a book-writing app that can help you write and edit and format and illustrate and publish a book, all of that the StoryLoft overview is gonna show you exactly how that works.
[00:00:35] So what is StoryLoft? StoryLoft is this cool new tool. It’s an AI-powered writing platform built specifically for authors. So whether you’re writing a novel, a nonfiction book, memoir, or series, StoryLoft combines manuscript writing, AI editing, book formatting, cover design, character illustrations, e-book publishing, and print-ready PDFs exportable in [00:01:00] a single place, all underneath one roof.
[00:01:02] How cool is that? So in this video, I’m gonna walk you through the entire platform, the whole writing app, and show you the core features. I’m gonna explain how authors have been using StoryLoft to take a book from first draft and all the way even to publication. So let’s jump in.
[00:01:17] Area: Okay, so we’re coming in here now to the StoryLoft dashboard, your landing pad, if you will, for all of the creative work that you are doing. Now, there’s a bunch of stuff you can do on here. It’s really a branch-off point to get to your book. But let me show you how you can manage your books from this screen.
[00:01:35] So first off, you got a really nice writing goals panel on the side here. You can see I’ve done a few demos, a few tests. But this is really helpful information. Total words written over all of your manuscripts, your daily record, so if you hit a new high, it will record that and keep pushing it up for you.
[00:01:53] We’ve got your top writing streak. So how many days have you gone in a row and not [00:02:00] procrastinated like me to go and find something else to do? I’m doing okay. I’m at eight days. My consistency score is eight out of 10, which is actually, this is a proprietary score based off of how well you’re writing over a month’s…
[00:02:16] a a, dragging month’s period of time. So that’s really cool, too. All right. So let’s take a look at our books here. Like I said, this is where all of your books, all of your manuscripts will live in our book writing app. I wanna show you first, because a lot of people are curious about this, for you novel writers out there, how to create a series.
[00:02:39] So creating a series is super easy. All you do is you click on a button here, the mini button on your manuscript, and you say Create Series, and you give it a name. I’m gonna give it the Ender Deep Series, and it’ll do this for you automatically, but let’s say you’re just creating a shell, you don’t have to do that.
[00:02:58] And I’m going to [00:03:00] click on Create Series So now our book series has been created. You can see it’s reorganized the book here for me down there at the bottom. So all of my novels will be organized for me, which will be very helpful when it comes to, like, how I do my illustrations or how I do my outlining and, obviously everything that you know about, world bui- building and everything else.
[00:03:23] World building one of the things that we’re gonna be releasing soon is world building that goes across ser- novels in a series. So let’s say you have a character that develops, or you have a villain that develops, or a world that changes. Obviously, those changes aggregate over time, right?
[00:03:41] Over your books. And one of the things StoryLoft is doing is marrying that so you can have a shared world bible, which I think is gonna be really cool. And of course, Eddie is gonna understand our integrated AI, how those details change over time. So you’re definitely going to want to check that out.
[00:03:58] Okay, so [00:04:00] now take a look at this. This is fun. StoryLoft has a very comprehensive book illustrating tool for covers and for everything else. We’ll get into that here in a little bit. But one of the things you can do is you can take your e-book covers, we do print and e-book covers, but you can take your e-book cover, and you can just apply it to your series and give it a nice little c- bit of customization.
[00:04:25] That way, this dash build feels like your own, and you can get excited about coming to it. Okay, so that’s about it for the dashboard. Obviously, you can do things like delete a book. You can manage your books. You can add them to series. Like we said, we can manage your series independently. So if I wanted to change the name, for instance, I could go in and change the name, which is great.
[00:04:48] But let’s move on. How do we actually start creating a book in StoryLoft? Right now there are two ways. You can just start a blank manuscript, or you can import a DOCX. I’ll show you both. [00:05:00] But first, let’s start with importing a Microsoft Word, a DOCX file
[00:05:08] Okay, so let’s go import a DOCX file. I’m gonna click on Import DOCX here at the bottom, and I’m gonna import my book, Colin. This isn’t a plug. It’s just the only book I have in a DOCX file. Okay, so what’s gonna happen here? We have a really comprehensive DOCX importing. I know that sounds nerdy, but this is what it means.
[00:05:31] We go through your whole book, and we try to understand what your intent is, how you were organizing things, if there was structure, assuming that stuff is there, and this will help in for instance, creating the table of contents, getting your lead pages designed and organized, and getting all your content just basically squared up so that you’re ready to go immediately once the document is imported.
[00:05:55] Now, obviously, if you’re just beginning, you only have a few ideas or a chapter written down, [00:06:00] Eddie’s gonna internalize that, right? So Eddie’s gonna know everything about your book, so you can talk to him about how to improve it, but there’s not structure there. It’s not gonna artificially impose extra chapters or sections on you.
[00:06:11] So it’s not gonna do work for you that you don’t want it to do. All right now that our document has been imported, it’s gonna bring it in here. Yay. Hooray. Okay, so let’s take a look at this. I think this is gonna be really interesting. Okay, here we are with our imported novel. So let’s take a look. So you’ll notice a few things right off the bat, I think.
[00:06:32] So one is our navigation here. So this is really cool. We have lead pages, and then we have our table of contents, and then we have view endnotes and adding endnotes. So everything about linear structure of the book lives here. We can do custom pages. These are actually… I say they’re custom. You can do custom pages down here at the bottom.
[00:06:52] But you have a cover page, a copyright page, a dedication page, and custom pages for things like ads and that, that sort of thing. These are [00:07:00] automatically formatted for you based off of best practices, which is really cool. That’s not to say you have no customization. It means you don’t have to worry about customization or setup of the print file because, for instance, things like copyrights needing to be anchored to the bottom left and all that kind of stuff, StoryLoft just knows, it finds and it organizes for you so that you don’t have to do any heavy lifting.
[00:07:19] You can focus on the craft of writing. So the other thing here is nice, we got our page numbers here, or our… sorry, our chapter numbers here down the side, and then view endnotes. If I wanted to, for instance, add an endnote we’re not gonna get deep into this, but I’ll add an endnote just for fun. I’m gonna add endnote one.
[00:07:35] I got these nice little links here. So if I were to say add web source, it gives me a template. But let me just go let’s say storyloft.app/getstoryloftfree. I say save. And it adds the endnote in there for me. Now check this out. If I hover over this endnote, it tells me what the endnote is.
[00:07:54] That is so cool, right? I can manage my endnotes here. They show up. I can scroll to them. [00:08:00] And then, of course, I can go back, and then I can edit them By clicking on this pencil icon. Pretty cool, right? Okay. And then when you go to publish, they’ll be in the end note section. I’ll show you that fun stuff later.
[00:08:10] Okay, so let’s do this. Let me show you a few other things. The bookmarks section. So another way that a lot of authors like to navigate is through kind of memory, but have you ever had that moment when you’re like… Especially when your book gets really long, and you’re like, “Man, I’ve said something like this probably three or five times at this point.
[00:08:28] I don’t know where I said it. Where did I say it?” you can always talk to Eddie about it, too, but if you want just a kind of a quick tactical way one of the ways you can do it is select a s- phrase or a word here in the editor, so our ancient fathers. Let’s say that. And then I’m gonna click on this bookmark tool, add bookmark, and say the ancients.
[00:08:50] Say bookmark. Now, later, if I come back to this book it’s been a couple weeks, and I was like, “Where was I talking about the ancients?” It was, our ancient, [00:09:00] history. Where was I talking about ancient history? I know it was somewhere here in the book, but I don’t remember exactly what chapter it was in.
[00:09:05] I don’t have to remember what chapter. Maybe I don’t have chapters yet. I just click on the ancients, and here it takes me right back to that section. I’m like, “Oh, yeah. That’s, where I was.” And then I compare that with my notes and see if I had any notes in that section, too, which we’ll get to here in a minute.
[00:09:18] All right. So having fun yet? You have all the basics here for controlling your look and style. Let’s do a little bit of that. StoryLoft takes care of all of the print and e-book formatting for you. Let me say that again. You don’t have to do print or e-book formatting. None of it. You can obviously customize things as you want to, but StoryLoft’s layout engine for both print books and e-books is state-of-the-art.
[00:09:47] Where there needs to be indentations, where pages need to roll over, where your endnotes need to show up, whether if you convert your endnotes to footnotes, don’t worry about any of it. StoryLoft is gonna do that for you. You can change things if you want to. You can have control where you want to, but you don’t have to worry about it.
[00:09:59] You can [00:10:00] focus fully on writing, which is what I like to do. Okay, so let’s move to a chapter the spirit and the spatula. All right. So the first thing I probably wanna do here is customize my themes. So what I’m gonna do is find a theme that I like. Now these… We- guys, I’m just gonna be honest with you. A pet peeve of mine is when someone throws a 1,000 Google fonts at you and says, “Go pick.
[00:10:21] Here’s your favorite font.” I’m sure it’s in there somewhere, and you’re like, “Oh yeah, I love font 563. That was my favorite.” No, we don’t do that at StoryLoft. We don’t make you dig through a pile of Google fonts hoping that you’ll find something you like. These are specially curated themes, hand-curated fonts pairing both the headings and the sections and the body copy with contrasting fonts that work well for certain genres and readability on, let’s say, an e-book versus a print book or a sci-fi book versus a book on parenting.
[00:10:51] We think about these things because we really want the character, the personality of your book to come through because you’ve worked so hard on it. So we’ve got these very special themes here. [00:11:00] This is, oh, I’m gonna say- It’s semi, it’s a ser- semi-serious subject, but I talk about it with a lot of humor, kind of purpose in life.
[00:11:08] So I’m gonna choose this font maybe. Sorry, this this theme Elliot, which is nice. I like it. Can’t catch everything. Actually, I wanna keep that. Let me show this to you. Shoot, Kenny. You know what? Little understated. I’m going back to Elliot. I think it’s friendly. It has a little bit of friendliness to it, which I like.
[00:11:31] Okay. So now let’s go about formatting our chapter headers. Now, these end up being your chapter pages, right? Your, where your chapter starts. And so customizing your headers is part and parcel of customizing that first part of your page. So we make it very easy. One thing I like to do personally is I just like to put the counter the chapter counter on top.
[00:11:54] So I just added chapter counters to all of my chapters. So if I were to jump down to [00:12:00] chapter three, urgency and opportunity, there we have it, chapter three. All right. So the other thing I wanna do is give it a decorative element here. So I’m gonna give… We got a lot here, but again, based off of all different kinds of themes.
[00:12:13] That’s actually nice. I don’t love that dot in the middle. So do we have anything decorative but clean? Yeah, we have days where you’re feeling fancy. This is actually a Friday. I don’t look fancy, but I feel fancy. Okay, so check this out, what I wanted to show you. We had that that verse, and let me reinsert it into the manuscript.
[00:12:37] So what I’m gonna do here is I’m gonna click on block quotes. I pulled it in there, and I’ve got four different block quote styles here. Simple, classic, archival, and editorial. These all look great. I’m gonna go for classic because it’s in the middle of the book, and this is like I said, I want it to feel like like we’re having a timeless conversation.
[00:12:56] So check that out. Doesn’t that look beautiful? I could pick something else, but I really like the way that looks. [00:13:00] Okay, so let’s do a little bit more setup on the lead pages. I’m not gonna do all of them. I just wanna give you a general idea. Calling. I’m going to insert in the book title and give it a title heading.
[00:13:09] I’m gonna give it a subtitle too for that cover page
[00:13:15] Dunskey. All right. Again, I don’t need to worry about much here. I’m just gonna log in there for later. StoryLab will figure it out. Okay, let’s put in our copyright information for our book’s copyright page. Copyright 2018, all rights reserved. You guys wanna know some fun facts? I’m not a lawyer, preface, but you can’t copyright a book title.
[00:13:35] Go, fact-check me on this. You can’t book… You can’t copyright book titles, which freaks everybody out until you realize that if someone were to copy your book title, like they obviously get flagged for plagiarism, and I’ve seen it on, for instance, Amazon, and people go nuts. Even if you just copy a cover, like just don’t do it.
[00:13:52] Respect people’s creative independence. And all rights reserved, too. This is also people still do it, but it doesn’t really hold any massive [00:14:00] legal weight. But it’s a good indicator. All right, fun facts for the day. Nerding out. Save. And dedication. It was to my dad. To my father
[00:14:17] Alex, extra love. All right. Okay, and I think we are pretty much done with the lead setup. What do you guys think? Should we go look at how to publish? All right, let’s go look at how to publish. So to publish, obviously there are two different ways you can do that. You can print the book or you can you can…
[00:14:37] Sorry, you can create a print book or you can create an e-book. So let’s start with the print book version of our book. So I’m gonna click on Export Book here, and it’s gonna go and bring me to this landing screen here. And I have some awesome stuff here on the side to take a look at. I have basically two things that are gonna control everything for me, my book size and then [00:15:00] settings, which are fine-tuning details for your book.
[00:15:04] So I’m a big fan unless it’s like a novel with graphics in it, of just doing a good old digest. Now, if you have a custom size, like a kid’s book, do a custom size. I’m pretty vanilla. Okay, so I click Digest, and you can see here that everything is already laid out for me. See how all of my formatting is done?
[00:15:24] It’s magic. So table of contents is set up. I’ve got all my pagination done based off of this book size. Nothing to think about. I got my endnote down here. We’ll have to check out that, 315. Introduction. We’re looking pretty good. See? It’s picking up my endnotes. All my formatting looks good. These paragraphs started on those pages, so they’re gonna be indented on those pages.
[00:15:49] All oh, see how we got a little pull over here? Let’s say you don’t want your pages to be right aligned. This is industry standard, but let’s say you [00:16:00] don’t, ’cause some people hate the blank page. You ever seen your your readers… Have you ever seen your readers complain about blank pages?
[00:16:07] And you’re like, “I’m not gonna charge you more for the extra space, don’t worry.” But some people get really weird about it. Look at this. If you take out right alignment, if you take out right alignment, what it’s going to do is just wherever the page falls… Let’s find a chapter here that’s on that side. So take a look here.
[00:16:29] I had to scroll down and find one. But if you turn right align chapters off, then what’s gonna happen is wherever the, chapter just starts, whatever page it just starts on, that’s the page it’s gonna start on. Some people really like that. I know it’s a new school thing. So you have that option here if you want it.
[00:16:49] The other things you’ve got to control here are all of your bleeds. Also, if you had a working title, and let’s say you wanted to change it to the full thing with the subtitle, you can do that. [00:17:00] Calling Awakened Do the purpose, your work, that’s my subtitle, and click on Update
[00:17:15] Check out this. See how it updated the title for me? Isn’t that nice? Notice how the chapters don’t start until the we actually get to that part of the book. So the headers and everything else are dynamic. For a big book, this isn’t actually that big compared to what I know you all write. This is like a 53,000 page sorry, 53,000 page, 53,000-word book.
[00:17:44] I know some of you crazies are like, “I write that in an afternoon.” But I’m gonna do an inner margin of 1.5 just to show you can really support bigger books and to give you a sense of how the formatting works. That’s obviously a little too [00:18:00] much this size book, but you get the point. The important thing, actually you probably want…
[00:18:05] The important thing, actually, that you’ll probably wanna take a look at is the bleed. So every, publisher has different bleed requirements. You can check, set up your bleed here, and you can see here that our bleed has been updated. That’s a pretty chunky bleed, but just so you can see it on the screen.
[00:18:22] Also, if you don’t want print marks, some people like print marks. Some publishers or printers like print marks. You can turn them off, though, and they’re gone. That blue line disappears on the export. You don’t have to worry about it. It just gives you a sense of where that bleed is, so you know that it’s there, and you can compare that against other content, too.
[00:18:43] All right, so now I think we’re probably ready to export. So let’s do this. Let’s click on Export PDF, and it’s gonna start running the job in the background, making sure everything looks correct and getting everything aligned. One of [00:19:00] the cool things about the print book feature is that our illustrations are print ready, meaning they’re like 300 DPI.
[00:19:10] I know that’s a technical term, and you can print out and see my K2, which is also a technical print term. The point is a lot of people have issues with, let’s say, AI-generated content or maybe something that you just sped up quickly, and that’s because for most of these platforms, the technology really isn’t there for print quality graphics.
[00:19:28] With StoryLoft, we thought about print quality graphics from the beginning. Those will be embedded in your PDF when you go to export. So no worries. You’ll have those at least 300 DPI images inside of the document, so you have a nice clear picture when you go to print. Okay, our document is done, so we’re gonna click on Download PDF.
[00:19:51] Point three megs. Let’s open it up, and look at that. We have got a perfect 508 with a really healthy inner margin [00:20:00] all set up, and it looks great. I’m really happy with it. Looks good. And I can take this to my printer, which is awesome. Okay, so back now in StoryLoft. PDF looked great. We’re gonna go back, and I’m gonna show you how to export an e-book, which is even- easier.
[00:20:19] So let’s click on ebook, click on export ebook. We’ve got a book title here. We could update it if we wanted to. This is really for like KDP and like Apple Books, that kind of thing. This is the title for them. Awaken to the Purpose of Your Work
[00:20:41] Wait And I don’t have a cover image. I’m gonna have to show you a novel here in a little bit so we can look at cover images. Export
[00:20:51] Perfect. And now our export is ready. Let’s take a look at this e-book and see how it looks in Apple Books, see if our [00:21:00] formatting looks good
[00:21:08] And there we have it. We need to add a book cover to it, but you can see that all of our formatting, look at that, looks fantastic. Notice how we have the same theme in our e-book as we do in our print book. It’s magic. And let’s take a look at our table of contents here. And we can see that we’ve got everything we need along with our, footnotes.
[00:21:33] Okay, cool. So do you see how easy that is? Creating a professional-looking book should be the last of your worries. As an author, I want most of my energy focused on the craft of compelling a story or literature that my readers are going to wanna come back for, that’s gonna change them somehow, right?
[00:21:57] And it’s not that these little details don’t [00:22:00] support all of that, it’s just that I think our time is best spent focusing on the craft and not on these little details, and I just love that StoryLoft takes care of them for us so easily Let’s start going to the next level. So if we click on Notes here, I can integrate my notes directly into the work I am doing.
[00:22:22] So there’s a couple different ways this works. One, all of my notes are here, and all I have to do is bring them up, and they’re there for me to scroll through, which is really nice. I can expand this or shrink it based off the screen size I have. I can get rid of this if I’m really just trying to look at my research and everything else while I am writing.
[00:22:43] The other thing I can do though… And by the way, I can manage by binders. If I just ha- wanted to look at my characters, I could do that. So the other thing I have here is binders. So I don’t really organize by binders, but you can create as many binders as you want. I’ll show you that in the Notes section.
[00:22:59] [00:23:00] Characters, villains, ideas. Those were just some things I was pulling with here. But this is really nice to be able to view this. But let me show you something else. Let me go to the manuscript itself. Look at these sections here, All, Here, and Unassigned. Notice it also says I’m in the Introduction section.
[00:23:18] Let’s see if that’s true. I am in the Introduction section. Okay. Now let me move on. I am now in the Spirit in the Spatula section. Yes. Okay. I’m gonna make a note to myself that I want to find a different quote than this one, and I want it to be more work-focused. So A little behind the scenes magic I copied and pasted from Wikipedia to show you.
[00:23:48] So I’m gonna put a note in here. You can format obviously. You can add links, and I’m gonna just keep it simple. I’m gonna call it The History of Work. So I’m done. I’m gonna just go back, and look at that. [00:24:00] I’ve got my history of note work here in The Spirit and the Spatula. Now I’m gonna scroll on. All right, I’m gonna move on to The Fire and the Bones.
[00:24:11] And no notes are on this filter. Create one or switch to all. I already switched to all. Look at that. Spirit and the Spatula labeled for me. I could bring up my note. Yes, and I can edit that note, which is great and go back to my work as it is. So this is one of StoryLab’s really powerful integrated notes features.
[00:24:33] You can also go to the notes section, which I’ll show you here once we’re done with the editor, but that is pretty, pretty cool. Okay, so I’m gonna turn my notes off. Now, let’s say that I really wanted to focus, or I was writing on a… writing on a airplane or something like that, and I needed to focus in, and I didn’t want a lot of bright light around me.
[00:24:52] To help me in my writing process, I can click on dark mode. This is a very special dark mode. I don’t know if you can [00:25:00] tell on your screen, but we’re using off-blacks and off-whites and soft colors, and this is really, easy on your eyes, guys. You could spend, I think, hours in here and not feel fatigued because everything looks so muted.
[00:25:17] Your eyes really feel relaxed. Even now as I’m saying it, I can just tell my eyes have been relaxing. I could go a step further though. If I wanted to go to, let’s say, dark mode and focus mode, check this out. Now I can go to focus mode, and now all I’ve got here is my text on a dark background, and I can get to work editing in silence and go put on some nice groove music and not worry about anything about the world around me.
[00:25:43] But let’s bring that back. Click on this little eye icon or hit Control + F, and I am out of focus mode. Mode. Let’s get back to it, and let’s look at our spellchecker. So this is a next-level spellchecker. It’s [00:26:00] very similar to if you’ve used Grammarly or something like that. It’s gonna give you the same range of helpful content.
[00:26:06] Handles really big books. So I’m just gonna click on check spelling And it’s gonna get to work checking spelling across the whole document. All right, so the, it, the spellchecker is done now, and I have a reasonable amount of issues to work on before, before I get this ready. But let’s take a look at some of these.
[00:26:29] A calling. A calling is a mass noun, meaning I’ve used it many times in the book, and it’s right. I’ve used it one, two, three, four times within the first two pages. So that’s helpful. Word choice agreement, calling out is a massive noun. Yes. The form of a verb must agree in grammatical number with the pronoun.
[00:26:56] Let’s go to that one. Okay, so you can see I’m going through here. I’ve got [00:27:00] formatting, grammar, redundancy, repetition, punctuation. Okay, so take a look at all of these different categories we have here to work through. We’ve got spelling, agreement, typos, style, formatting, miscellaneous things we found, redundancy, grammar, repetition, capitalization, punctuation, enhancement.
[00:27:20] The list goes on. You have very granular detail of what’s going on in your book, and this is a helpful way of being able to find that stuff out. Okay, so let me go through and look at some of these, see how it’s gone through and it’s marked up the book. This sentence is forty-seven words long. So if…
[00:27:40] I think actually every once in a while a long sentence is good, but in truth I do like to keep ’em brief, so that’s helpful. Let’s scroll down, the fire and the bones. What do you have wrong with this? Let’s scroll down. Elbow room. What do we have here? Did you mean the closed compound noun elbow room?
[00:27:59] Yes, I [00:28:00] did mean the closed compound noun elbow room. Thank you. And you can start to see that there’s all kinds of things that are found in here for you to be able to use. Yeah. I’m gonna ignore that one. All right. I’m gonna clear everything out, so that way I can just better read my manuscript, but that is the spellchecker You also have the ability to add comments add collaborators, co-writers, beta readers.
[00:28:29] You’ve got your book ver- version history here which is really nice. You can set a history mark if you’re like, “I don’t wanna go past this poi- or I really wanna remember this point I don’t wanna lose anything past this,” go in there, create a history mark for you. And then you can change your views and stuff as well.
[00:28:47] Last thing I’ll probably show you here in the editor today is this… You’ve probably been wondering, what is this 64,499 over 500? That’s because I imported a document. [00:29:00] Let me reset this counter. Words written today. I can set up writing goals for myself, so I’m gonna set up a really short one here, five.
[00:29:10] And then I also have a couple other analytics here, total words written and my writing streak to give me a sense of how long, how consistent I have been with this book. The writing goal today is really easy to use because I think of it as just setting up a habit like working out, bleh. You should be writing consistently every day, right?
[00:29:29] To the best of your ability. Obviously you need breaks sometimes. This helps with that, so I’ve set it at five words just to give you a sense. So I am writing a sentence. Yay. I met my writing goal. See? So it keeps track of that, which is really, helpful. I’ll know whether I met it or not based off the feedback from the system.
[00:29:55] Now let’s jump into editing using the AI, [00:30:00] Eddie the AI, inside of StoryLoft, the book writing app. So let’s look at Eddie. So inside of Eddie, I’ve got three different modes. I have collaborative, which is working alongside Eddie to make edits, do research, do write analysis. I have insights, which is what Eddie has discovered about my writing.
[00:30:20] This is like a personality test of your writing. A lot of authors really like this. And then we’ve got our research, which is where we save all of our content, PDFs, research for worlds, little snippets of things that we’ve found. We put that in our research section to bring it up later. Okay. And by the way, Eddie has full context of it, so I’ll show you that, too.
[00:30:43] All right. So we’re gonna stay here in collaborative mode. And I’m just gonna show you a couple things out of the box that are really easy. Just to get started, I’m just gonna say analyze my writing style. We have some quick prompts for you, but again, by the time you’ve gotten here, Eddie [00:31:00] has already memorized your manuscript.
[00:31:02] He knows it back to front. Okay, so you can see how it’s already going through my voice, my prose. I have some passive constructs in here, which is hard. It always took me a while to learn how to write in active voice, so it’s probably right about that. I… Hopefully, I need to go look and see which examples it’s telling me.
[00:31:25] Personal storytelling. I love doing personal storytelling. I think all authors should do personal storytelling. Why? Because au- readers want to get to know you. They don’t want to get to know an AI, right? They want to get to know you, your content, your stories, not some slop that was generated by some kid in ch- using ChatGPT.
[00:31:47] Okay, so this is really helpful, but let’s go down a deeper level. All right, so again, context here. We’ve just imported a document, and we wanna get started. So the first thing [00:32:00] I’m gonna do is say “Hey, can you find…” I’ve got lots of personal stories. My new shoes story So it’s perfect. I found your new shoes stories.
[00:32:15] Let me pull it up, the passage, so I can give you their detailed feedback. This new shoes story is excellent. It’s one of your strongest personal narratives, and the metaphor is perfectly balanced. Thank you. Thank you
[00:32:34] Okay, great. Then you take me to it. Perfect. Thank you very much. All right. New shoes. So it took me to the new shoes section, which was really, helpful because you can customize obviously the content that you get down in here, but sometimes it’s just easier to ask Eddie, “Where did I write that?”
[00:32:50] And then it takes you to it. Yes, that’s the kind of help I need. Yes. All right. I like little word- little sentences to have spaces like that, don’t you? You won’t leave your shoes to walk in. Yes. All right. [00:33:00] Okay, that looks a little better. Now let’s do this. How well does my new shoes story fit with the overall theme?
[00:33:16] Theological pivot. You can’t white-knuckle yourself into them. Yes, how it connects. One minor opportunity, that’s what I care about Okay, so actually it liked it. So let me see if I can find something else. I know. I have actual genuine questions about this. Can you look at all the places that I wrote about Gideon and give me your honest opinion on the writing within the context of the book?
[00:33:55] Cool. So you can see that it’s found all four passages, and it’s gonna go through and read [00:34:00] all of them so it can give you an honest assessment. So one of the things that Eddie is really good at is looking at multiple things across your manuscript. So he can h- hold memory a lot longer than we can and analyze things all at once which is really cool Okay, so it gave me some really good feedback, and I like it.
[00:34:24] The material is good, and it’s carrying more weight than it probably should, which this is true. I doubled down on the story, but the, point was thin. So I did a lot of storytelling with a lot of… without a lot of point telling or point communicating, I should say. Thematic fit. The Gideon story fits the book’s theme well, but it sits in slight tension with the New Shoes conclusion.
[00:34:51] See how it kept that up? New Shoes ends on surrender. Gideon, as currently ends up on willpower. He mans up. [00:35:00] Those two guys are pulling in opposite directions. They’re not wrong about that. He’s– or Eddie’s not wrong about that. Okay. It’s solid material with a few rema- refinements needed.
[00:35:12] The comedic huma- the comedic humanization of Gideon is a genuine strength. Thank you. Okay, so that’s Eddie’s AI summary of my Gideon passage, passages rather. So let’s see if it can do something super advanced. Can you go through each of those passages and make the connection s- stronger to surrender?
[00:35:45] ‘Cause that’s what Gideon ends up doing anyway. It’s true. All right, send it off
[00:35:57] Okay. See how it’s going [00:36:00] through and making edits for me in my manuscript? Come on. How crazy is that? I love it. So this moment, not because Gideon suddenly feels capable, he doesn’t, but because he stops waiting for permission from himself and accepting God’s calling as permission enough. Yes. All right.
[00:36:21] Love it. How neat was that? Very cool. Okay. So I know I did that a little bit blindly. We probably should have gone back and forth a little bit more before I did that, but I wanted to show you just how powerful Eddie is at being a co-writer. He’s very good at working alongside of you, understanding your book.
[00:36:43] Not writing for you per se, but writing with you and in your voice, really being there to guide you. So you can use him as much or as little as you want. Now, I will say, if you are a nonfiction writer, you’ve got some really powerful [00:37:00] tools. We probably need to do a second video on it. One is your insights.
[00:37:05] So structure, prose, style. Eddie starts to build out a personality profile for you based off of your writing strengths and weaknesses. You’ll wanna look at these because they’re pretty good. Authors tell me that they really are actually helpful. They like to see how their writing changes. And then the other is research.
[00:37:23] Wait till you see this Okay, so let me show you what you can do for research. This is actually good for nonfiction and fiction because if you’re doing research on world-building, then obviously you’re doing a ton of research. What I like to do personally, if I’m going to do research, is I’m gonna go into full-screen mode or focus mode for Eddie, which is great.
[00:37:45] It’s like chatting with an editor over the phone. So what I’m gonna do here is I’m gonna go to Research first. I can add a URL, or I can attach something. Now, I already did some [00:38:00] prep here. I’ve got The History of Work and Labor here by Jan Lucanson. Obviously, I’d need to get permission unless it was a general use citation.
[00:38:09] But I’m gonna download the full text PDF, History of Work, go back to my research here, and let’s bring it in. I can upload… So here’s what I can upload for research. I can upload a PDF, a Word document, or a text. Eddie will accept any of those types of file formats. And I’m gonna go see if I can find that labor work and upload it.
[00:38:33] Yes. So the document has been added to my research. Now notice, immediately it gets to work learning the key sections of that PDF and reading it through and trying to understand how it relates to the book. So already, Eddie has that context and can help you with it. All right, so let’s X out of here. And I notice…
[00:38:58] Thank you. Appreciate [00:39:00] that. Added it to my research. That’ll be useful later. Now a big question. How well does Eddie understand this research that I gave it, and how can it use it in this book? So I’m gonna do this. Hey, Eddie. Okay, so let’s try this. Let’s try walkie-talkie mode. This is an experimental feature, but it is fun.
[00:39:22] Hey, Eddie, can you look at my History of Work and Labor research and tell me if there’s anything in it that applies to this book?
[00:39:39] Okay, so check this out. It goes, “Honestly, not much, at least not directly. Here’s what’s actually in that file and what it does or doesn’t connect to your book. It’s an advocate academic paper studying labor relations from the Middle Ages to the present. It’s a historical paper.” Okay yada, “So this is great because I just pulled a [00:40:00] file off the internet.
[00:40:01] My honest take, the file reads like it may have been saved for background context. Your reader isn’t interested in Dutch labor histo- history. He’s interested in why his job feels empty.” Okay. “If you want research that’s actually supporting your thesis, I’d recommend research your s- your sources on theological vocation.”
[00:40:21] So did a great job of understanding that there probably wasn’t content that we could use. But let’s see what happens when there is some research that it can use and will apply to the book. So let me ask it a question about a different document I uploaded the history of work in the US and how it applied to my argument in my introduction
[00:40:47] So it’s gonna pull up both your introduction and the PDF so it can give me a thorough answer. And it says, “Good news. There is applicable material in it, the evolution of work in the United States. The core [00:41:00] findings of this paper is that over the past century, American jobs have shifted dramatically.”
[00:41:04] That’s helpful. Okay, bottom line is usable but not theological, and that’s fine. Want me to draft a short passage from the introduction that weaves this in? First off, save to notes. Thank you. For me. And then secondly, yes. Yes, I would Like a rebound Production All right, it’s gonna get to work revamping the introduction while preserving my voice with the message.
[00:41:36] Thank you. That’s helpful. So for this, honestly, the easiest thing to do sometimes is just to select the the area that you want. And you know why? It’s because I actually have some story stuff in there. So let’s actually do this. Take this section here. Okay. I actually need you to rewrite [00:42:00] this section since it’s an ending With that same research, please source it as well.
[00:42:11] Carefully reread the section before doing any writing. Thank you
[00:42:20] Perfect. And here we get to work rewriting that section. Thank you so much for giving me a source. I really appreciate that. All right, so do we have, All right, so let’s take a look at the work that it’s done. Okay, it did create a source for me Atalay, Failla, a lot of folks. The evolution of work in the United States.
[00:42:50] Let’s see what it actually said. That’s what this book about. You were designed for partnership with the Almighty, and that partnership doesn’t pause at 5:00. The clock doesn’t go out. You do have a call to career. [00:43:00] Cool. I love how it integrated that and gave me the source. Instead of doing this inline, I’m gonna go ahead and make this an end note too, just again, to show you how this works once we go to publishing.
[00:43:16] So I’m gonna put that in here. Save. There we go. End note two. So now let’s switch to notes. Okay, so we are here in the notes section, and now what I wanna do is add a binder. So I’m gonna go to research. Sorry, I’m gonna go to binder, and I’m gonna add a binder name called Research and create that binder. I don’t have anything in it right now, but that’s okay.
[00:43:40] I can add something to it very easily by simply going to that note. Let’s say I was inside of it And then I can very easily just while I’m there working on the note, add it to the binder and it’ll be there for me in the future, which is great for organization. The other thing I can do… Notice [00:44:00] this. So this was generated by Eddie.
[00:44:02] Obviously, I can edit it, which is great. So I can add notes to Eddie’s notes. We can all get along. Notice how it went ahead and tagged everything for me. This is really, nice when it comes to searching through your notes once you start to add a whole bunch. Okay, so that is notes. Now let’s move on to some of the fun stuff.
[00:44:21] So now let’s move into illustrations and what it looks like to integrate beautiful illustrations into novels and fiction books and fantasy books, and everything in that world. So let’s go to illustrations. We have a second-to-none character generating system here at StoryLoft. Our system actually knows about your characters, knows about their emotions, can even know about their backstory and personality habits if you craft them in their personas, and will think about that and illustrate that all into [00:45:00] the illustration so that the way your characters act and the personalities they have is always going to be the same from illustration to illustration, and you don’t have that other irritation, which is like my characters don’t look consistent illustration to illustration.
[00:45:16] You don’t have that problem with StoryLoft. We get it right every time. Almost… You don’t have that problem with StoryLoft because we remember this information and use it in the creative process. So we have characters, artifacts, and scenes. I’ll walk you through each one very quickly. So let’s go to characters.
[00:45:37] First, we’re gonna select a book. You gotta have a book. I’m gonna click Stone of Interdeep. Fair warning, I have a bunch of characters in this book. All right, so I’ve got Roth here. I’ve got, Who was this? Oh, this was a concept character. I think we called her Megan. Did we call her Megan? [00:46:00] Cool. All right and then a bunch of others.
[00:46:03] Rog. Yes. Okay. So how do we c- actually create a character, though? So to create a character, first we wanna make sure one thing is set. And you may wanna do this before doing any of your illustrations, and that is to make sure that you have a style that you like. This book has been edgy comic book.
[00:46:25] I’ve been experimenting with other styles, but I think I’m gonna go back to that. We do have a ton of predefined styles for you here to make it easy. One simple click and then you- you’re there to go. Apply style, and then all of your illustrations will have that style. I typically like to play around with it a little bit.
[00:46:46] So I’m gonna say I like edgy, hard comic books that have a dark [00:47:00] feel
[00:47:05] That’s perfect. I like that. Came up with a pretty good style. The other thing that I can do here is add white space to images. What does this do? A, comic book would be an exception, but a lot of books don’t actually create square-like AI-looking images. They actually have lots of white space in them.
[00:47:24] Maybe it’s just a character in a tree. Maybe it’s the character just doing an action. Maybe the edges are drawn off and fade off into the back of the that paper. There’s different ways that we can do illustrations, right? So I can add white space to the images, which is really cool. But that won’t affect characters.
[00:47:42] So let me do this. Let me create a character
[00:47:53] Okay, so StoryLoft has come up with some concepts for me based off of my description, [00:48:00] and I think that’s kinda cool. I like him. He’s good. Now, I could always do this little fun button here. I can always roll the dice, and what roll the dice does is it basically is like… Remember the old finding l- I’m feeling lucky button from Google?
[00:48:16] It’s like that. Click it, and StoryLoft is gonna go into full creative mode and try to come up with something really unique for you. So it’s a fun little button to press. Okay, so this is a good time to talk about image credits. Your image credit status is right here. Your count is right there. Typically it’s a credit an image sometimes a little more depending on the action you’re doing, but it’s really straightforward.
[00:48:39] Let’s see what we got here. Yes. Maximum creativity. I love it. All right, what’s this guy’s name? Wormwood. Height, we’re gonna give him a height of eight feet. You need to specify your heights. Why is that? Think about it in a fantasy world. [00:49:00] Like Eddy, or any AI for that matter, has no idea the size and scope of your characters.
[00:49:06] It will by definition in the manuscript if you’re starting there, but when you’re actually going to illustrate, it doesn’t know who’s tall, who’s short. So we give it a little bit of information to help it with that. You can also do a full character profile here. These details are super… It’s crazy how StoryLoft will use them.
[00:49:28] So let’s say, remember Gandalf? Gandalf, typically when he was relaxing, he would be smoking a pipe. And you don’t have to say he’s smoking a pipe. If you go watch the Lord of the Rings movies, what’s he doing? If he’s not fighting or yelling at somebody, he’s probably smoking a pipe. So if you say in this Wormwood when he’s relaxing typically eats pizza.
[00:49:52] If you say in your novel “Wormwood was at rest from the day’s battles and finally looked over his [00:50:00] victories,” you’d probably see him sitting in front of the sunset and, eating a piece of pizza. So you get to describe the personalities in there. StoryLoft isn’t gonna always use them.
[00:50:11] It’ll look at context and everything else, but you can give more information so that Eddy will understand your character better. So I’m gonna do this. I’m gonna clear out the ones I don’t like. All right, now let’s look at artifacts. Let’s give them an… Megan and Wormwood a artifact to fight over. So again, I’m gonna select my book.
[00:50:39] It’s gonna load the artifacts that I’ve got in here, and we’ve actually already got a nice one here. It’s the the Ruben Stone. So let’s do this. Let’s create a scene.
[00:50:56] Okay, so let’s do this. Let’s select our characters we want in this scene. [00:51:00] So I want Wormwood and I want… Where was Megan at? I want Megan, and I want Ze Rubinstein. All right, that’s enough. Okay. I’m gonna show you another really cool way to create images here in just a second, but watch this. Wormwood and Megan f- Megan fight almost to the death
[00:51:39] Struggling for a Reuben Stone that teetered. How do you spell teetered?[00:52:00]
[00:52:01] Teetered, two E’s, teetered at the edge of a cliff Don’t mock my fiction. I know some of you are So Eddie’s gonna get to work on pulling all of these assets together and creating a scene based off the description that we gave it. Notice too, this, iterations. Let’s talk about this while the thing is getting designed.
[00:52:28] So iterations lets you scrub, meaning you can go forward and backward, making little tiny changes to an image once you’ve got it where you want it, which is really nice. You can make some light refinements if you want to
[00:52:45] Perfect. Okay, and we’ve got our image done, and that’s a pretty good job. For a pretty light description, I’m happy with how that looks. I could obviously go through this and make some changes, but noticed, notice [00:53:00] how the description of the Rubinstone, which actually w- it does shoot out electrical rays, it’s in its persona and the postures of the characters very well describe what we described, and it does a really good job at that.
[00:53:19] We can always roll the dice just for fun, see what we get
[00:53:26] I like it. Okay, cool. You guys get the point. Let’s do this just to show you. Let’s make a little change just for fun. Let’s make a third iteration, and I am gonna go back to the royal battle here ’cause I want a shoulder. And I’m just gonna do this just a little painty paint, and I’m gonna say “Can you put- A blue jay [00:54:00] on his shoulder
[00:54:06] Everybody needs a blue jay on their shoulder. He needs to feel a little loved. He probably wasn’t held much as a baby or something like that. Okay. And there we have it. We now have a blue jay. Let’s take all this away. We now have a blue jay on his shoulder. I love it. Okay, so as you can see StoryLoft is really good at helping you make illustrations just as you want them.
[00:54:33] L- let me show you very quickly an even better way to do it inside the book itself
[00:54:42] Okay, we are back in Stone of Enderdeep. Let’s do this now. This is my favorite way. If you want a little bit of magic, little bit of magic in your life, everybody needs that, right? To cr- generate illustrations inside of your book, if that’s your [00:55:00] aim, this is one of the coolest ways you can do it. So to generate an image inside of your book…
[00:55:06] Get out of here, Apple. To generate an image inside of your book, just select a scene and click on Generate image. That’s all you have to do. Notice this, creating a publisher quality image, AKA 300 DPI, print sized, big, high quality image that you’re gonna be able to use. Now, again, it doesn’t put that image in the editor.
[00:55:27] It goes, keeps it, puts it in a safe place for you. You don’t have to worry about it until it’s time to publish. But it creates that for you from the beginning. Notice how it’s found the ground it’s in. It’s cr- found Balin. It’s found these different assets in the scene, and it’s studying their interactions.
[00:55:44] It’s thinking about their emotions. It’s doing all sorts of stuff to get everything just right and consistent with the other illustrations there in the book
[00:55:59] Perfect. Okay, our [00:56:00] illustration is done. Let’s see how well it fits the description of the scene. “Balin swung Granite’s end, felling two goblins with one strike. Dora locked her shield against a storm of arrows, protecting Durran at her side. Mira sang a battle chant, her voice fierce and courage surged through the limbs.”
[00:56:19] So let’s look at that. Swinging ax, two felled goblins, singing passionately a war tune, and then protecting Durran with her shield. Not bad. Not bad at all. So let’s talk about book covers, generating and creating book covers both for e-book books and print books as well. Yes, you heard me right, print books.
[00:56:43] If you wanna create a really professional print book cover, StoryLoft is the place to do it. So let’s go through. We’re gonna go back to The Stone of Enderdeep. You can see that I’ve been messing around with lots of different things here. Now, listen, if you don’t wanna generate artwork, you don’t have to.
[00:56:59] You can [00:57:00] upload artwork from your favorite illustrator. Let’s say you designed the book cover. That’s fine. Go ahead and use that artwork. That, that… You can bring that in. You can import it. It’s not a big deal. However, we do have really helpful tools for you to create really stellar book covers, especially because we already have your characters and your artwork in the system, and it helps create cohesiveness between your cover and your illustrations, which I think for novels or fiction stuff is gonna be really important.
[00:57:32] So let’s do this. Remember, Eddie already knows about your characters, okay? Knows about your character illustrations and everything else, so we don’t have to bring anything else in. Okay, so I have a prompt here. I’m gonna put it in s- “Show Wormwood underneath a dark, broken stone bridge, lighting just his face and silhouette in the moonlight.
[00:57:50] His sword glows red, and Megan can be seen faintly,” let’s get rid of that period, “in the distance.” So it’s gonna start working on your [00:58:00] cover. It’s gonna go, again, look at Wormwood, look at the relationship perhaps between Wormwood and Megan, and begin to craft that out in a comic book style.
[00:58:16] Okay, so look at this. Nailed that description. I love it. The cover artwork for this book looks really, good. I think I’m gonna keep it. I’m not gonna iterate on it. What I am gonna do though is customize it. Now, what I’m gonna do is use some really cool tools. Now, I could simply just say Stone of Enderdeep right here, right?
[00:58:43] Make it white, and then we have beautiful hand-curated fonts again. These are title fonts, not Google fonts. Title fonts that you can use here in StoryLoft.
[00:58:59] So I like [00:59:00] this. Stone of Enderdeep. Bring that in. That looks cool. And I could do that, but let me show you another way. I like this way personally. So s- title graphic, and then I’m gonna click on Fantasy, Stone of Enderdeep. I’m gonna say enter the keep And I’m gonna click generate title. Now, what Eddie’s going to do here is he’s gonna make sure that this title matches, both from a contrast standpoint and a stylistic standpoint, what will look good on your cover art, right?
[00:59:39] We want scene illustrations and visual storytelling that actually communicates exactly what’s going on inside of the pages of the book. Okay. Here we got our title graphics. Stone of Enderdeep: Enter the Keep. Now, we can hit this refresh button and it keeps on throwing out creative ideas so you can come up with new [01:00:00] ones.
[01:00:00] It also stores all of them here and matches them so that they’re really easy to read. You can see I’ve got a few here. But let’s just insert the one that we got, see how it looks. The Stone of Enderdeep: Enter the Keep. I like that. That’s pretty cool. It needs a little bit of adjustment, which is fine.
[01:00:19] We can adjust like this. Yeah, man, what do you think? I like it. Give it a shadow. N- Not too much shadow. See? And/or a glow, which would probably glow red if we did this, wouldn’t it? Oh, no, it’s using the moonlight. Okay, cool. So one of the neat things that StoryLoft does is you don’t have to think about shadows or glows or ways of blending images.
[01:00:44] It’s just gonna do that for you. You have control over how much, but it’s going to color match your book’s cover art automatically so that you don’t have to do any of the changes yourself. All right, let’s get that back brighter again. [01:01:00] Done. Okay. Save.
[01:01:07] Now, while that’s saving, let me show you something cool. Export. I can download just my, graphic image. That’s fine. It’s yours. Take it. You can download a PNG, you can download a PDF, or you can beautify the PDF right at the end to try and… It’s an experimental feature, just to try and up the ante, make something look really cool.
[01:01:27] Okay. The other thing we can do here is add cover assets. So we’ve got hundreds literally hundreds of beautiful cover assets for you here to take a look at. I’m gonna type in fantasy
[01:01:46] Now the problem I’m gonna have is that some of these are gonna be cool, but they’re not gonna be comic book like What kind of feels like this character we got? You [01:02:00] know what? It might be too much rock. You know what I’m saying? But we can add it. So I’m gonna say add image. That’s cool. Toss it to the back.
[01:02:15] And we’re getting a pretty cool book cover. I would probably wanna adjust this a little bit, but you can see how you could have a lot of fun making a book cover that feels pretty, cool. You can also take that exact same style, let me find it again, and say add a stylized image. Now, what this does, if I add a stylized image, is it goes and matches it to the artwork.
[01:02:39] So it goes and takes that. It’s not gonna ruin the original or anything, so you’re not gonna break anything, and it starts to think, and think about how it could take this asset, this image, and match it perfectly into your cover artwork so that it looks cohesive
[01:02:59] Okay. [01:03:00] We’ve got our updated illustration here. Do, And I like it. You can see how it’s a little bit more comic book-y.
[01:03:13] Here, should I zoom in for you? Let me zoom in for you. Really zoom in. Yeah, I like that. Cool. Okay. And now let’s move to print book, and this is gonna go so fast. Yes, you heard me right, fast. You are going to be blown away at how fast you can create an incredible looking print book cover, and real CMYK print shop ready PDF with your 300 DPI graphics and your CMYK colors and everything that your nerdy print guy is gonna want to make sure you have the best book cover available.
[01:03:51] So first thing we’re gonna do, sync cover, bring everything over. There we go. I’m done. Then what we’re going to [01:04:00] do, you can import a background or just say “Please give me a background.” And what it’s gonna do is… Have you ever tried to put back copy on a book, and the text didn’t fit right, the readability was wrong, you didn’t know how to extend it past your graphic image?
[01:04:16] I get all of that. StoryOff takes care of that for you. So you don’t have to use this feature, but what it does is it creates a blended background from your cover artwork into the back of the book so you have this nice gradual change that looks cohesive and doesn’t distract the buyer when they’re trying to inspect whether or not they think your shell, your your book is going to be a good one.
[01:04:41] Very good, and we’re done. And look at that. Isn’t that nice? Doesn’t that feel like it fits? And we didn’t have to do any work to do it. Now, I am… I’m gonna change this from five point five to eight by eight. I can go back and forth as many times as I want, which is really nice. But I, yeah, I’m gonna…
[01:04:59] [01:05:00] This, kind of thing is gonna look better on a table, which means we’re gonna wanna m- ultimately have a bigger book since we have so many nice sort of graphics in it. Okay, the next thing we need to do, add our spine content. How do we add spine content? The easiest way would be to click on add spine content, which just adds the spine content directly there for me, and then I can go do the work of styling it.
[01:05:23] So let’s do that. Style it really quick. Let’s go back. Ridgeline is cool. I’m not gonna make this perfect.
[01:05:35] We’ll also do, actually brush for that smaller text. I have a long name. All right, save it. Looking good? Yes, maybe, possibly. We could do things like add shadows and blend all of that in but I’m pretty happy with that. One question before we move off of spines, let’s move into [01:06:00] fine-tuning. Check this out.
[01:06:01] Two ways to adjust the width of your spine effortlessly, the spine of your book. The first way would be the most obvious, would be just change the inches. There we go. There’s a one-inch spine, and I’m done. The other way, and this will override that, would be to say, this is two hundred and twenty pages, and then it’ll estimate the width that it should be based off of the page count that you gave it, which is great.
[01:06:32] The other thing is that you can show or hide the bleed lines. Notice, because this is a paperback or this is a print book, that our bleed lines here, or our bleed lines… Notice that because this is a print book, our images extend past the bleed lines so that they can be cut. Now, you can set this up however you want.
[01:06:54] You have your bleed right there. You can customize the width and height if you want, if you have a special [01:07:00] size. This is, maybe this is a special edition book or something, but everything looks pretty good. So that’s spines on your book cover artwork. Lastly, when creating a print book cover, what do you need?
[01:07:14] You’re always gonna need that back of matter copy that nobody wants to do, and you typically end up paying someone to do, right? So the best way to add back of cover matter to your book illustrations on your book cover are to go over here and click on Generate Cover Blurb. Now, you need to have enough content to go off of, right?
[01:07:35] So if you have a paragraph or two paragraphs, you don’t have enough to write off of, and I wouldn’t go to the po– I wouldn’t jump to writing the back of matter copy yet. But it does a really good job of writing it once you are ready for it. So let’s take a look at this first. Let’s change the color.
[01:07:55] I like a nice breathable line height, actually one point [01:08:00] seven, because again, we want it to fill up the back of the book mostly. And then okay, so I’m gonna pick this one
[01:08:10] Basic, but that’s fine. I’m gonna take this. In the shadowy depths of the Frostpine Woods, a band of dwarven warriors abandons- embarks on a treacherous quest. I’m gonna do this. I’m gonna take this first line, and then I am going to add some more text
[01:08:36] Added it in there. Yes. It’s too big, isn’t it? I know. And
[01:08:47] Give it a different treatment just to give this back-of-book thing here a little bit of character[01:09:00]
[01:09:03] There we go. I like that. Okay. That gives it a little bit of distinction, doesn’t it? Last thing we could do a little bit of back cover artwork here. The way to do that is really simple Open up this tab right here. Then you’ve got your characters. Let’s do… Yeah, Megan, ’cause she’s the protagonist. And this is what we’re gonna say.
[01:09:29] We can customize our characters, our artifacts right here for our book cover. So I’m gonna say Megan’s back is toward us. She looks back confidently, sword ready to fight[01:10:00]
[01:10:03] Perfect. Okay. So what has just happened here? So StoryLoft has generated back of cover artwork for me, or I guess I could use it on the front of cover too, based off of that description. Now isn’t that nice? So now I have a epic fantasy artwork sticker that I can put on my book cover illustration. So I’m gonna this one and click on insert image.
[01:10:28] And now we have this fantastic image that we can apply to the book cover in just a matter of minutes. Look at that. Doesn’t that look great? There we have it. I think I am pretty happy with that as a book cover. You can obviously add your ISBN number in here. You can put back bio info. But just look at how far we have gotten in less than five minutes.
[01:10:56] Keep me honest, go back and look at the time. But really, quickly, we have [01:11:00] created a professionally, professional looking book here. Okay. Once again, you want your asset, get an asset. Download the image only. There you go. There you have it. You can pull it out and open it. That looks good. I like it.
[01:11:16] Okay. Once again, you got lots of options here for the export. So you can download the image only
[01:11:28] Take a look at that. Nice high-res artwork for you. Then of course, you can download all the way to the CMYK print shop PDF, the big boy. This is an X4 category CMYK PDF. Nerd speak for printers will like it
[01:11:50] And let’s take a look at our cover here. Beautiful. I love it. So if I were to zoom in here, you can take a look at just the [01:12:00] quality, look at that, of the assets. When you print that on a six-by-nine book cover, it’s gonna look really good. Okay, that covers book covers. Last but certainly not least, for my nonfiction authors out there, I haven’t forgotten about you nonfiction authors.
[01:12:19] There’s a really cool tool that I know a lot of you will like that I want to show you here real quick. So what does it do? It’s called data visualizations, and what it lets it, you do is generate editorial illustrations for your nonfiction books based off of data that you have, maybe data from a research project or from a survey or from some, even just some research that you’ve been doing on that project, and you want to provide that proof.
[01:12:48] You can do that with data visualizations. So let’s head over there, and I’ll show it to you real quick. The data visualization part of StoryLoft, the part of StoryLoft that lets you [01:13:00] create beautiful infographics and charts for your nonfiction book. So let’s do this. Let’s click on New Visualization, and then we’re gonna select the book that we want to apply this visualization to.
[01:13:16] And I’m going to select Calling, and then I’m going to select a CSV file
[01:13:25] I selected this dummy data off of sleep, health, and lifestyle
[01:13:31] And what we’re gonna do is we’re gonna upload it to StoryLoft so it can start crunching the data. Always here. So I’m gonna click Commit and Continue And now what’s gonna happen is Eddy is going to look at all of this research that you have done, and it is going to look for every possible, or I should say every conceivable avenue that this data could be used for to te- tell a data-driven story [01:14:00] in your nonfiction book using artwork, using generated artwork.
[01:14:04] So while we’re committing, it’s also doing that back legwork to make sure that we can find something useful for it. See? Okay, so here we are at the fourth step which is selecting a goal. Notice how it summarized everything for me. Sleep health and lifestyle data. This data set contains three hundred and seventy-four individuals across demographic sleep patterns.
[01:14:26] Thank you.
[01:14:30] Generated six for me. What’s the distribution of age among occupations? How does stress level impact qualities of sleep? Which BMI category has the hardest… Isn’t this cool? So all I have to do is pick a goal. This one for my nonfiction book. How does stress level impact quality of sleep? And what it’s gonna do is it’s going to generate a chart for me.
[01:14:55] Now, charts are used for different kinds of things, right? I know that’s not rocket [01:15:00] science. But in books they’re really important because you’re both doing storytelling, even if it’s nonfiction, and you’re doing visualization. So we want to create s- an asset that’s actually gonna communicate something interesting within that book.
[01:15:12] So check this out. How does stress level impact quality of sleep? I’ve got my quality of sleep on my Y-axis and my stress level on my X-axis across the mean levels of stress. I know all of you fictional nov- novelists probably dropped off by now, but isn’t that cool, guys? Last thing, party trick. If you want an infograph to insert into your book, click on Infograph, and it’s gonna give you a couple different versions of ino- infographs that it thinks will fit well in your book based off of that data as well.
[01:15:45] So in this case, we’ve just got a general editorial data infographic. Typically, that’s where I would stay. But if you want something more themed based, if you want to have a little bit more fun with it, you could do visualize sleep pattern trends or demographic impacts on health. Whatever you [01:16:00] think is going to communicate the best visually within your book, that’s the one you should choose.
[01:16:05] And it’s okay, too, to try multiple ones as well. You can download them, and then they’re all gonna be available for you within your book in the gallery section. Beautiful. Now look at that. We have a great little infographic that we can use in our book. The two ways we can use it, one is just download it simply.
[01:16:24] This is, again, a high-res graphic. Or it’ll be available in our gallery, and we can just insert it into our book from there.
[01:16:32] Okay, friends, authors, this is the part where we say goodbye unfortunately. There’s so much we could review over the StoryLoft app, but for that, why don’t you go and create your own account? You can do one for free by going to storyloft.app. Again, that’s storyloft.app, and start finishing your book today
[01:16:53]
